The Fresh Loaf

A Community of Amateur Bakers and Artisan Bread Enthusiasts.

Benito's blog

Benito's picture
Benito

Ilya recently started a thread linking to Martin Philip’s recipe on the King Arthur website for a IDY Pan de Cristal.  I’ve always wanted to try baking this unique bread and I’m glad that I have now.  I believe most recipes for this bread have some olive oil in them, so I added that.  Also rather than mixing all the water at once, I bassinaged the water gradually.  I used my Ankarsrum Assistent to mix since I am still learning to use it and want to get as much experience as possible.  It does an awesome job with bassinage.  It is said to be gentle on the dough and I believe it is.  I might have thought that the crumb would be tight having used a mixer to mix, however, I don’t think the crumb shows that at all. This bread has the finest crumb and a thin shattering crust.  You can see why it is named Pan de Cristal, you can shine a light through the bread, even the bottom crust can show light easily through it.  Each loaf feels like air, it weighs so little yet tastes so good and has such satisfying texture with the contrast of the crisp crust and soft open crumb.

Light through the bottom half of the loaf!

For 2 medium breads

250 g water (175 g for mix) then bassinage 75 g

250 g bread flour

1.25 g IDY

5 g salt

6.26 g olive oil


Mix all flour and 175 g of water then rest 15 mins.

Dissolve 1.25 g IDY in 15 g of water add to mixer and mix until well absorbed.

Dissolve 5 g of salt in about 15 g of water and then add to the mixer until well absorbed.  The addition of the salt will tighten the gluten a bit.

Bassinage the rest of the water in small aliquots waiting until the water is well absorbed before adding more.

Once all the water has been added the dough appears to be well developed, drizzle in the olive oil while the mixer is running.  Mix until well incorporated, this will not take very long.

Grease a Pyrex dish with olive oil and then pour the dough into the dish.  Do a few folds to get the dough into a nice roundish shape.

Place the dough in a warm place, 78°F and every 20 mins do a coil fold, stop when the dough seems to have good structure.  I did three sets of coil folds.

Allow the dough to rest 2 hours.

After 2 hours the dough will have risen nicely, about double volume.

Flour the top of the dough especially around the edge of the dish.  Sprinkle a generous amount of dough onto your countertop.  Using a bowl scraper release the sides of the dough from the dish, then gently invert the dish so the dough releases onto the floured countertop.  Generously flour the top of the dough.  Using a bench scraper cut the dough carefully into two or four pieces (depends on whether you made a full or half batch).  Ensure the cut edges are well floured, then gently transfer two pieces onto one piece of parchment, repeat if a full batch was made. 

There is no need to cover the dough at this point, just keep it away from drafts.  The development of a thin skin is actually fine and may help with the oven spring.

Allow the loaves to rest at room temperature for 2 hours, uncovered. While the loaves are resting, preheat the oven to 475°F with a baking stone or steel on a lower rack. 

1 hour before final proof is complete, pre-heat your oven to 475°F with a baking stone or steel on the lowest rack.  Place the other rack in the upper half of the oven.

The dough is ready to bake when it looks puffy and there are large bubbles visible in all pieces of dough on the surface.

To bake the bread: Carefully slide the two loaves (still resting on the parchment) into the oven onto the preheated stone or steel. If space is tight and the full sheet of parchment won’t fit on the stone or steel, cut the parchment between the two loaves and arrange them as best you can. Allow the other two loaves to continue to rest.

Bake the loaves for 15 minutes, then transfer them, from the stone or steel, directly onto a rack in the upper third of the oven for an additional 13 to 15 minutes. (Leave the stone in place.) Moving them to the rack allows the baking stone or steel to become hot again in preparation for the next two loaves. After a total of 27 to 30 minutes of baking, remove the loaves from the oven and allow them to cool on a rack.

Repeat the process with the two remainingloaves. Cool the bread fully before slicing.

My index of bakes.

Benito's picture
Benito

I baked this for the staff in our building as a Happy New Year present to them for all they do for us. Using once again my 50% WW SD Hokkaido Milk Bread dough as the base, I infused it with cardamom, cloves and orange zest. The filling has cardamom, cloves, cocoa powder, sugar, flour and chunks of dark chocolate. I have found that when the shaped dough is filled with spices and sugar that the hygroscopic effects of the sugar causes the layers to separate when baked. I now add flour in a 1:4 ratio to the sugar to counter this and so far it has worked well. I didn’t get a photo of the crumb but didn’t get a bite of this bread, and I have to say that it is really good. I love the gentle spices and hint of orange with the chocolate. The whole wheat goes really well with these flavours and makes me feel a little bit (only a little) less guilty about this enriched sweet bread for the new year.

An update to the formula shared above, I used the zest of one medium orange which turned out to weigh 9 g, so the percentage of orange zest is in fact not 1.39% but was 2.3%.

For one 9x4x4” Pullman pan

Filling

66.7 g granulated sugar

7.38 g cocoa powder

1.96 g cardamom

1.1 g ground cloves

16.68 g all purpose flour 

28.25 g unsalted butter, very soft

85 g dark chocolate, finely chopped (about 3/4 cup) 

Icing

1 1/2 cups confectioners sugar

2 tbsp whole milk

This makes too much icing, I didn’t use all of it.

Egg-Milk wash
1 egg, 1 tbsp milk and a pinch of salt

Instructions
Levain
Mix the levain ingredients in a jar or pyrex container with space for at least 300% growth.
Press down with your knuckles or silicone spatula to create a uniform surface and to push out air.
At a temperature of 76-78ºF, it typically takes up to 10-12 hours for this sweet stiff levain to be at peak. For my starter I typically see 3-3.5 times increase in size at peak. The levain will smell sweet with only a mild tang.
Tangzhong
In a sauce pan set on medium heat, stir the milk and Whole wheat flour until blended. Then cook for several minutes until well thickened, stirring regularly with a spoon or heat-resistant spatula. Let cool in the pan or, for faster results, in a new bowl. Theoretically it should reach 65ºC (149ºF) but I don’t find I need to measure the temperature as the tangzhong gelatinizes at this temperature. You can prepare this the night before and refrigerate it, ensure that it is covered to prevent it from drying out.

If you plan on using a stand mixer to mix this dough, set up a Bain Marie and use your stand mixer’s bowl to prepare the tangzhong.

Dough
In the bowl of a stand mixer, add the milk (consider holding back 10 g of milk and adding later if this is the first time you’re making this), egg, tangzhong, salt, sugar and levain. Mix and then break up the levain into many smaller pieces. Next add the flours. I like to use my spatula to mix until there aren’t many dry areas. Allow the flour to hydrate (fermentolyse) for 20-30 minutes. Mix on low speed and then medium speed until moderate gluten development this may take 5-10 mins. You may want to scrape the sides of the bowl during the first 5 minutes of mixing. Next add room temperature butter one pat at a time. The dough may come apart, be patient, continue to mix until it comes together before adding in more butter. Once all the butter has been added and incorporated increase the speed gradually to medium. Mix at medium speed until the gluten is well developed, approximately 10 mins. You will want to check gluten development by windowpane during this time and stop mixing when you get a good windowpane.

On the counter, shape the dough into a tight ball, cover in the bowl and ferment for 4 hours at 82ºF. There should be some rise visible at this stage.

You can next place the dough into the fridge to chill the dough for about 1.5 hours, this makes rolling the dough easier to shape. Remember, if you do so the final proof will take longer. Alternatively, you can do a cold retard in the fridge overnight, however, you may find that this increases the tang in your bread.

Prepare the chocolate filling
Whisk sugar, cocoa, cardamom, cloves and flour in a small bowl.

Prepare your pan by greasing it with butter or line with parchment paper.

Shaping
Melt butter for filling. Remove dough to the countertop. Roll dough into a 10-by-15-inch rectangle. Brush butter over dough and sprinkle with sugar-cocoa mixture. Sprinkle with dark chocolate and press down gently. Use a sharp knife to cut dough into 5 (3-inch-wide) strips. Cut each strip crosswise into 3 squares for a total of 15 squares. Arrange squares vertically in an 8½-by-4½-inch loaf pan coated with cooking spray, turning last square inward. Sprinkle any pieces of chocolate that fall off between and on top of squares. Cover pan with plastic wrap and let rise in a warm place until it passes the poke test about 4-6 hours.

Bake
About 30 mins prior to the dough completes final proof preheat the oven to 350F and brush the dough with the egg-milk wash. Just prior to baking brush with the egg-milk wash again.

Bake the loaves for 50 minutes or until the internal temperature is at least 190ºF, rotating as needed to get even browning. Watch your dough closely in the first 30 mins of baking, it may brown very quickly because of the sugar filling. Shield your loaf if it gets brown early in the baking process. After 50 mins remove the bread from the pan and bake a further 10 mins by placing the loaf directly in the oven on the rack with the oven turned down to 325ºF

Once the loaf has cooled completely drizzle with the icing.

I don’t think I’d do this pull apart shaping again, it was really challenging to get the dough into the pan. I think doing the twisted braids I’ve done recently or doing this as rolls would work better and be tidier.

I hope you give this a try, it is surpassingly delicious.
Happy New Year everyone.

 My index of bakes.
Benito's picture
Benito

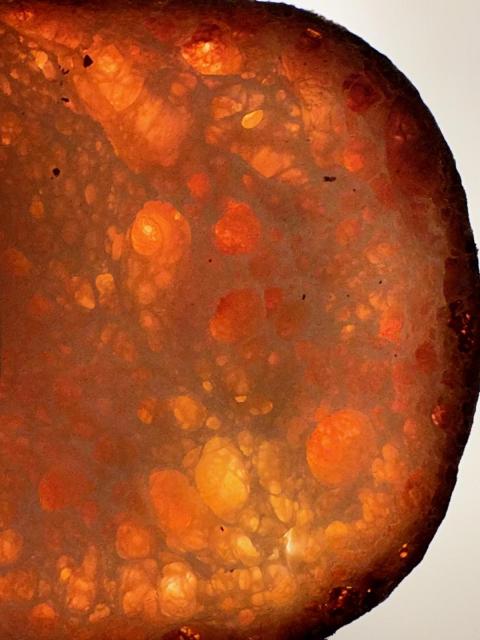
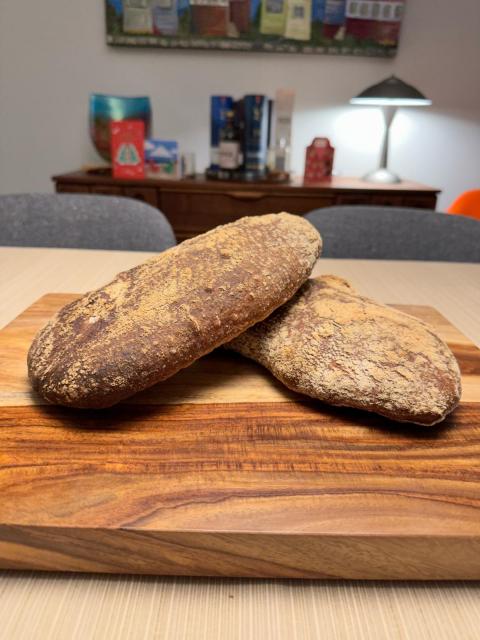
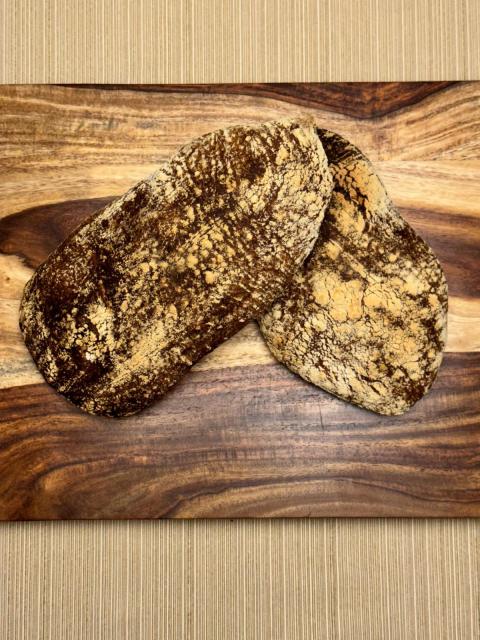
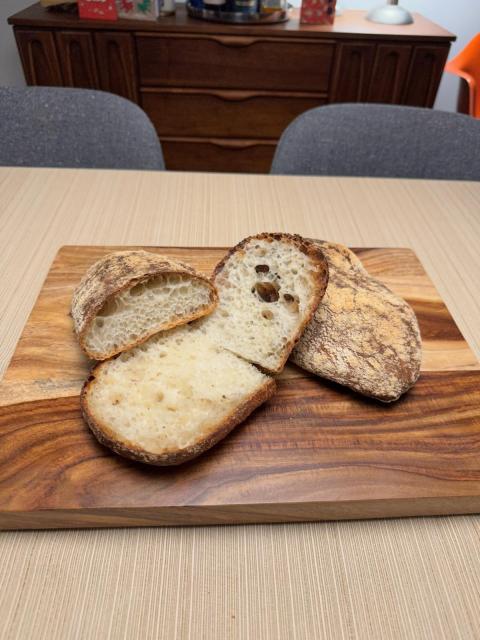
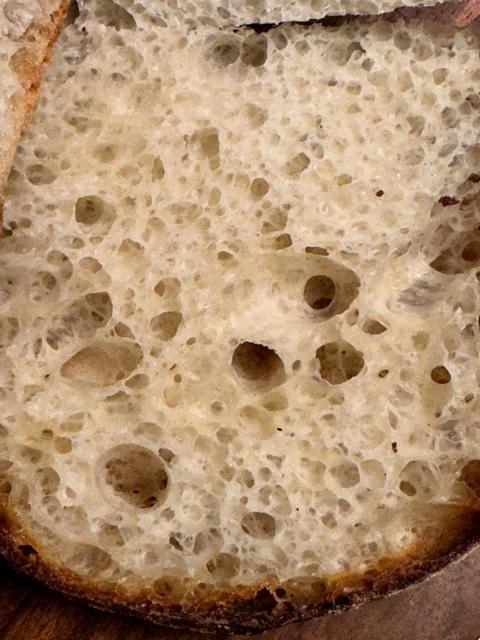
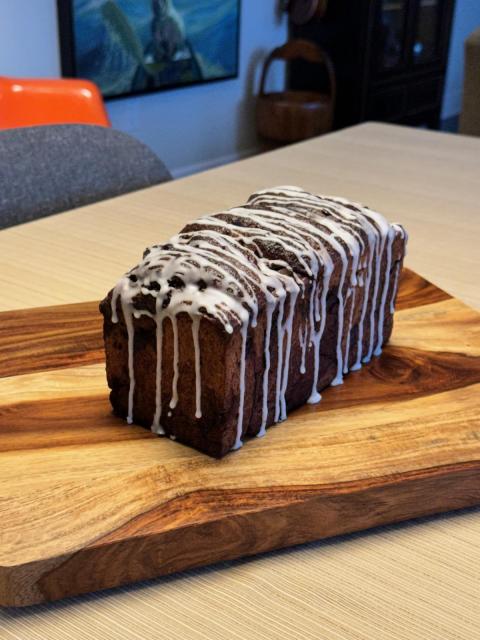
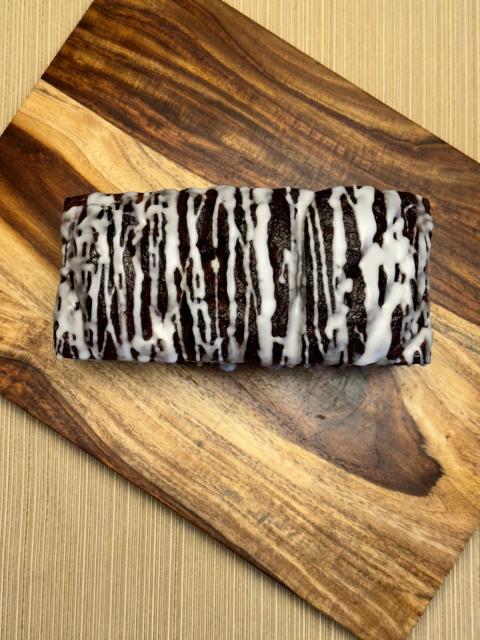
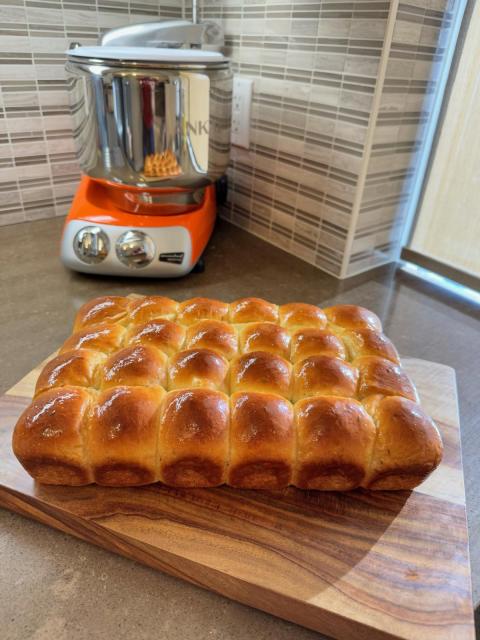
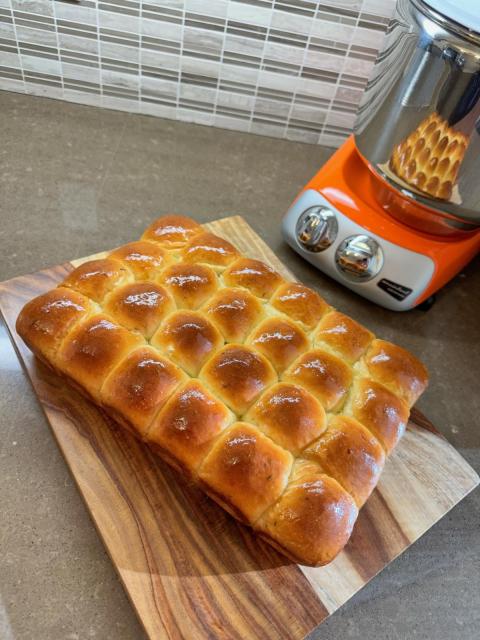
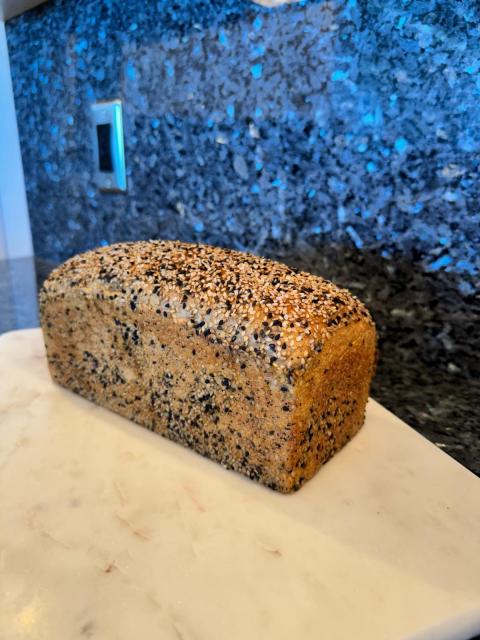
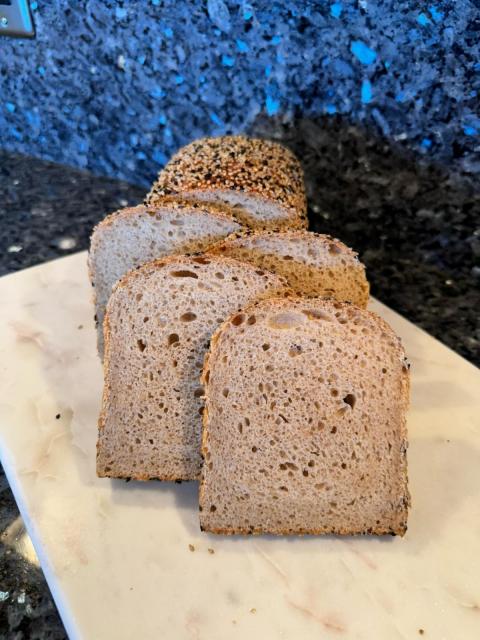
My first time trying this bake which Lance, Jeff, Martadella and Rob have been posting about.  Not being sure if I would like it or not since I haven’t like many of the previous 100% ryes breads I’ve baked, I decided to make a half sized loaf.  I also bought a fresh bag of Anita’s organic whole rye flour to ensure that the rye I used wasn’t starting to go off and alter the flavour.  The cracking appears to show a bit of under proofing, I did 50 mins of final proof but the dough was showing a good number of broken bubbles but not cracks at that point so I decided to bake it.  I like the rustic appearance of the cracks and it shouldn’t affect the flavour, but may make the crumb a bit more dense, hopefully not too much.

I’ve made notes in Stanley Ginsberg’s original post with some of the things that Martadella or Lance changed.

http://theryebaker.com/latgalian-rye/


Highly recommended.

Can use barley diastatic malt instead of pale rye malt.


Hold the scald at 65°C for 3 hours.

Hold Sour-scald at 28-32°C 


Rye %:

100%

Stages:

Sponge, Scald, 2-Stage sponge-scald

Leaven:

Rye sour culture, Instant yeast

Start to Finish:

28-32 hours

Hands-on Time:

45-50 minutes

Yield:

One 3.15 lb/1.40 kg loa


Scald (Day 1, Evening):

Ingredient

Grams / ½ batch

Ounces

Baker’s
Percentage

Wholegrain rye flour

320 / 160

11.30

100%

Hot (150°F/65°C) water

650 / 325

22.95

203%

Pale rye malt

20 / 10

0.70

6%

Caraway seed, ground

2 / 1

0.05

1%

Can use Diastatic Barley Malt instead of pale rye malt.


In the mixer bowl, mix the scald ingredients by hand into a firm porridge, cover and let stand at 150°F/65°C until it smells like apples, has a sweet taste and the consistency of pancake batter, 16-18 hours. (Original instruction)


Instead hold the scald at 65°C 150°F for 3 hours.  Could also use the instant pot [keep warm normal] 148°F. 


Sponge (Day 1, Evening):  (Stiff levain)

Ingredient

Grams / ½ batch

Ounces

Baker’s
Percentage

Wholegrain rye flour

50 / 25

1.75

100%

Warm (105°F/41°C) water

30 / 15

1.05

60%

Rye sour culture

20 / 10

0.70

40


Mix the sponge ingredients by hand into a stiff dough, cover and ferment at room temperature (70°F/21°C) overnight, 16-18 hours, until the sponge has visibly expanded and has a pronounced vinegar smell.


Sour-Scald 1 (Day 2, Noon)

Ingredient

Grams / ½ batch

Ounces

Baker’s
Percentage

Sponge all

100 / 50

3.55

100%

Scald all

992 / 496

35.00

992%

Combine the sponge and scald, cover and let stand at 130°F/55°C until it has a strong smell of apple cider, 6-7 hours.


Martadella did the following:  At 28-32°C 82-90°F 

Drop sour into scald, dont mix, leave in a warm place for 3 hours

(I did 2 hours)

Then mix and let stand in warm place another 3 hours

(I mixed after 2 hours and removed from lukewarm oven, placed at cool room temperature overnight)


Sour-Scald 2 (Day 2, Afternoon)

Ingredient

Grams / ½ batch

Ounces

Baker’s
Percentage

Sour-Scald 1 all

1092 / 546

38.50

100%

Instant yeast, ¼ tsp

1 / 0.5

0.05

0.01%

Latg_opara-300x300.gif

Add the instant yeast to Opara 1, stir to blend, cover and ferment overnight, 10-12 hours, at room temperature. In the morning, the mixture will be extremely bubbly and have a distinctive sweet-sour taste.


Martadella - dissolve the yeast in a small amount of water, then add to the sour-scald 1 1.  ferment 12-13 h at 28-30°C 82-86°F 

(He actually added 2g yeast and fermented 8 hours)


Final Dough (Day 3, Morning):

Ingredient

Grams / ½ batch

Ounces

Sponge-Scald 2 all

1093 / 546.5

38.55

Wholegrain rye flour

600 / 300

21.15

Water

100 / 50

3.55

Salt

5 / 2.5

0.20

Honey

30 / 15

1.05

Latg_mix-300x300.gif

Add the final dough ingredients to the Opara 2 and use the dough hook at low (KA2) speed to mix until the dough is fully blended into a firm, sticky mass that gathers around the hook, 7-8 minutes.


Latg_shape.gif

Turn the dough onto a well-floured work surface and used floured hands to shape it into an oblong loaf, then place it on a well-floured peel, if using a baking stone, or on a parchment-lined sheet pan.


I wet the counter and my hands to shape.  Try to shape very narrow since the dough will spread as it final proofs.


Alternatively - Martadella - kept the countertop wet and used wet hands to shape.

Final proof was 60 mins for him.


Latg_proof.gif

Brush the loaf with water, cover it with a tea towel and proof at room temperature, brushing with water every 15 minutes, until it has expanded to about 1 ½ times its original volume and shows cracks and broken bubbles, 45-50 minutes.


I used a spray bottle to keep the dough damp.  


Preheat the oven to 480°F/250°C with the baking surface in the upper third. Brush the loaf with water and bake without steam for 40-45 minutes, then reduce the temperature to 390°F/200°C and continue to bake until the loaves thump when tapped with a finger and the internal temperature is at least 200°F/93°C, about 20 minutes more.


Everyone commented that these temperatures were too high.

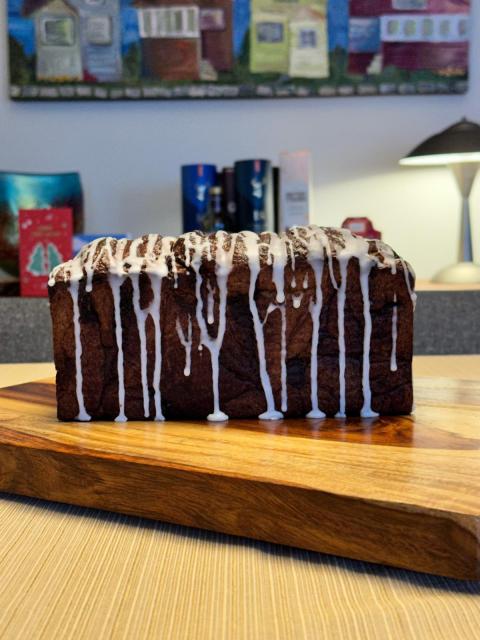
Start 480°F  30 mins then drop to 400°F until done another 15-30 mins or so.  Apply cornstarch glaze and then return to oven until glaze sets, about 3-4 mins.


Glaze:

Ingredient

Grams / ½ batch

Ounces

Cornstarch or potato starch, 1 tsp

3 / 1.5

0.10

Water, 1 cup

227 / 113.5

8.00

Bring about three-fourths of the water to a boil. Dissolve the starch in the remaining 1/4 of the water water and add it to the boiling water, stirring constantly until the mixture thickens. Brush the hot glaze on the top crust and return the loaf to the oven until the glaze sets, 3-4 minutes. Transfer  to a rack and cool thoroughly before slicing.

My index of bakes.

Benito's picture
Benito

I’ve long wanted to try making steamed buns.  Char Siu Bao are a long time favourite of mine from my childhood.  Since I haven’t made anything like this before I decided that I’d make the plain buns first to test the recipe I found in a book called Mooncakes and Milk Bread.  These are IDY and I think I’ll try to convert them to sourdough eventually once I get the hang of the steaming and what to expect of the dough as it ferments.  I purchased a bamboo steamer in order to makes these.

Makes 6

150 g AP flour

25 g sugar

½ tsp IDY

¼ tsp baking powder

⅛ tsp coarse salt

80 g 110°F water


This is a very stiff dough, I mixed by hand and kneaded by hand.  I added the matcha powder to half of the dough once the gluten was moderately developed.


The two balls of dough were allow to ferment until they doubled in size.  They were then each divided into six equal pieces and formed into tight small boules.  


Prepare six 4” squares of parchment paper.


After a brief rest each boule was rolled out into a circle about 2.5-3” in diameter.  Each circle of dough is cut in half. Then arrange four half circles of dough in a straight line, overlapping by 1/2-1.5” with the straight side of the half circle aligned.  Roll up each half into a tight roll to form rosettes.  Arrange rosettes on the parchment squares.  Repeat with the remaining half rounds.  If you prepared two colours of dough, alternate the colours when arranging the half circles of dough.


Cover the rosettes of dough with a damp towel.  Set them in a warm spot until they are 1.5 times larger, 30-45 mins.


Prepare your steamer setup and bring water to a boil.  Working in batches if necessary, arrange buns in the bamboo steamer spacing 2” apart.  Steam over boiling water for 10 minutes.  Turn off the heat and leave the buns in the covered steamer for 5 more minutes to prevent collapsing.  (I left them in the steamer and on the same stove element turned off). Remove the buns from the steamer and allow them to cool for 5 minutes before serving.  


Buns can be kept in an airtight container (a resealable bag works great) at room temperature for up to 4 days or in the freezer for up to 3 months. Room temperature buns can be reheated in the microwave for 15 to 20 seconds or steamed for about 2 minutes, until soft and warmed through. Reheat frozen buns by steaming until soft and warmed through, 10 to 15 minutes.


My index of bakes.

Benito's picture
Benito

I needed more bread now that I’ve returned to Toronto.  Despite making 24 rolls there were none left after Christmas dinner!  I wanted to do the braiding again like the loaf I gave to Alfanso and show that it doesn’t have to have a pinched waist.  After baking this loaf, which admittedly is a bit darker than even I like because of the cinnamon sugar getting on the outside of the dough, I believe that my oven in Fort Lauderdale is running a bit low in temperature.  I’ll have to get an oven thermometer to check on it when I return.  This bake was also a test of my starter to see if it is up to snuff.  I’d say that it could still use a couple more feeds before I bake with it again.

For one 9x4x4” Pullman pan


Instructions

Levain

Mix the levain ingredients in a jar or pyrex container with space for at least 300% growth. 

Press down with your knuckles or silicone spatula to create a uniform surface and to push out air.

At a temperature of 76-78ºF, it typically takes up to 10-12 hours for this sweet stiff levain to be at peak.  For my starter I typically see 3-3.5 times increase in size at peak.  The levain will smell sweet with only a mild tang.

Tangzhong 

In a sauce pan set on medium heat, stir the milk and Whole wheat flour until blended. Then cook for several minutes until well thickened, stirring regularly with a spoon or heat-resistant spatula. Let cool in the pan or, for faster results, in a new bowl.  Theoretically it should reach 65ºC (149ºF) but I don’t find I need to measure the temperature as the tangzhong gelatinizes at this temperature.  You can prepare this the night before and refrigerate it, ensure that it is covered to prevent it from drying out.


If you plan on using a stand mixer to mix this dough, set up a Bain Marie and use your stand mixer’s bowl to prepare the tangzhong.


Raisins 

Place the raisins in a microwave safe bowl, spritz with water, cover with cling wrap and then microwave at 10 second intervals until the raisins are rehydrated.  Alternatively, soak in water overnight.  In the morning, strain and pat dry before use.


Cinnamon filling

12 g cinnamon 

30 g white sugar

7.5 g all purpose or bread flour


Combine cinnamon and sugar and flour and set aside.


Dough

In the bowl of a stand mixer, add the milk (consider holding back 10 g of milk and adding later if this is the first time you’re making this), egg, tangzhong, salt, sugar and levain.  Mix and then break up the levain into many smaller pieces.  Next add the flours.  I like to use my spatula to mix until there aren’t many dry areas.  Allow the flour to hydrate (fermentolyse) for 20-30 minutes.  Mix on low speed and then medium speed until moderate gluten development this may take 5-10 mins.  You may want to scrape the sides of the bowl during the first 5 minutes of mixing.  Next add room temperature butter one pat at a time.  The dough may come apart, be patient, continue to mix until it comes together before adding in more butter.  Once all the butter has been added and incorporated increase the speed gradually to medium. Mix at medium speed until the gluten is well developed, approximately 10 mins.  You will want to check gluten development by windowpane during this time and stop mixing when you get a good windowpane.  


On the counter, shape the dough into a tight ball, cover in the bowl and ferment for 4  hours at 82ºF.  There should be some rise visible at this stage.


You can next place the dough into the fridge to chill the dough for about 1.5 hours, this makes rolling the dough easier to shape.  Remember, if you do so the final proof will take longer.  Alternatively, you can do a cold retard in the fridge overnight, however, you may find that this increases the tang in your bread.


Prepare your pan by greasing them with butter or line with parchment paper.  


Divide the dough into 2 equal portions.  Form each into tight boules.  Stretch and then roll each piece of dough into a large rectangle, approximately equal sizes.   Spread the cinnamon sugar evenly over one of of the rectangles of dough leaving about 1cm at the edge of dough without mashed potato.  Lightly sprinkle some flour onto the cinnamon sugar, this will help absorb some of the water that the sugar draws out of the dough.  Spread the prepared raisins next.  Place the other rectangle of dough onto the other sandwiching the sweet potato between them.  Using a rolling pin, roll the dough out a bit more aiming for more than 12” in length and just under 9” in width.  


Using a ruler and pizza cutter, cut the dough into evenly wide strips about 1.5-2 cm wide along the length of the dough but leaving about 2-4 cm of dough uncut at the end furthest away from you.  When all the strips are cut, twist the strips in alternating directions, clockwise and then counter clockwise.  Once all the strips are twisted, roll the whole thing into a log starting furthest away from you getting a nice tight roll at the start.  Transfer the dough into your prepared pullman pan with the seam side down.


Place in the buttered baking pan seam side down.


Cover and let proof for  4-6 hours at a warm temperature.  I proof at 82°F.  You will need longer than 4-6 hours if you chilled your dough for shaping. I proof until the top of the dough comes to within 1 cm of the top edge of the pan.


Preheat the oven to 350F and brush the dough with the egg-milk wash.  Just prior to baking brush with the egg-milk wash again.


Bake the loaves for 50 minutes or until the internal temperature is at least 190ºF, rotating as needed to get even browning. Shield your loaf if it gets brown early in the baking process. After 50 mins remove the bread from the pan and bake a further 10 mins by placing the loaf directly in the oven on the rack with the oven turned down to 325ºF. You can brush the top of the loaf with butter if you wish at this point while the bread is still hot to keep the top crust soft.  


A note, if there is a good amount of cinnamon sugar on the top of the dough, then watch it like a hawk while it bakes and be ready to shield it if it starts to brown quickly because of the sugar.  I did not do that soon enough with my loaf.

My index of bakes.

Benito's picture
Benito

We are back in Toronto and I’ve just gotten a couple of feeds in and the starter is looking good.  However, I needed to get these rolls done for our family dinner at my sister’s quickly.  So using IDY I made these rolls.  Since my partner is from Newfoundland and they have Newfoundland savory as their local herb that is widely used in stuffing I decided to give him a taste of home by using Newfoundland savory in my mashed potatoes that I’ve added along with black pepper to these milk rolls.

For 13 x 9” pan 24 rolls 

egg wash: 1 yolk, 1 tbsp milk and a pinch of salt, beaten…


Cook Tangzhong mixing flour and milk constantly until it becomes a thick roux.  Let cool before adding to final dough.  Or add to cold milk and egg to cool it down.


Blend room temperature butter and flour together and set aside to incorporate after the dough is well developed.


Whisk together dry ingredients flour salt and yeast. 


To mix by hand, add the salt and yeast to the wet ingredients (milk, tangzhong and egg) to dissolve.  Next add the flour and mix with a silicone spatula until no dry flour remains.  Rest 10-20 mins.  Next perform French folds until the dough is well developed.  Smear the blended butter/flour onto the dough and then fold to incorporate and then perform further French folds until well developed.  Gradually add the mashed potato and knead to incorporate it well into the dough.  Form into a tight ball and place in a bowl covered with plastic or a damp cloth and place in a warm place until doubled (about 1hr 30 mins).  Alternatively, you could mix the mashed potato and butter and then add the mixture to the developed dough until well incorporated.


Butter a large baking pan.  Punch the dough down and then divide into 12 equal portions.  Form each into tight boules.  Place in the buttered baking pan seem side down.  Cover them and allow them to fully proof about 1 hour to 1 hour and 20-30 mins, they should pass the poke test.


After about 30 mins of proofing time, whisk your remaining egg and milk and then brush the small boules.


About 30 mins prior to end of final proof preheat the oven to 350°F. 

Immediately prior to baking brush the dough again with the egg and milk mixture.


Bake the rolls uncovered for 30-35 minutes or until the internal temperature is at least 190F. Cover if your rolls get brown early in the baking process.


Remove the bread from the oven but not the pans, brush the tops with butter while hot, and then let cool for 10 minutes before pulling the bread from the pans. You may need to slide a butter knife down the sides of the pan to loosen the bread, but I have found parchment paper to be unnecessary.  Sprinkle with fleur de sel if you wish after brushing with butter. 

Merry Christmas TFL Bakers!

Benito's picture
Benito

A visit to Fort Lauderdale wouldn’t be the same anymore without visiting with Alan (Alfanso) and his lovely wife.  We spent last evening chatting about life, travels and many other topics and a little bit about bread (actually very little). We were lucky enough to get to enjoy Alan’s famous baguettes.  In this case he had baked a set of Hamelman’s seed SD baguettes that I have always admired in his posts.  Well I can say that they look and taste even better than the photos and descriptions on TFL make them appear.

There was a wonderful crunch to the thin crust and the slightly chewy crumb was enhanced by the flavours of the seeds.  Absolutely wonderful bread to have with butter or cheese and a wonderful way to spend the evening.

Alan kindly sent us home with one baguette that will enjoy for dinner.  Lucky us!

I will have to bake these in the near future.  Here’s the thread that I found where Alan shares the formula for these amazing baguettes.

Benito's picture
Benito

This loaf was a gift to Alfanso (Alan) and his wife.  We got together for a lovely evening at their place here in Fort Lauderdale last night so I wanted to bring them something different so I came up with the idea to use mashed cooked sweet potato with some cinnamon as a filling for a milk bread.  The baked loaf had some structural issues that made me concerned that it was either overproofed, underbaked (due to the added moisture of the sweet potato) or just too tall to handle its height.

100 g mashed sweet potato

15 g brown sugar

10 g butter

Cook on medium low heat in a pan until it slightly dries.


For 1 loaf in a 9x4x4” pullman pan


Egg/milk wash: 1 yolk and 1 tbsp milk, beaten


Cook Tangzhong mixing flour and milk constantly until it becomes a thick roux.  Let cool before adding to final dough.  Or add to cold milk and egg to cool it down.


Blend room temperature butter and flour together and set aside to incorporate after the dough is well developed.


Whisk together dry ingredients flour salt and yeast. 


To mix by hand, add the salt and yeast to the wet ingredients (milk, tangzhong and egg) to dissolve.  Next add the flour and mix with a silicone spatula until no dry flour remains.  Rest 10 mins.  Next perform French folds until the dough is well developed.  Smear the blended butter/flour onto the dough and then fold to incorporate and then perform further French folds until well developed.  Form into a tight ball and place in a bowl covered with plastic or a damp cloth and place in a warm place until doubled (about 1hr 30 mins).   Place in fridge for 1 hour to firm up the dough to make shaping easier or cold retard until next day.


Butter a large baking pan.  Punch the dough down and then divide into 2 equal portions.  Form each into tight boules.  Stretch and then roll each piece of dough into a large rectangle, approximately equal sizes.  Spread the prepared sweet potato evenly over one of of the rectangles of dough leaving about 1cm at the edge of dough without mashed potato.  Place the other rectangle of dough onto the other sandwiching the sweet potato between them.  Using a rolling pin, roll the dough out a bit more aiming for more than 12” in length and just under 9” in width.  


Using a ruler and pizza cutter, cut the dough into evenly wide strips about 1.5-2 cm wide along the length of the dough but leaving about 2-4 cm of dough uncut at the end furthest away from you.  When all the strips are cut, twist the strips in alternating directions, clockwise and then counter clockwise.  Once all the strips are twisted, roll the whole thing into a log starting furthest away from you getting a nice tight roll at the start.  Transfer the dough into your prepared pullman pan with the seam side down.


Place in the buttered baking pan seem side down.  Cover them and allow them to fully proof about 1 hour to 1 hour and 20-30 mins, it should pass the poke test.


After about 30 mins of proofing time, prepare your egg and milk wash and then brush the top of the loaf.


About 30 mins prior to end of final proof preheat the oven to 350°F. 

Immediately prior to baking brush the dough again with the egg and milk mixture.


Bake the bread for 50 minutes or until the internal temperature is at least 190F. Cover if your loaf gets brown early in the baking process.


Remove the bread from the pan and return to the oven baking directly on the rack if the sides of the loaf aren’t yet crisp baking for another 5 mins.  Cool on a rack, enjoy.

The steps to shape this loaf.

After dividing and rolling the two halves of the dough into large rectangles, the sweet potato is spread on one half and then the others is placed on top, rolled out further and finally cut into 1 cm widths leaving one  end of the dough intact.

My index of bakes

Benito's picture
Benito

We had some friends over for dinner and had to have some nice soft rolls to go with my chicken with artichoke hearts and sun dried tomatoes.  I decided that I wanted something with rosemary since the chicken dish has rosemary in it.  So I prepared a mashed Russet potato and added rosemary and black pepper to taste.  Of course the mashed potato had butter and milk as well, make sure that the butter and milk are hot when adding it to the mashed potato for the best smooth texture.

Pan 7.5 x 11.5” = 4 rolls by 6 rolls about 37 g each x 24

egg wash: 1 yolk and 1 tbsp milk, beaten…


Cook Tangzhong mixing flour and milk constantly until it becomes a thick roux.  Let cool before adding to final dough.  Or add to cold milk and egg to cool it down.


Blend room temperature butter and flour together and set aside to incorporate after the dough is well developed.


Whisk together dry ingredients flour salt and yeast. 


To mix by hand, add the salt and yeast to the wet ingredients (milk, tangzhong and egg) to dissolve.  Next add the flour and mix with a silicone spatula until no dry flour remains.  Rest 10-20 mins.  Next perform French folds until the dough is well developed.  Smear the blended butter/flour onto the dough and then fold to incorporate and then perform further French folds until well developed.  Gradually add the mashed potato and knead to incorporate it well into the dough.  Form into a tight ball and place in a bowl covered with plastic or a damp cloth and place in a warm place until doubled (about 1hr 30 mins).  Alternatively, you could mix the mashed potato and butter and then add the mixture to the developed dough until well incorporated.


Butter a large baking pan.  Punch the dough down and then divide into 12 equal portions.  Form each into tight boules.  Place in the buttered baking pan seem side down.  Cover them and allow them to fully proof about 1 hour to 1 hour and 20-30 mins, they should pass the poke test.


After about 30 mins of proofing time, whisk your remaining egg and milk and then brush the small boules.


About 30 mins prior to end of final proof preheat the oven to 350°F. 

Immediately prior to baking brush the dough again with the egg and milk mixture.


Bake the rolls uncovered for 30 minutes or until the internal temperature is at least 190F. Cover if your rolls get brown early in the baking process.


Remove the bread from the oven but not the pans, brush the tops with butter while hot, and then let cool for 10 minutes before pulling the bread from the pans. You may need to slide a butter knife down the sides of the pan to loosen the bread, but I have found parchment paper to be unnecessary.  Sprinkle with fleur de sel if you wish after brushing with butter. 


My index of bakes.

Benito's picture
Benito

I am still trying to get used to our oven down here in Florida.  For this bake, I wanted to see how I might add steam to a bake.  I wanted some more sandwich bread, but thought I’d make a loaf that used a tangzhong with milk but without milk in the mix or butter in the dough.  I decided to use olive oil instead for the enrichment.  To add some flavour there is King Arthur whole wheat in the dough and the three types of sesame seeds on the crust.

I think that the large baking pan I used to add water to create steam should have been above the loaf rather than below.  I believe it’s position below compromised the oven spring and also you can see that the bottom crust didn’t achieve the caramelization that I usually want and the crumb at the bottom is a bit off.

For 9x4x4 Pullman Loaf Pan


Prepare Poolish – Night before mixing

Mix the poolish ingredients in a container and leave covered to ripen at about 78°F (25°C) for 12 hours overnight.


Tangzhong - night before to allow to cool

Be sure to do this ahead of time to give the pre-cooked flour time to cool before mixing.

Milk alternative: If you want to avoid using milk in this recipe, substitute out the dairy milk in the roux, below, for water (or something like oat milk).


To a medium saucepan, add the flour and milk listed above. Turn the heat to medium-low and cook, whisking continuously, until the mixture thickens and becomes like a paste, about 5-8 minutes. In the beginning, whisk vigorously to break up any flour clumps, and be diligent about this near the end to avoid burning. The mixture won’t seem to do anything until it reaches a critical heat point, be patient; it will thicken.

Once it transforms into a viscous paste (something like oatmeal porridge), remove the pan from the heat and spread it out on a small plate to expedite cooling. Set the tangzhong aside until called for when mixing.


Mix in the morning when poolish is ready

It is easiest to mix this dough using a standmixer, but it’s possible to make this bread without a stand mixer by mixing everything together by hand in a mixing bowl. To do this, you’ll need to mix for around 10-15 minutes, depending on your technique (slap and fold will work really well!).


To the bowl of a stand mixer fitted with the dough hook attachment, add the pre-cooked flour, flour, water, ripe poolish, sugar, olive oil, and salt. Mix on low speed for approximately 2 minutes until the ingredients come together, and no dry bits remain. Increase the mixer speed to medium (2 on a KitchenAid) and mix for 8-10 minutes until the dough starts to clump up around the dough hook. It won’t completely separate from the bottom of the bowl, and it will still be shaggy. 


To mix fully by hand, to a large bowl add the tangzhong, water, ripe poolish, sugar, salt and olive oil.  Stir to breakdown the poolish and dissolve the sugar, salt and poolish.  Add the flours and mix until no dry flour remains.  Rest for 10 mins.  Slap and fold the dough until the gluten is well developed and you can pull a good windowpane.  This required about 700 slap and folds for me.


Bulk Fermentation

On the counter, shape the dough into a tight ball, cover in the bowl and ferment for 2-2.5 hours at 82ºF.  There should be some rise visible at this stage.


You can next place the dough into the fridge to chill the dough for about 1.5 hours, this makes rolling the dough easier to shape.  Remember, if you do so the final proof will take longer.  Alternatively, you can do a cold retard in the fridge overnight, however, you may find that this increases the tang in your bread.


Prepare your pans by greasing them or line with parchment paper.  A tip if you’re using very soft butter to grease your pan, after greasing the pan, place it in the fridge for a bit to firm up the butter that way the butter won’t just melt into the dough.


Shape 

Prepare your pans by greasing them with butter or line with parchment paper.  


Lightly oil the countertop.  Scrape the dough onto the oiled countertop. Shape tightly as a batard or roll.  On a small cookie tray, add the sesame seeds.  Roll the batard seem side down on the sesame seeds, then roll onto the sides and ends to get the dough well covered with seeds except for the top of the batard.   We will be applying an egg milk wash to the top of the dough twice before baking and will then add the sesame seeds after this wash is done.  I have found that egg washing onto the seeds affects their colour more than I prefer.


Proof


Cover and let proof for 3-4.5 hours at a warm temperature.  I proof at 82°F.  You will need longer than 3-4.5 hours if you chilled your dough for shaping. Proof until the dough passes the finger poke test.  For a loaf the dough should reach within 1 cm of the rim of the pullman pan.


Preheat the oven to 350°F setting it up for steam baking  and brush the dough with the egg-milk wash when the dough is 30 mins away from fully proofed.  Just prior to baking brush with the egg-milk wash again.  Finally apply sesame seeds to the egg washed top of the dough, then bake.


Bake 


Bake for a total of 50 mins at 350°F.  Pour 1-2 cups of boiling water into the roasting pan and bake with steam for 20 mins.  After 20 mins vent the oven and remove the roasting pan.  Rotate the bread and bake for another 30 mins. 

My index of bakes.

Pages

Subscribe to RSS - Benito's blog