The Fresh Loaf

A Community of Amateur Bakers and Artisan Bread Enthusiasts.

Benito's blog

Benito's picture
Benito

We felt like having fish burgers for dinner but only made that decision this morning.  So without any time to make sourdough buns I decided to try making buns with KA’s yeasted burger bun recipe.  Since these are enriched they should still have good flavor even without the benefit of the added sourdough.

Ingredients

Buns (for 4 buns measurement in brackets)

  • 420g (210g) King Arthur Unbleached All-Purpose Flour
  • 170g to 227g (85-114g) water, lukewarm*
  • 2 tablespoons 28g (1tbsp 14g) butter, at room temperature
  • 1 large egg (½)
  • 50g (25g) sugar
  • 1 1/4 (5/8) teaspoons salt
  • 1 tablespoon instant 9g (½ tbsp 4.5g) instant yeast

*For best results (a smooth, slightly soft dough), use the smaller amount of water in summer (or in a humid environment), the greater amount in winter (or in a dry climate); and something in between the rest of the time.

Butter glaze

  • 3 tablespoons 43g (1.5 tbsp 22 g) butter, melted; divided

Seed topping (optional)

  • 1 large egg white* whisked with 2 tablespoons cold water
  • sesame seeds, or the seeds of your choice

*For added richness and color, add the yolk left over from separating the egg to the dough above. 


Instructions

  • To make the dough: Mix and knead all of the dough ingredients — by hand, mixer, or bread machine — to make a soft, smooth dough.
  • Cover the dough and let it rise until it's nearly doubled in bulk, about 1 to 2 hours.
  • To shape the buns: Gently deflate the dough and divide it into eight pieces (about 100g each); to make smaller or larger buns see "tips," below. Shape each piece into a ball.
  • Flatten each dough ball with the palm of your hand until it's about 3" across.
  • Place the buns on a lightly greased or parchment-lined baking sheet. Cover and let rise until noticeably puffy, about an hour. Toward the end of the rising time, preheat the oven to 375°F.
  • Brush the buns with about half of the melted butter. To make seeded buns, brush the egg white/water mixture right over the melted butter; it'll make the seeds adhere. Sprinkle buns with the seeds of your choice.
  • To bake the buns: Bake the buns for 15 to 18 minutes, until golden. Remove them from the oven and brush with the remaining melted butter; this will give the buns a satiny, buttery crust. If you've made seeded buns apply the melted butter carefully, to avoid brushing the seeds off the buns.
  • Cool the buns on a rack before slicing in half, horizontally. Use as a base for burgers (beef or plant-based) or any favorite sandwich filling.
  • Storage information: Store leftover buns, well-wrapped, at room temperature for several days; freeze for longer storage.


https://www.kingarthurbaking.com/recipes/beautiful-burger-buns-recipe


Benito's picture
Benito

Blueberry Rhubarb has become one of my favourite flavour combinations.  For this iteration I wanted to try using Bravetart’s whole wheat pastry, in my case using whole red fife and less water than her recipe calls for.  I also wanted to try cooking the filling ahead of the bake so that there would be no chance of a soggy bottom with this very wet filling.  The filling was completely cooled before using.  For a regular pie you will have left over filling which is great on ice cream or on your toast.  For a deep dish pie you will have the right amount.

For the top crust I wanted to try something I saw somewhere.  I rolled the pastry into a large rectangle and then rolled that out into a tight roll.  I think cut 3 mm thick swirls of the pastry, theses were laid on top of the filling to make what I think is an attractive pie crust.  The extra can be baked topped with cinnamon, sugar and an egg wash as little treats to taste your pastry while your pie is baking and filling your home with wonderful scents.

Did you know that adding coriander to your blueberry will bring out more blueberry flavour?  What is it about linalool specifically that makes blueberries and coriander such a great combination? Sater broke it down for me like this: “In the case of blueberries and coriander, the linalool present is mostly the same type. In a nutshell, there are two different forms of linalool that can be produced in nature, and they actually have different odor properties. The type that predominates both the blueberry profile and the coriander profile is the (S)-(+)- linalool, which has an odor that can be described as green, rosy, floral, and citrusy.”

Since blueberries and coriander share the same type of floral linalool flavor, then, our brains seem to interpret this flavor as the same. Sure, coriander has other flavor and aroma compounds, but combining it with blueberries will layer the linalool, making those blueberries sing.

For a double crusted pie.

166 g all purpose flour

173 g whole red fife flour (whole wheat can be used)

23 g sugar

6 g salt

18 tablespoons butter unsalted 

210 g cold water add a little by little tossing with a fork just until the dough can barely hold together when pressed. 

Filling

2 pounds rhubarb, trimmed and cut into 1/2-inch pieces (7 cups)

1 ¼ cups (8 3/4 ounces) sugar


4 cups of blueberries

⅓ cup plus 1 tsp of corn starch

juice and zest of one lemon

1/2-1 teaspoon of ground coriander seed.

Pinch of salt 


Benito's picture
Benito

I’ve been meaning to bake this combination for some time now and glad I finally did.  Toasting the walnuts is always a great way to enhance the walnut flavour but in this loaf I also added toasted walnut oil.  

For one 900 g loaf 78% hydration 

311 g white bread flour.        

67 g whole spelt     

266 g warm water          

7.5 g salt  

77 g levain  


21 g water for mixing later 

12.5 g toasted walnut oil 3% to be added after gluten moderately-fully developed.


total flour 417 g  


62 g dried blueberries 15% pre-soaked in brandy overnight. 

51 g Lightly toasted Walnuts 12% 


A refrigerated saltolyse was used given the higher summer temperatures.  The levain was built overnight and kept in the coolest room in the house on the floor.

Bulk lasted about 5 hours.  Shaping was done around 35–40% rise at a pH of 4.16.  Further bench rest was allowed until the pH reached 4.0 and the dough then had a final cold proof at 3ºC overnight and then baked as usual in a dutch oven overnight.


The crumb is a bit tight I’m sure partially because of the weight of the inclusions and perhaps also because of the microbe inhibiting effects of the brandy?  I’ve never been able to get anything like a relatively open crumb with fruit and nut breads, I think I’d have to reduce the amount of fruit and nut that I add to the bread.  However, I love the density of inclusions in these types of bread and this was a lovely eating bread.  The blueberries are delicious and still have some tenderness to them, while the toasted walnut flavour is definitely enhanced by the addition of the oil.  I think that the crust is a bit thinner and crispier which I believe is because of the walnut oil.  I’ll need to compare to future bakes to know for sure. 


Benito's picture
Benito

I haven’t baked plain sourdough baguettes in a while and I thought it would be a good way to test out my new flax linen couche.  You might recall that my old couche, sold to me as being flax linen was in fact 100% cotton and has given me tons of grief each time I’ve tried to bake ciabattas.  The dough would stick no matter how much flour I used.  So I broke down and got a new couche.  I seasoned it by sprinkling then rubbing in white flour.  It did work well and my baguette dough didn’t stick, thank goodness.  The big test will be trying ciabatta again.

I’ve updated my formula for these baguettes and used Scott McGee’s MeGee’s shaping.  I’m very happy with his technique.  In fact, when shaping the baguettes you never press down at all on the dough to elongate.  You press along the edge where the dough meets the table which builds tension and elongates the dough.  This time I’ve increased the hydration to 72% and increased the dough so each baguette is 330 g.  I was easily able to shape the baguettes to the maximum length of my cookie tray that fits in my fridge which is 15 inches.  The shaped baguettes sit in the couche on the cookie tray which makes it easy to give the dough a final chill to ease scoring once they are fully proofed to 30% rise by aliquot jar.  By the way, the pH of the dough at the time of baking is a relatively high 4.34.  For hearth loaves I’ve been aiming for a pH of 3.8 - 4.0 at the time of bake.

With the longer baguettes I’ve now also done five scores per baguette which I think works well for this length.  I’ve need a bit more practice to avoid overlapping them too much which I did particularly in the one baguette where the ears broke from the oven spring.

Benito's picture
Benito

One of my favourite combinations on a pizza that I’ve made is the Speck, Parmigiana Reggiano, Peach and Arugula Sourdough Pizza.  Something about the salty speck and cheese, the sweetness of the peaches and peppery arugula is so delicious.

The recipe that follows was originally shared during the pizza community bake, I’ve made some edits so that it works better with my starter and oven.


For 4 9” pizzas NY style thin crust 200 g each

Levain Build 100% hydration 35 g needed


433 g bread flour

43 g Whole grain flour (50:50 whole spelt:whole wheat)

4.76 g Diastatic malt 1%

252 g water and

41 g water hold out

8.43 g salt 1.71%

2.5 g sugar 0.5%

4.8 g olive oil 1.0%


Total flour 493.5

Total water 310.5 

63% hydration water only

64% including olive oil


Sourdough version you may have to adjust the amount of levain. At 3.5% PreFerment Flour (PFF) 2-4 day retard should work.


(1) In your mixer bowl(or by hand) dissolve the Starter or yeast in all of the Final Dough Water except the HOLD OUT Water.  (Add diastatic malt too)

(2) Mix in the flours until well hydrated 

(3) Allow to fermentolyse for 1hr 

(4) Mix in the remaining HOLD OUT Water, salt, and sugar mix until well-incorporated. 

(5) Slowly drizzle in the oil until well combined. 

(6) Beat or knead by hand until dough is moderately developed. The dough will be sticky and elastic. If kneading by hand, use slightly wet hands and avoid adding more flour. 

(7) Oil your hands and a suitable container. 

(8) Shape into a tight ball.  I divide the ball into four smaller ones each for one 9” pizza at this point.  Each goes into a small oiled bowl and allowed to proof for 1 hour before starting cold fermentation.

(9) Cold ferment in the refrigerator for 48-96hrs. 

(10) Remove to warm up to room temp for at 3-6hr or so before use, or you can ferment at room temp. for 6hrs.   2-3 hours seem ideal 80ºF 

(11) Stretch the balls into your desired size skins (see video below), top and bake at 550F (as high as your oven will go) Until the crust is browned and the cheese has melted. Spin the pie at least once to avoid burning due to oven hot spots. I have included a link to a skin stretching tutorial. Watch this video, more than a few times then go through the motions in your head. If you can see it in your mind's eye, you too can be a home oven pizzaiolo! 


Heat oven to 550ºF convection roast setting, with skillet in oven on baking steel on the second highest rack about 1 hour.  My set up with the baking steel on the roasting rack that set up is on the third highest rack because of the added height from the roasting rack so it essentially makes the skillet on the second highest rack.

Place stretched dough into skillet and top with sauce and toppings.  For this pizza the order of toppings is speck, parmigiana reggiano then peaches.  The arugula toss with pepper and olive oil is added when the pizza is out of the oven.

Brushing water on the cornicione prior to baking in oven, gives better oven spring and leopard spots to the cornicione. 

Benito's picture
Benito

You may know that I have recently started using a new pH meter, the Hanna bread and dough meter.  I have wanted for some time to use pH to help guide decisions during dough development including when to start cold retard.  My interest really peaked when I was trying to bake a decent 100% whole red fife sourdough loaf and ran into issues including gluten breakdown.  So I am now first trying to discover what the ideal pH is to shape ending bulk fermentation and when to start cold retard.


Some background information that might be useful, aspartic proteinases native to grains are active in the pH range of 3 to 4.5.  These are the proteinases that will break down our gluten.  Mildly degraded gluten may be beneficial and help with extensibility, however severely degraded gluten will no longer trap the CO2 produced and cause our loaves to have poor oven spring.


My assumption is that the ideal pH to end bulk and start cold retard may vary from dough to dough depending on their flour composition.  For example, I have learned that red fife is not very fermentation tolerant.  My assumption, not based on any facts that I could find, is that red fife may contain higher levels of aspartic proteinases and thus the gluten breakdown will be faster as the pH drops below 4.5.  On the other hand, a very strong flour such as semola rimacinata may tolerate a lower pH especially if you fully develop the gluten.  So I’ve been working with my country sourdough recipe and doing a bit of baking trying to find the limit of the pH.  I think I have found that starting cold retard at a pH of 3.89 is too low.  This recipe is 80% bread flour, 15% red fife and 5% rye.


My most recent bake of this I ended bulk shaping at a pH of 4.08 and an aliquot rise of 60%.  The shaped dough was left on the counter until the aliquot jar showed a rise of between 90-95% and had a pH of 3.89 and then placed in the fridge at a temperature of 3ºC. Because of the dough mass is 900 g it will take a few more hours in order to reach that temperature and greatly reduce the LAB production of acids.  


The baked loaf shows some spreading and less than ideal oven spring, suggesting that it is a bit overfermented.  The crumb also shows some evidence of overfermentation and gluten degradation with the small elongated alveoli and generally compressed alveoli rather than more rounded alveoli.  

As I said the evidence of overfermentation is mild not severe, but I do see it in this loaf so I believe I am very near the lower limit of pH for this particular dough with its grains and hydration.  My plan will be to shape earlier perhaps with an aliquot jar rise of 50% and expect that the pH will be around 4.2 at that point and then cold retard close to pH of 4.0.  This should allow for some reduce in pH as the dough mass slowly cools in the fridge.  From what I have read from other bakers who have collected pH data, for this 700 g doughs they get a further drop of 0.2 pH during cold retard.  I haven’t tested the pH of my shaped dough because I don’t want to damage it by stabbing it with the pH meter.  I usually have a 2nd aliquot jar that I use to measure the pH of the dough similar to the aliquot jar I use to measure rise.  However, I do not know how to approximate the slowly dropping temperature of the shaped dough because the aliquot jar quickly stops fermenting in the fridge since it is only about 30 g of dough.


Benito's picture
Benito

Sometimes things don’t work as planned, so it is good to have a plan B just in case.  Having a pullman pan lined with parchment or a focaccia tray ready is always a good idea if your dough doesn’t seem to be developing the way it should during bulk.  That is what happened today to this dough, it just seemed much wetter and looser than I recall when I made this recipe a year ago.  I’m pretty sure I didn’t measure incorrectly so I wonder if the flours have just absorbed quite a bit of the moisture from the air lately as it has been humid.  Regardless baking this lean dough as a pan loaf seems to have worked.  This is a 78% hydration 20% whole einkorn and 9% whole red fife sourdough bread.  I had black and white sesame seeds left over on the tray from seeding the baguettes so decided to top this loaf with the seeds and I’m glad I did.

Benito's picture
Benito

As many of you might know I love sesame seeds so it was time to use them on my Yorkville Sourdough Baguettes.

Final Dough

475 g 10% protein white flour 

311 g water autolyse

9 g water bassinage

5.22 g diastatic malt

9.38 g salt

95 g Levain built with 12 g stater 45 g water 45 g white flour 10% protein


Overnight levain build 1:6:6

7 g + 44 g + 44 g

Total flour 522.5 Total water 367.5

70% hydration

Overnight levain build with cold filtered water, refrigerate levain and then take out of fridge before bedtime.

In the morning dissolve diastatic malt and levain in water.  Then add flour and mix to shaggy mass.  Rest 20 mins then add salt and gradually add bassinage water, do Rubaud kneading for 4-5 mins until dough is smooth.  

Remove approximate 40 g of dough and set up your aliquot jar.  How to use an aliquot jar.

Ferment at 82ºF, after 50 mins do coil folds, then after another 50 mins do another coil fold.  Once the aliquot jar shows a 20% rise the dough is placed into the fridge until the following day.  At 80ºF this is about 4 hours or so.

The dough is divided and pre-shaped as loose cylinders and left to rest covered at room temperature for 20-30 mins.  The dough is then shaped, placed on a wet towel and rolled in black and white sesame seeds.  A little tip for shaping is to stretch the dough by gently pulling the dough while flipping the dough after each fold during final shaping.  This way you are close to the final length you need and when rolling you are just giving the dough a nice shape without having to stretch them much longer.  Finally they are placed on a couche seam side up and left at room temperature for 40 mins to proof.  You do not need to flour your couche if you have applied seeds, however, do remember to flour the bottom of the baguettes which are facing up in the couche otherwise they will stick when flipping them onto your transfer board.  Aliquot jar rise to 30% is the end of root temperature final proof.

With 10 mins left of bench rest the oven is started 500ºF to preheat.  When the 40 mins of bench rest is completed the shaped baguettes are placed in a bag and returned to the refrigerator for 30-40 mins to chill to make scoring easier.  Once this time is over the baguettes are scored and immediately placed on the baking steel and boiling water is added to the cast iron skillet.  The Sylvia towel with boiling water was placed in the oven 30 mins prior to baking time.

The oven temperature is jacked up to 525ºF to get the burners to activate immediately and then once activated dropped to 480ºF.  The baguettes are baked with steam for 13 mins.  The steam equipment is removed venting the oven of steam.  The oven is left at 480ºF but convection is turned on and the baguettes bake for 10 mins rotating them halfway.  The oven temperature is then dropped to 450ºF and the baguettes rotated again if needed and baked for another 3 mins to achieve a rich colour crust.


Alfanso money shot ; )

Benito's picture
Benito

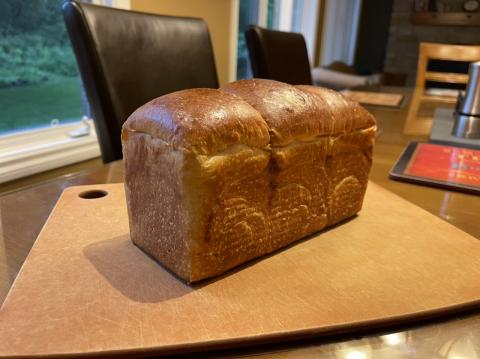
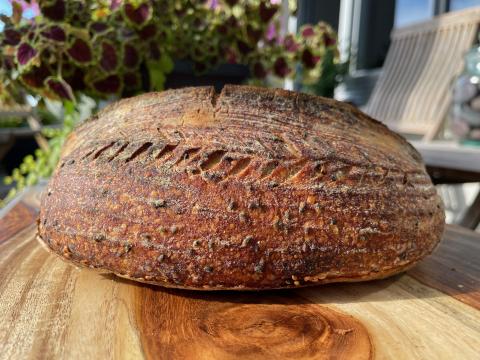
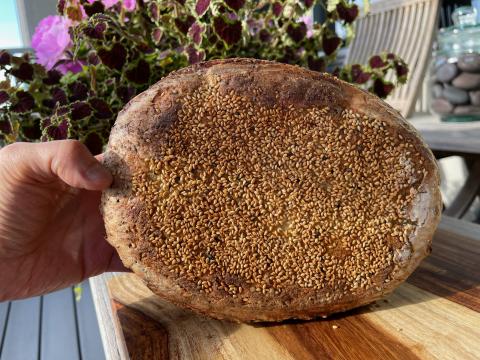
For this bake I followed the recipe that Melissa shared on Breadtopia.com a couple of years ago.  It has been on my list to bake for a long time after having made a yeasted version a long while ago.  A couple of challenges I had on this bake was using my niece’s starter which needs some work to boost and then baking in my in laws’ oven.  However, despite the very slow fermentation the end result is really good.  

For one loaf 9x4” Pullman pan 


Ingredients


Sweet Stiff Starter 

• 53g bread flour 

• 24g water 

• 18g light brown sugar 

• 18g sourdough starter ~100% hydration 


Tangzhong classic 1:5 ratio

• 89g milk (adjusted down to 1:5 ratio from original)

• 18g bread flour   


Dough Dry Ingredients 

• 360g bread flour 

• 59g sugar

• 7g salt 

• Dough Wet Ingredients 

• 139g milk 

• 59g egg beaten (about 1 ⅕ of a large egg)

• 67g melted butter Soften but do not melt if you are hand-kneading and see the instructions at the end of this recipe.


Total flour = 431 g


Total weight 899 g

Instructions

Starter 

Mix the starter ingredients in a jar or pyrex container with space for at least 50% growth. (See gallery where 150ml grows to approximately 225ml.)

Press down with your knuckles to create a uniform surface and to push out air. This reduces drying and allows you to see actual CO2 aeration over time.

At room temperature, it typically takes 7-9 hours for this sweet stiff levain to be at peak.

Tangzhong 

In a sauce pan set on med-low heat, whisk the milk and flour until blended. Then cook for several minutes until thickened, stirring regularly with a spoon or heat-resistant spatula. Let cool in the pan or, for faster results, in a new bowl.

Dough 

These instructions are for using a stand mixer. Scroll to the end for hand-kneading instructions if you do not have a mixer.

In the bowl of a stand mixer, briefly whisk the dry dough ingredients, and then add the sweet stiff starter, separating it into 5-6 portions as you add it to the bowl.

Now pour/scrape in all the wet ingredients (including the tangzhong), with the melted butter last. With the dough hook attachment, mix on low speed for a minute, scrape down the sides, and then mix on medium speed for 15-20 minutes. The dough will seem very soft, but as you approach the 15-20 minute mark, it should not stick to your hands and should pass the windowpane test.

Transfer the dough to a lightly oiled bowl, form it into a ball, flip it smooth side up, cover and let rise for 6-12 hours depending on room temperature. If you refrigerate the dough, plan for longer rise times. See photo gallery for approximate dough expansion during the bulk fermentation.

Prepare your pans by greasing them or lining them with parchment which is what I usually do.

Cover and let proof for 2-4 hours (more if you put the dough in the refrigerator).  I proof until the top of the dough comes to within 1 cm of the top edge of the pan.

Preheat the oven to 350F and brush the dough with the egg-milk wash.

Bake the rolls uncovered for 30-35 minutes, and loaves for 50 minutes or until the internal temperature is at least 190F. Cover if your rolls get brown early in the baking process.

Remove the bread from the oven but not the pans, brush the tops with butter while hot, and then let cool for 10 minutes before pulling the bread from the pans. You may need to slide a butter knife down the sides of the pan to loosen the bread, but I have found parchment paper to be unnecessary.

After the bread is completely cooled, store it in a plastic bag at room temp for a week or longer.

Instructions for kneading by hand 


Mix all of the ingredients except the softened butter in a bowl with a spatula, dough whisk and/or your hands. Let rest for 10 minutes, then transfer to your countertop and knead by hand, adding 2 Tbsp of butter at a time, kneading between butter additions until the butter is incorporated and the dough stays together. Now follow the instructions above from when you transfer the dough to a lightly oiled bowl and start the bulk fermentation.


I actually changed up the instructions a tiny bit and we hand mixed.  I mixed all the wet ingredients including adding melted butter together and dissolved the tangzhong and added the firm starter.  Next I added the flour and mixed.  Finally slap and folds were done by my niece until a good windowpane was attained.

Benito's picture
Benito

Trying to learn more about pH guided sourdough baking I decided to bake another 100% Semola Rimacinata bread.  Last time I felt that the dough didn’t hydrate as well as I remembered when I last baked this for the CB so I upped the hydration from 81 to 83%, I think I could have gone further given the high protein of this flour.

With this bake I followed pH during bulk and aimed to get the dough into cold retard by a pH of around 4.0, the thinking being that the pH would fall further by about 0.2 during the first hours of cold retard as the dough slowly drops in temperature to 3ºC.  I won’t post all the details of the formula because I did that for the last bake and the only change is the increase in hydration.

The black sesame seeds were added during lamination and the white sesame seeds are on the bottom of the loaf.  The white ones were added when the dough was in the banneton.  This should keep things tidier when slicing the bread while still giving us all the sesame flavour.

Pages

Subscribe to RSS - Benito's blog