The Fresh Loaf

A Community of Amateur Bakers and Artisan Bread Enthusiasts.

CrustyJohn's blog

CrustyJohn's picture
CrustyJohn

I've long been yearning to bake a nice perfectly rectangular rye loaf.  Earlier this year I finally bought a pullman loaf pan, but since starting to use it, I've discovered it's not so simple as just baking a loaf in such a pan.  Thus far the rye loaves I've baked in it have stopped their rises just a little short of the rim, thus resulting in a slightly domed top.  On the other end of the spectrum, a wheat loaf blew the lid off the top.  There's nothing wrong with rounded tops, but I wanted the Nordic esthetic.  I realized it's important to get the dough volume right.  With this loaf I finally did that.  For my loaf pan (the standard length pullman I believe), it seems to be 1000g of flour/seeds and whole or chopped grains

It was a three stage affair:

1.

100g Maine Grains rye flour

100g water

35 g starter

~let sit at room temp. (60s) overnight (~10 hrs)

2. add

400g seed & multigrain mix

50g barley

200g rye flour

mix thoroughly and let sit ~4 hrs at room temp (60s)

650g water

3. add

250g rye flour

mix thoroughly, place in oiled pan, smooth top with water and dough scraper.  Let rise until nearly at top of pan.  This happened sooner than I expected (about 3 hrs) so I put it in the refrigerator to put it on hold until I was ready to bake. 

Baked at ~450 for 40 min. then 400 for another 30-40 min.  Took the lid off for the a bit toward the end to brown it up.  Let cool in turned off oven.


The close reader may notice that missing from the list of ingredients is salt. This was not my intention, but the loaf still tastes quite good, probably better than a what loaf would taste sans salt.  I guess I'll have to bake another rye loaf!

CrustyJohn's picture
CrustyJohn

Normally the loaves I record here are the successful one.  There are plenty of so-so loaves that don't offer too much to dwell on worth writing about.  And then there are the total disaster loaves.


This one falls in that category.  It is a buckwheat porridge loaf.  I think I over loaded it with porridge and ended up with a loaf a bit too much on the wet side.  It was manageable enough ti shape, but it must have seeped moisture while doing the final cols proof in the banneton because when I went to turn it out to bake, it was not just a little stuck but totally adhered to the banneton.  I had to scoop it out with a dough scraper!  So I just dumped the dough mess on the hot stone, covered it and hoped for something with a shape.

Fortunately it kept somewhat of a shape and rose alright.  It actually has a very nice soft airy crumb.  This is not the first time something like this has happened to me, and I imagine others have experienced this as well.  Sometimes those total mess loaves, if you can manage to get them into and out of the oven, can actually be quite nice bread, if lacking shape and beauty.  So here's to ugly bread that still tastes good!

CrustyJohn's picture
CrustyJohn

I haven't been logging loaves as much recently in part because I don't have easy internet access but also because I haven't been doing too much different.


  I found a handful of chanterelles the day before I wad planning to bake, so that became the inspiration for this one.  For whatever reason the ones I've found this year don't seem to have much flavor, but it's still fun to throw them in.  Olives are always a nice savory addition.

450g loaf

40% Maine Grains whole wheat (more recent milling batch than earlier in the year, quality seems a bit lower)

60% KAF special patent

85% hydration

50g starter

3 tsp salt

Handful sauteed chanterelles

Handful oil packed olives

‐----‐--------

Room temp. Throughout ~65-70°

-mix water, starter, and flour; sit 1 hr.

-pinch in salt and knead some

-stretch and fold every half hour over 3 hours

-continue bulk fermentation 8 hrs.

-shape

-retard 11 hrs.


---------

I think this once was dancing on the edge of the hydration and bulk fermentation limits.  It felt loose and jiggly when turning it out to bake, and it spread a bit after being turned out onto the stone.  But it came through!  The crumb is really soft and airy, and the flavor is nice and rich!

CrustyJohn's picture
CrustyJohn

I came across this purple sticky rice while stocking up on some pantry dry goods recently.  I've never heard of it before, but it has a nice rich flavor, and I've enjoyed working it into my recent breads.  


My first go-round was a 50-50 white/whole wheat loaf 

I think amounts were about

200g Maine Grains hard red spring whole wheat

200g KA special patent 

~3tsp salt

50g starter

@ 80% hydration I think


Then added

50g rice cooked milk and water until fully cooked 

during stretch and fold

Pretty much standard approach, for me.  I think I mixed all the flour together and did maybe a 1-2 hr. autolyse.


I baked at ~550, and it really seemed to help get a nice spring, though there were also some big holes in the center that are slightly more than I'd prefer.  The flavor is nice.  The rice as expected add a creaminess to the crumb, but the purple rice gives a more dark/complex taste than brown rice.  


Enjoying the results with a wheat loaf, I though it might make a nice addition to a rye loaf in place of the traditional seeds.  

I loosely followed the approach of a recipe I'd used a week before from The Rye Baker but I modified it so that the dough

was 100% rye flour

750g Maine Grains rye

50g purple rice cooked in milk

Something weird happened with this bread; I appreciate any speculation as to what might have caused it:

After mixing the initial sponge and letting it double, I mixed in the second round of flour and water and let it be for most of the day at room temp.  When I came back, it hadn't visibly expanded much, but it was a little hard to gauge in a large bowl, so I just went ahead and added the final flour and rice and put it in the tin for the final rise- This part took crazy long.  I was expecting 4-5hrs as it has been decently warm here, but instead, after ~50 hrs (yes, over two days), it was slowly rising, but still not reaching the top of the tin.  I finally decided to just bake it.  As you can see from the picture, it rose up a bit more during baking, and turned out pretty nice, but I'm confounded as to why it would take so long.  The only idea I can think of is that the warm water I added with the second sponge was borderline too hot and maybe killed much of the yeast?  This seems unlikely as it felt only warm to the touch, and I poured the water on the fresh flour rather than onto the stage 1 sponge, but it's the only thing that comes to mind.  

CrustyJohn's picture
CrustyJohn

I    've been interested in really dialing in on making a nice whole wheat loaf this year, hoping to get to a point where I can consistently make a loaf that has enough of an airy texture + richness of whole wheat to make white flour less relevant in my repertoire.  I've had some good starts that I documented here, but I recently had a really satisfying breakthrough loaf, that I think pretty well meets my criteria for success, so I'll give it a post of its own.

I recently moved to work in Maine, so I was working with Maine Grains hard red spring wheat.

Maine Grains whole wheat 100%

Water 90%

Starter 11%

Salt ~3 tsp


Pretty much same approach as documented in earlier posts but some of the stages were a bit drawn out because I was working with lower temperatures.  Maybe slightly longer on the retard stage (12-13 hrs) as I was at a dinner and didn't get back home to bake until later than planned.


The result is really nicely airy, a few overly big holes, but not enough to bother me much.  Flavor is nice- rich but mellow, not as bland and astringent as the KAF whole wheat I was using previously.  Texture is very soft.  


I'm not sure what to attribute the improved results to- perhaps good grain, perhaps an appropriate hydration for the flour, or maybe just pushing the bulk fermentation and retard a little bit longer.  Whatever it is, if I can consistently make this loaf, I'll be very pleased!

CrustyJohn's picture
CrustyJohn

      I've been interested in making nice airy-ish, free-form loaves with all or substantially whole wheat flour for a few years, but I kind of put that on the back burner for a while.  I've gotten a lot better sense of gauging fermentation as well as experimenting with cooked or soaked grain or porridge add-ins the past two years.  I think it's time now to return to whole wheat loaves.  I think my baking goal for this year will be to 1. Learn to make an airy, well-shaped 100% whole wheat loaf 2. Work with locally or regionally sourced flours, hopefully encompassing a wide range of vatietals.

~~~~~~~

Here's my 2nd go at the 100% w.w. loaf.  The first I think I gave too long of an autolyse and maybe too much water and the gluten seemed to break down, so I just plopped it in a loaf pan to get something out of it. 


450g KAF ww flour (100%)

380g water (85%)

50g starter (11%)

-------

~3 tsp salt


-mix water, starter, and flour.  Rest 1.25 hr.  Pinch in salt.  Stretch and fold over 5 hrs.  (Room temp. ~65°) 

-continue bulk fermentation overnight ~10 hrs., slightly lower room temp.

-preshape, 30min. Shape. Retard 10 hrs.

-bake 475 covered 20 min. Uncovered 10 min. Lower to 425 20 min.
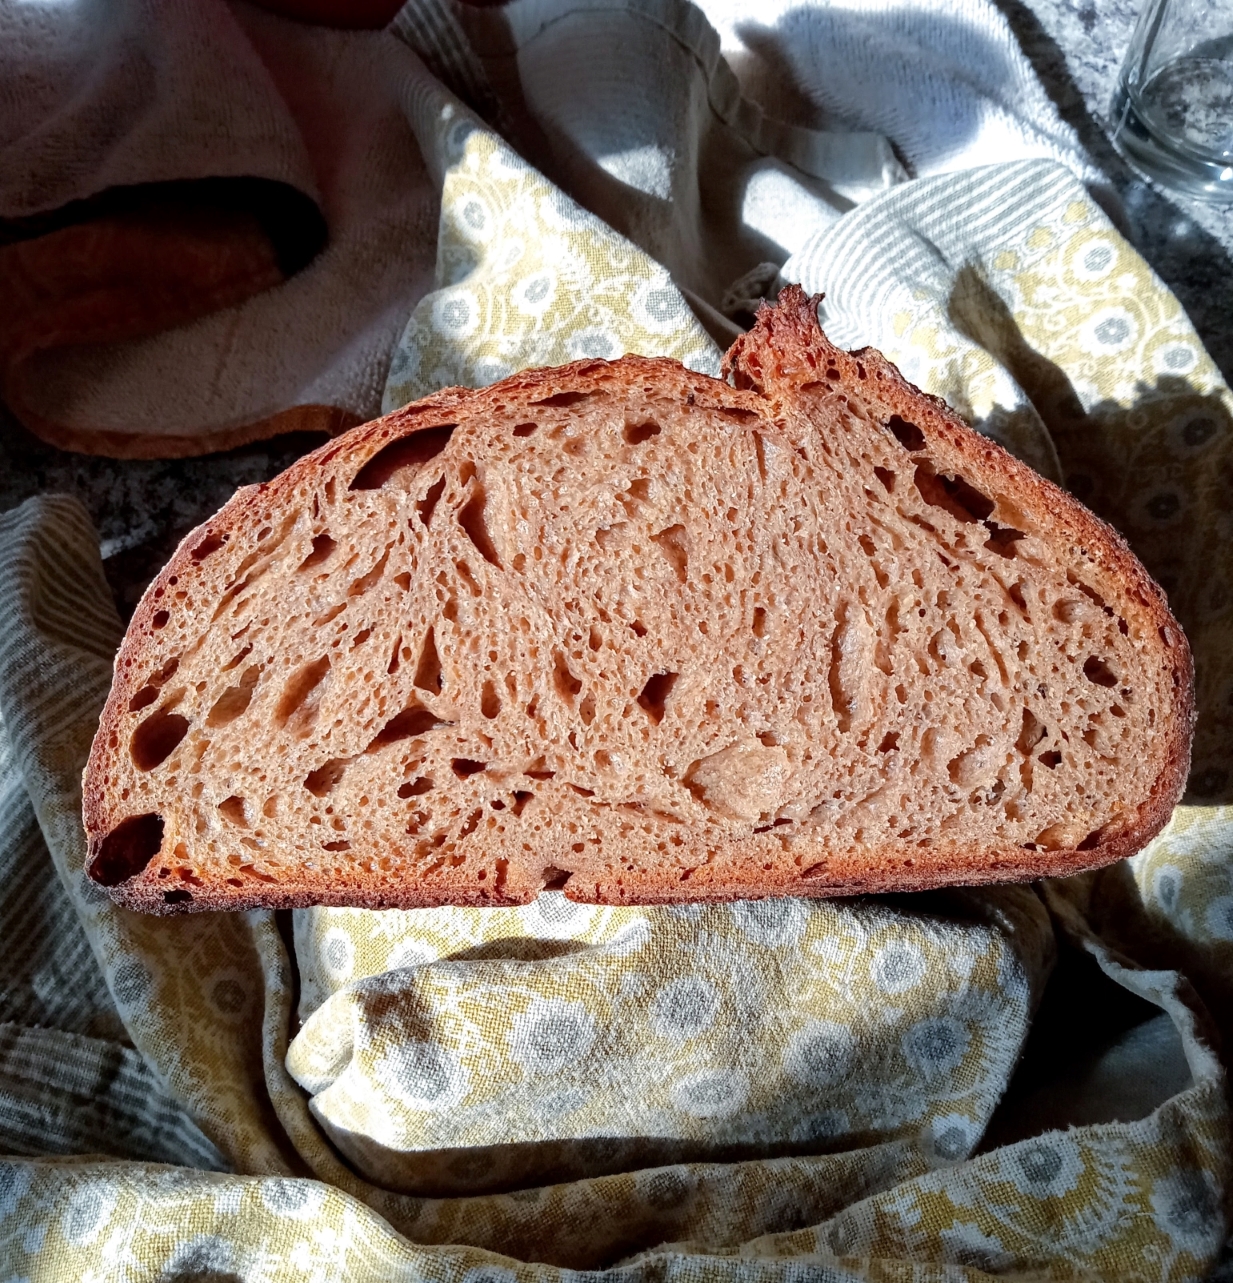


I'm decently satisfied with how this turned out.  It did well enough to give me confidence to continue on but also leaves plenty of room for improvement to push me further.  The flavor was pretty banal for whole wheat, which could be due to 1. KAF being a not particularly flavorful flour or 2. The flour likely being pretty old.

The dough came together slowly, sticky and prone to tearing fir the first few stretch and fold cycles but eventually becoming quite manageable.

I think it would be better to have more of a true autolyse period.  As for improving the crumb, I'm not sure whether I should try pushing the hydration a bit more or the bulk fermentation.  It felt nice and airy when I shaped it, but it didn't expand as much as I hoped when it baked.  


~Edit 3/12~

2nd go-round

Basically same process as above except I extended the autolyse from 1 hr to 3 hrs.

Similar end results.  Perhaps a little more consistent, less open crumb.  The dough developed strength quicker (presumably due to the longer autolyse) and was easier to shape.  I think I need to try increasing hydration a little bit next time.
 

3/22

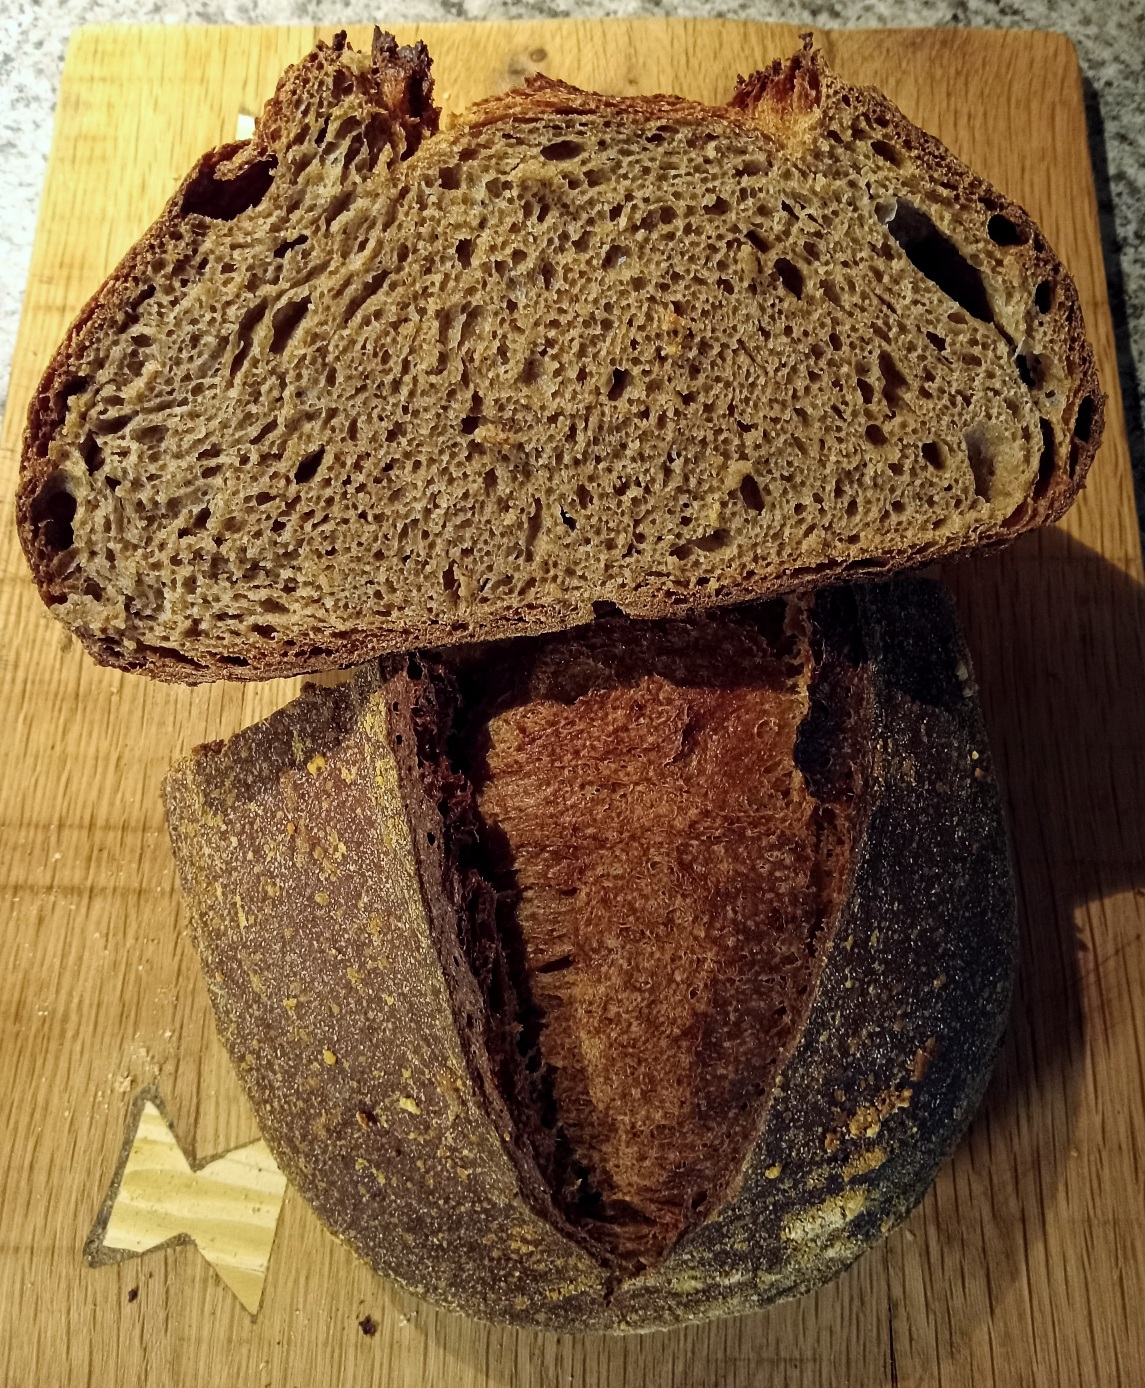
Further iteration on above concept . With this version, I increased the initial hydration percent to 90 and then used water more liberally during stretching and folding, so maybe increased hydration up to 92-3%.  
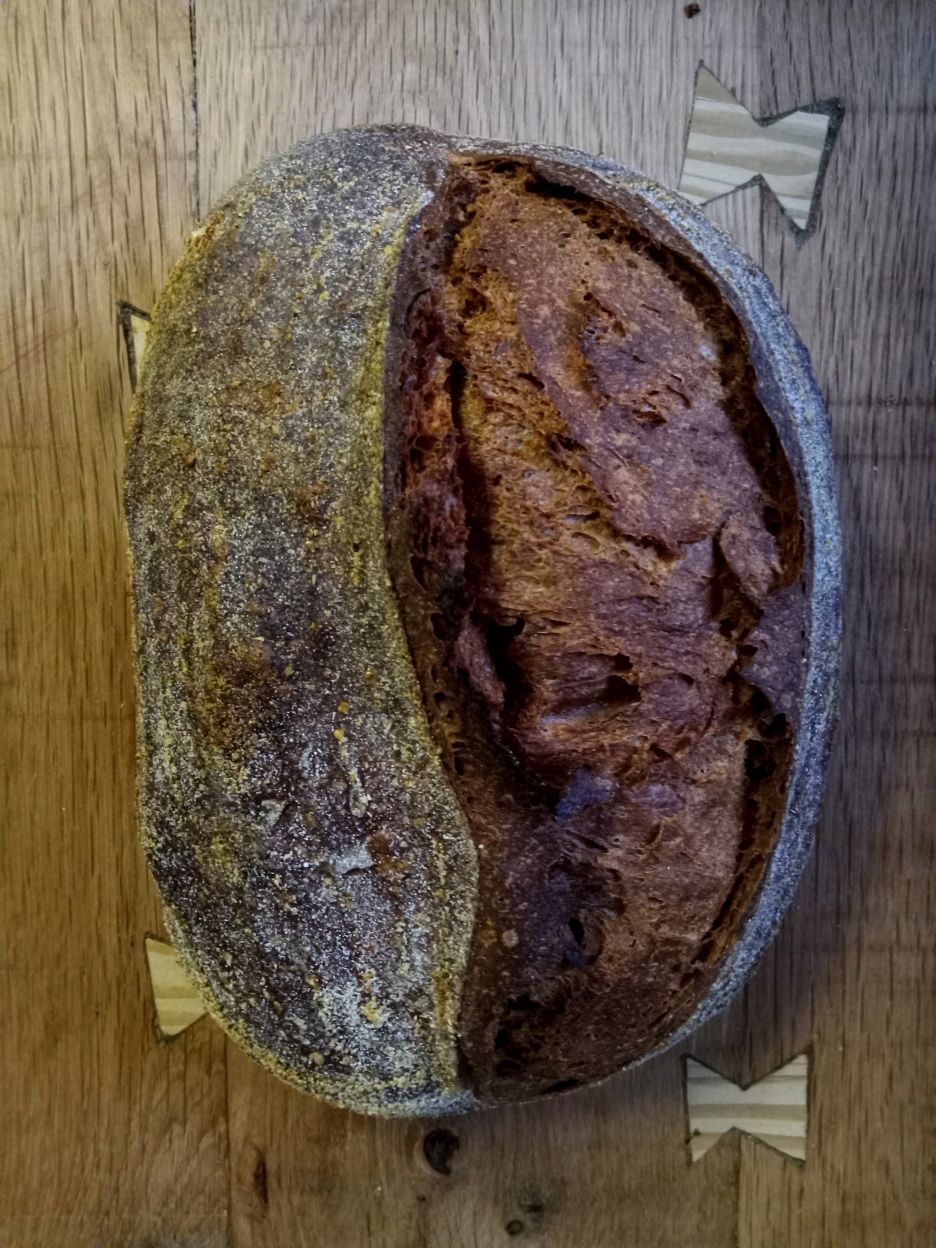


This shape of this loaf coming out of the oven didn't excite me so much, but when I cut into it and saw the crumb, I was happy.  This one feels like a distinctive step forward towards a really nice whole wheat loaf.


edit 5/15

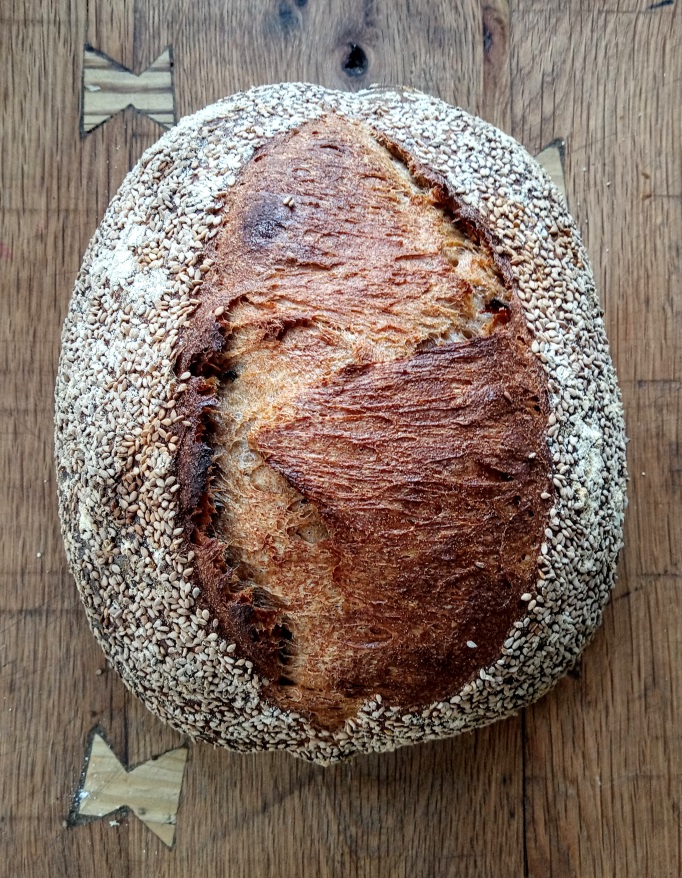
Another go-round with the 100% whole wheat loaf.  This one again with Maine Grains but crusted in sesame seeds.  Pretty much same approach I think as others.  The main thing with this loaf is that I was a little constricted on my baking schedule, and I decided to go ahead and shape it in the morning before work even though it probably could have used another 1-2 hrs. of bulk fermentation time.  Also did the final proof for ~2hrs at room temp. rather then the usual cold retard.  Crumb was a bit worse; shape was really nice; sesame outside is a really nice flavor.
CrustyJohn's picture
CrustyJohn

Basically a second go-round with my loaf earlier this year except that I was lazy with the polenta- instead of doing the whole saccharification process, I just microwaved it.  

King Arthur bread flour- 360g (80%)

Bob's Red Mill whole wheat flour- 90g (20%)

water- 340g (75%)

starter- 50g (11%)

-------------

salt- ~3 tsp

-------------

45g Cateto Orange polenta from Redtail Grains

150g water

tbsp Rag & Frass Farm cane syrup

~~~~~~~~~~~~~~~~

Mix starter & water, add flours, mix until incorporated, "autolyse" 1 hr. (~65 deg.)

Stretch and fold + "lamination" folds over next 3 hours

incorporate cooked polenta about midway through stretch and fold process

bulk ferment ~8.5-9 hours @ ~65-67 deg.

pre-shap, shape, retard for ~11 hrs. @ ~40s? deg. 

Bake (use pre-heated pizza stone and overturned dutch oven) 22 min @ "500" (I think the oven runs about 25 degrees low, so the real temp might be more like 475), uncover, bake another 10 min. drop temperature to 450 for 20 min., turn off oven and let bread cool on rack in hot oven.


I really like this one.  I'm really enjoying using the pizza stone to bake on as it allows the loaf to spread a bit more organically than when I bake in a small dutch oven.  It's also avoids handling the dough after turning it out of the proofing basket.  I think this is up there with some of my favorite loaves I've baked.  I really like the deeply browned crust contrasting with the really soft, sweet polenta-enriched crumb.  The polenta was a little blob-y rather than smooth and creamy, but cooking it in the microwave was really quick and easy.  


Any though on why the left side of the loaf seems to be a bit more consistently open than the right?  Shaping?

CrustyJohn's picture
CrustyJohn

      Well, 9/40ths Rye to be exact, but that doesn't roll off the tongue so well.  I haven't had rye flour on hand in a while, so I've been wanting to do a partial rye loaf for a while.  I did a full rye loaf two weeks back, which was tasty but a whole different beast.


      I also wanted to try baking on a pizza stone since I'm staying with my parents for a bit, and they have one.  I typically bake batard loaves in a dutch oven that is just slightly larger than the loaf, and it tends to constrain the bottom on the loaf, making a slightly rounded bottom.  

350g (78%) bread flour

100g (22%) rye flour

315g (70%) water

1/4c. wheat germ

~tbsp salt


      I pretty much did my usual approach.  I left the dough in the basement overnight to finish bulk fermentation because I was afraid it would progress too quickly at room temperature (mid-low 60s), but I ended up needing to give it a couple hours more at room temperature in the morning.  


      To bake I preheated a pizza stone in the oven (500) as well as a pot.  I put a little cornmeal on the stone, turned on the dough directly on the stone, scored it, and inverted the pot on top.


I liked the outcome quite a lot!  As I was hoping for, the loaf splayed wide with a nice flat bottom.  The bottom crust also caramelized nicer than usual, giving a nice flavor.  The crumb is nice, soft, airy, and has good rich flavor.  That big air pocket in the top is a bit of eye sore.  I imagine sub-par shaping is to blame, but I also read a recent comment on a post that suggested that a too hot oven can be a source of this as well, though I always bake as hot as I can, and have never run into that being an issue.  

CrustyJohn's picture
CrustyJohn

The farm I worked for this year sold at a farmers market in Atlanta at which a small bakery, Osono Bread, sold very good bread but, more importantly, top-notch cream-filled doughnuts.  I've been wanting to attempt something akin to them this whole year.  I finally got around to it for Christmas morning!

I relied on The Perfect Loafs recipe for bomboloni pretty much to a t except that I roughly doubled most of the time since I was working with a room temperature in the low 60s vs. 76-78 in the recipe.  Also I kneaded the dough by hand for about 10 minutes or so since I don't have a stand mixer- hand kneading was not particularly difficult with this dough fortunately.  


I had made cake doughnuts before but never leavened doughnuts.  I was really pleased with how they came out.  I wish I took a picture of the crumb- it was almost as light and airy as pictured in the recipe.  Much more than I dared hope for my first foray into leavened doughnuts, especially since my attempt at sourdough brioche earlier this year was pretty dense.  The only negative with these is that, even though I oiled the baking sheet, the shaped dough still stuck to the sheet a bit during the final rise, so many of the doughnuts came out slightly misshapen.  I would suggest a heavy oiling of the sheet or maybe flouring instead of oiling.  

The cream filling was made from cream cheese, butter, baked sweet potato, sugar, and milk.

CrustyJohn's picture
CrustyJohn

After taking a go at an olive polenta loaf a few weeks ago, I wanted to try the saccharification process highlighted by Benny in his loaf that's currently featured on the homepage.  I didn't have diastatic malt powder on hand, so I used honey as it's supposed to also have amylase.  The polenta definitely seemed a little sweeter after the process, but then again, I added honey to it, so it's a little hard to attribute the source of the change.  Pretty straightforward approach otherwise.


350g (77%) Bread Flour

100g (23%) Bob's Red Mill Whole Wheat Flour

330g (73%) water

50g (11%) starter

---------------------

3 tsp salt

--------------------

45g Cateto Orange polenta from Red Tail Grains

150g water

= ~190g (42%) cooked polenta

--------------------

-Mix starter + water, dissolve, add all flour, mix.  Let sit for 1 hr.

-pinch in salt

-over next 3 hrs. stretch and fold ever 30 min. (room temp. probably high 60s-low70s)

-after first 1.5 hrs. stretch out dough and spread polenta all over surface, fold up, continue stretch and folds

-finish bulk fermentation 7 hrs. at ~60 degrees

-shape, retard in refrigerator for around 10 hrs.

-Bake: 500 22min, uncovered 10min, 450 30min.

-----------------------

Result:  This was one of my best porridge type loaves, yet I think.  The fermentation seemed right about on point (thanks to the tip about corn accelerating fermentation) resulting in a nice oven spring and good crumb.  The crust is good too.  The flavor seems a little different than the previous polenta loaf I did, lending credence to the saccharification process perhaps.  Using a bit lower % of polenta, the crumb was a nicer balance between airy and creamy.  The polenta definitely adds a nice subtle flavor- not as distinct as barley, but more than oats.   

I think having a substantial portion of the flour be whole wheat (perhaps even higher than this loaf) is nice as the bitterness of the hard red whole wheat is balanced by the sweetness of the polenta. 

Pages

Subscribe to RSS - CrustyJohn's blog