The Fresh Loaf

A Community of Amateur Bakers and Artisan Bread Enthusiasts.

Lazy Loafer's blog

Lazy Loafer's picture
Lazy Loafer

As I said when I issued the 123 challenge, I needed an easy dough that I could use to test out new ingredients and compare techniques, etc. So to that end, I decided the other day to make dough for two 123 loaves. I was going to mix them together, then divide them and bulk ferment one in the fridge overnight, then shape and bake the next day, while the other was to be bulk fermented for a few hours, then shaped and proofed in the fridge overnight. I wanted to see if there was a significant difference between retarding the bulk ferment and retarding the shaped proof stage. The formula was:

  • 200 grams of fresh young 100% hydration starter
  • 400 grams of water
  • 400 grams of bread flour
  • 150 grams of whole wheat flour
  • 50 grams of coarse whole rye flour
  • 12 grams of sea salt

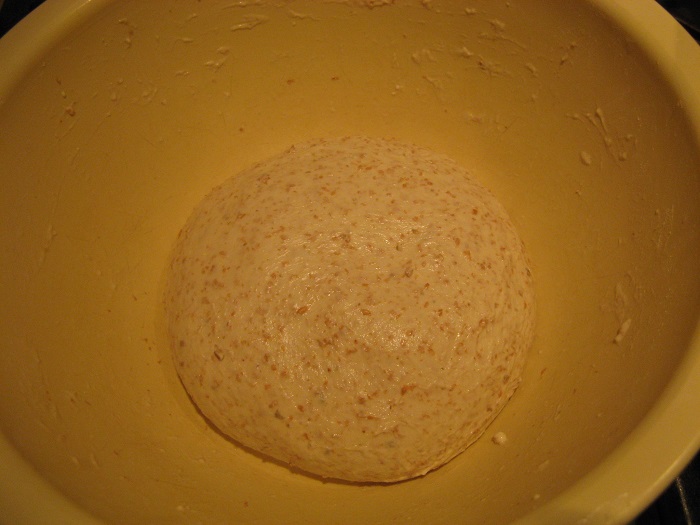
So far so good. However, I was stuck in a meeting that went an hour overtime, then had to make the dough for the following days' regular bake, so by the time I got to make the 123 dough, I didn't have enough hours to let it rise enough in bulk. I was falling asleep before it had risen much, so I gave up and put the dough for both loaves downstairs where it is quite cool right now.

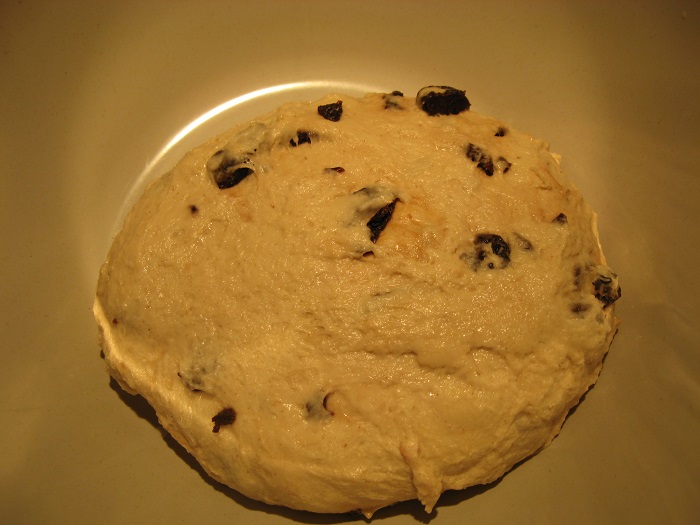
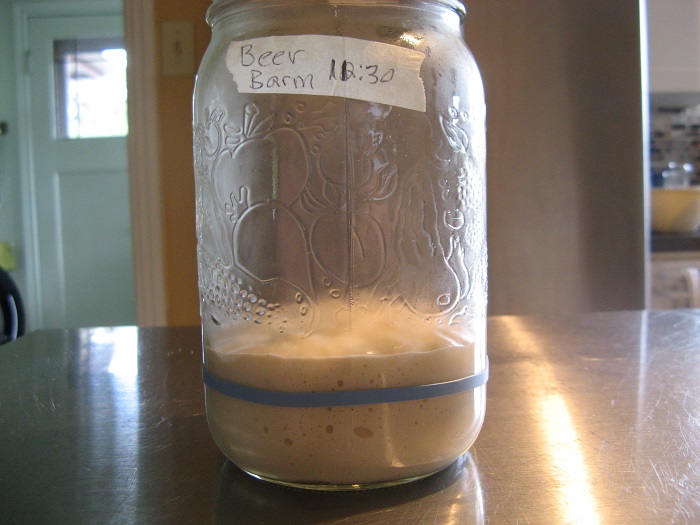
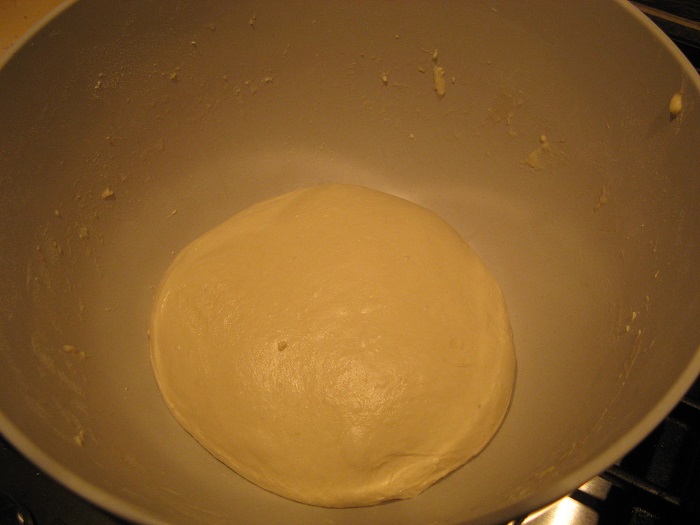
This morning, the dough had definitely risen! It was very, very soft and pillowy, obviously over-proofed. It collapsed in a puddle when I dumped it out onto the counter.

So I decided to do something interesting with it, while at the same time finally responding to Murph's Honey Challenge. I had some leftover soaked 10-grain cereal (Bob's Red Mill; maybe about half a cup). I mixed this with a tablespoon or so of honey, the last currants remaining in the bottom of a bag and a bit of my new-favourite bread spice, cardamom.

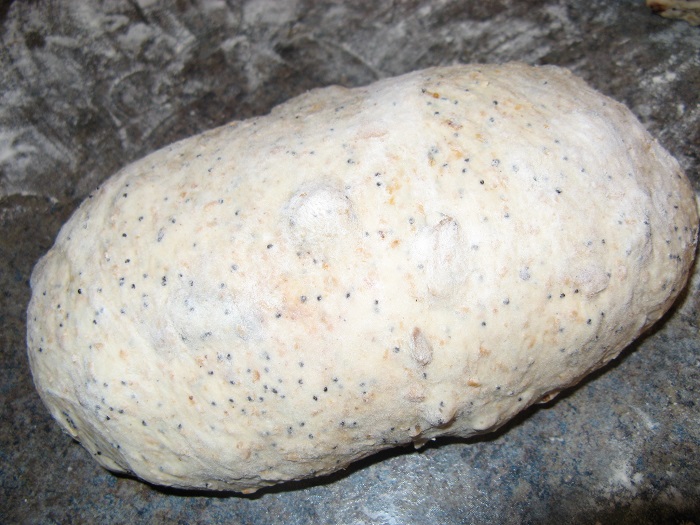
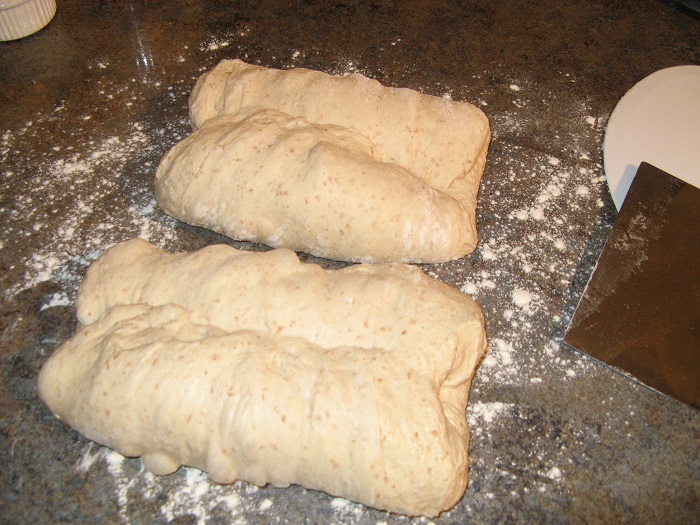
I figured the cereal would soak up the honey so I wouldn't have the same problems Murph had, and the currants just seemed like a good idea. The dough was so soft and stretchy that I had no problem stretching it out into a rectangle. I spread the filling across two thirds of it, then letter folded and spread the rest of the filling, letter folding the other way and leaving it to rest (beside the other loaf, which had no filling).

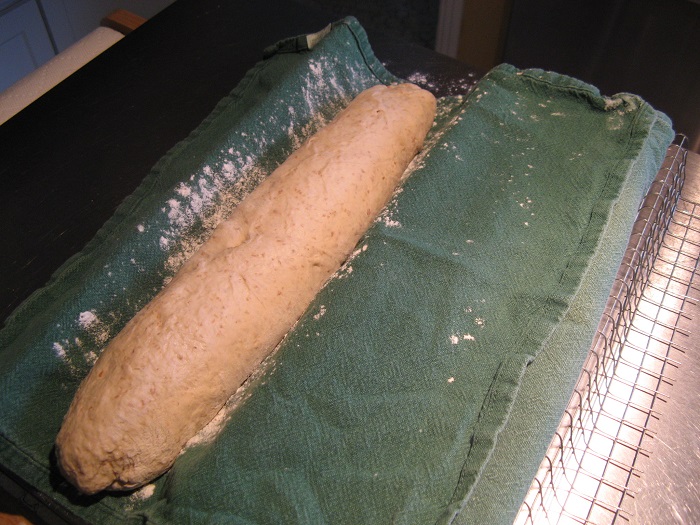
Note the new bread rising frame, ready to be used!

The poor dough was so fragile by this point that when I rolled it carefully off the proofing mat onto the peel it nearly collapsed into another puddle. In fact, the un-stuffed loaf stuck to the peel even though it was floured and sprinkled generously with farina. I had to scrape it off onto another peel so I could get it into the oven. Sheesh!

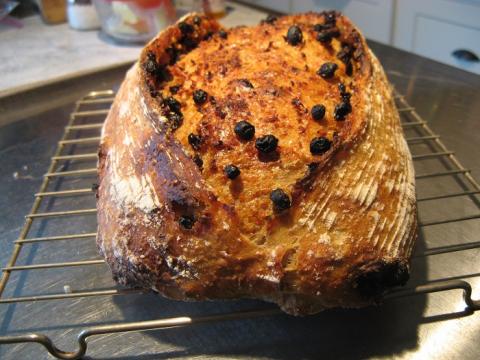
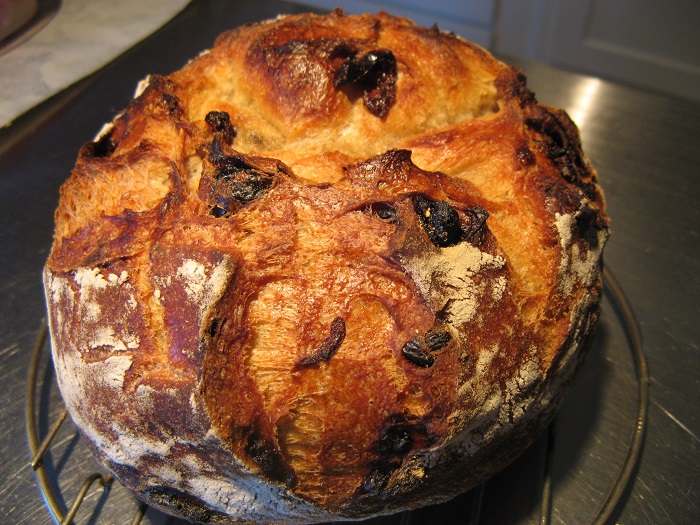
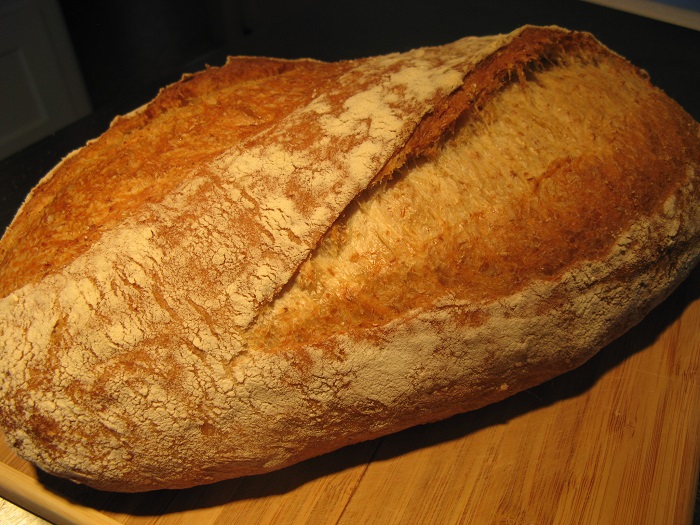
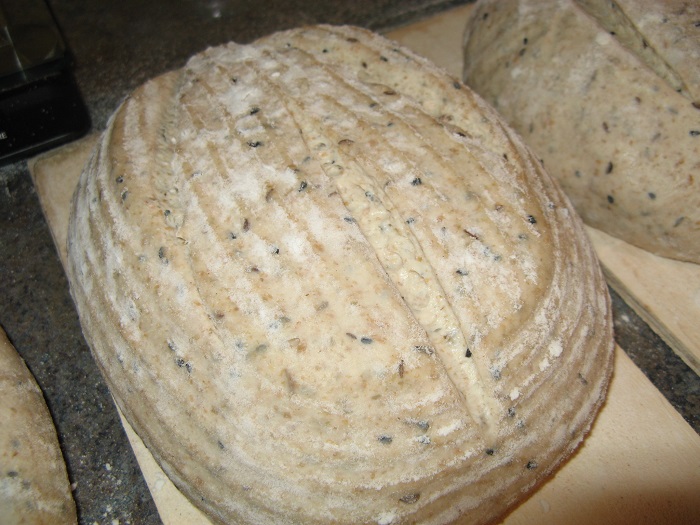
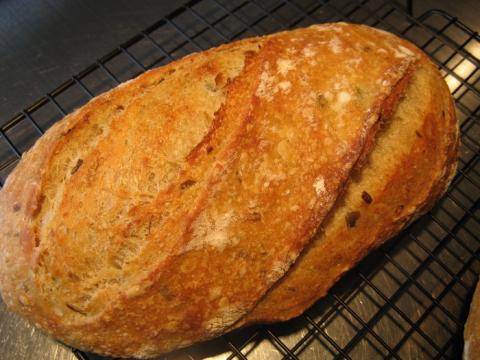
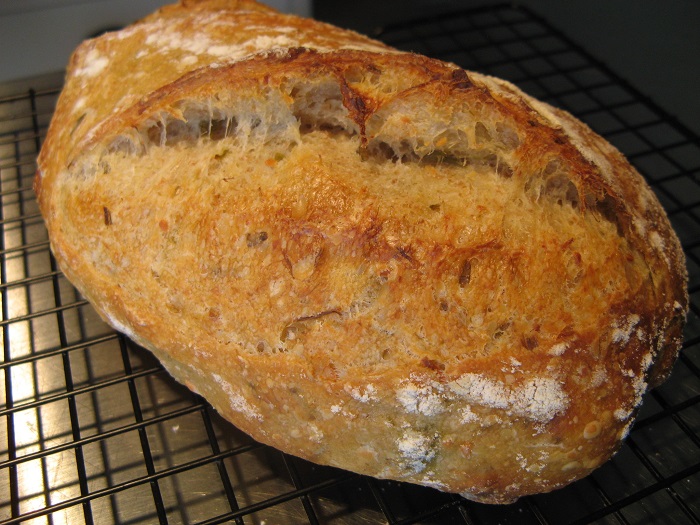
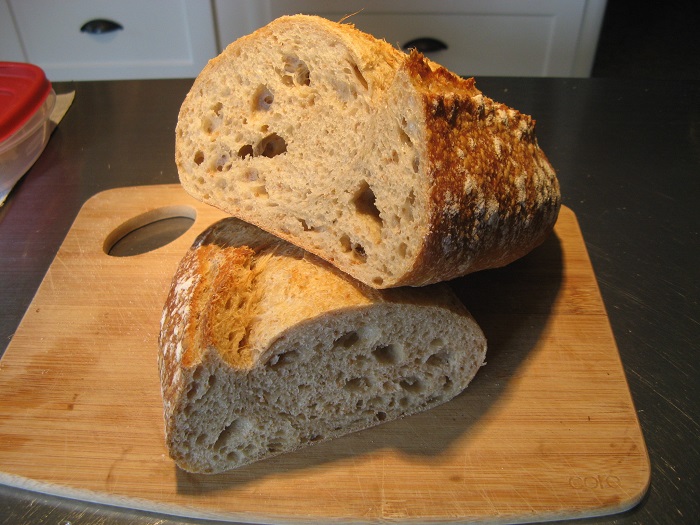
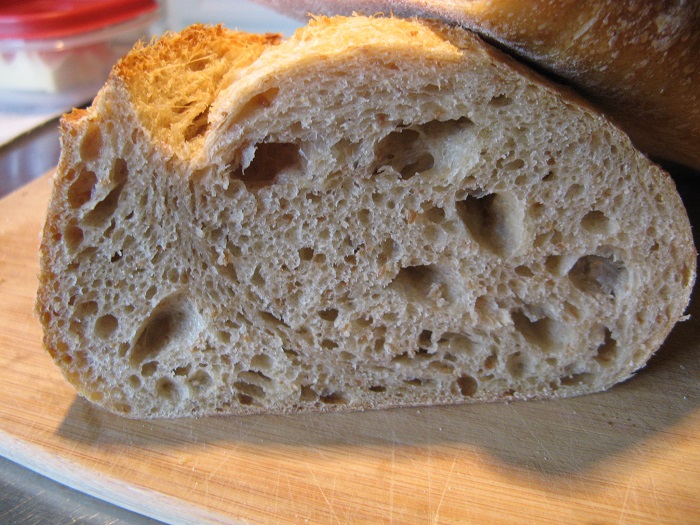
However, then the magic of bread happened. Oven spring wasn't as great as it would have been if the dough hadn't been over-proofed. However, it was still good and the loaf burst dramatically along the single score I managed to put in it.

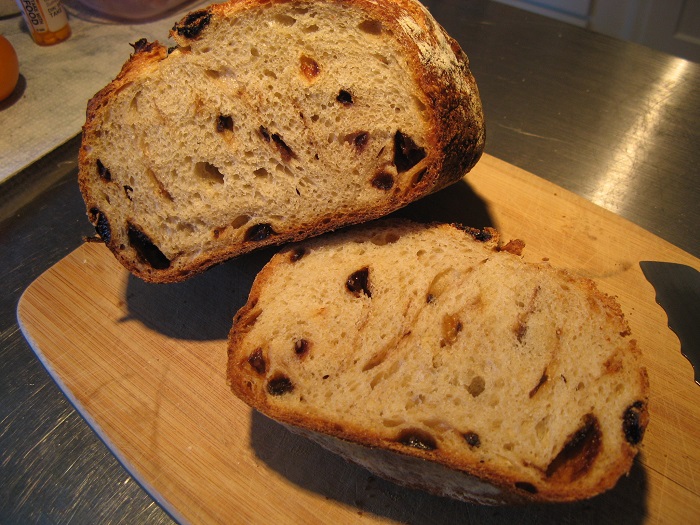
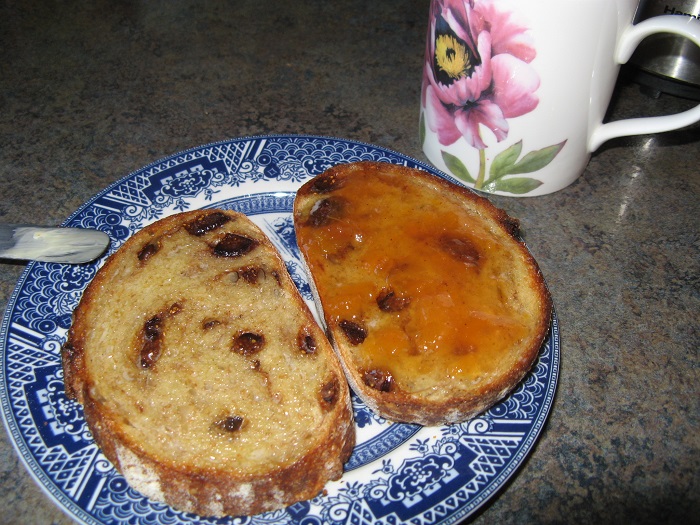
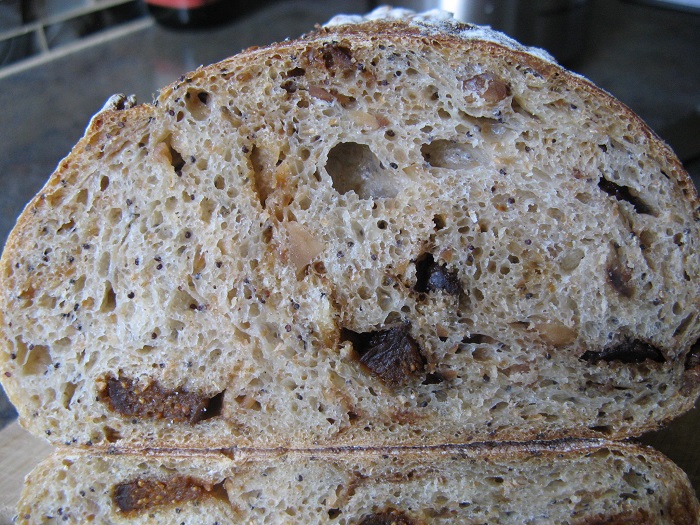
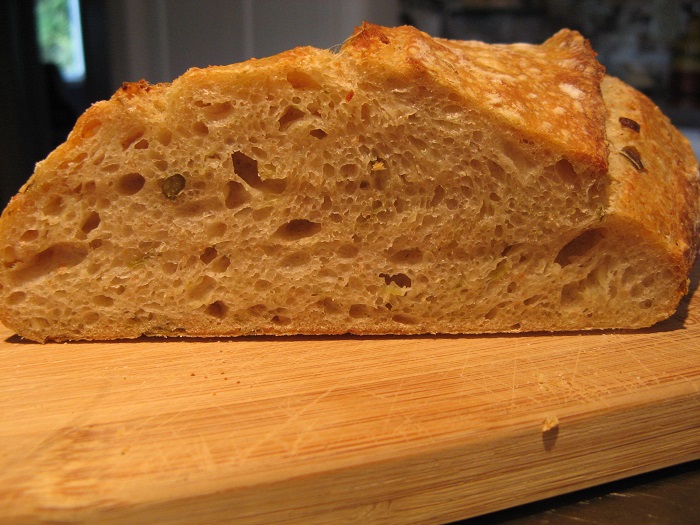
It smelled so good, I had to restrain myself and wait until it was at least mostly cool before slicing. I should have left it longer, as it was a teeny bit gummy, but it was so incredibly, wonderfully good that I didn't care. I could have eaten the entire loaf right then and there. It's moist, sweet and chewy, and I must make it again! The honey is very much there and everything else contributes to the overall goodness. Overall, a lovely mistake!

Lazy Loafer's picture
Lazy Loafer

Okay, this was fun! Inspired by some of the suggestions on the 123 challenge (notably Mini Oven's question about using Coca Cola in bread), I decided to try something completely different. This is a 123 bread but, instead of using 100 grams of fresh 'sourdough' starter I made a poolish with 50 grams of root beer, 50 grams of bread flour and a pinch (1/16th tsp) of dry yeast. It looked and smelled nice. I used a 'natural' root beer without a lot of chemicals.

For the liquid portion of the formula I used 150 grams of water and another 50 grams of the root beer. The flour was 225 grams of bread flour and 75 grams of barley flour. Then I added 50 grams of chopped dried Bing cherries, 6 grams of salt and, because it was a poolish bread, another 1/8 tsp of dry yeast. The dough seemed a little stiff, but I wanted to keep with the 123 formula so I didn't add any liquid. I actually may have made a mistake in measuring (or maybe barley flour is really thirsty?). Anyway, it performed well and shaped into a nice boule.

I baked it in a pre-heated (to 500F) cast iron pot - 30 minutes with the lid on (reduced heat to 450F after about 5 minutes) and 20 minutes with the lid off at 425. I didn't want to burn it with the sugar that is in the root beer. I put it in seam-side up and also did a simple cross slashed across the fold lines.

And here it is! The crumb is a little tight, due to the stiffness of the dough, but still moist. The crust is very nice though a bit 'bold' on the bottom. And the taste of the root beer actually comes through!

If I make this again I think I might add some soaked or cooked malted flakes of some kind, and maybe a little bit of anise to complement the anise in the root beer.

Lazy Loafer's picture
Lazy Loafer

I issued myself a challenge (posted here in the Challenge forum) to see what kind of fun I could have with a simple 123 method sourdough. In other words, 1 part fresh starter, 2 parts water (or other liquid) and 3 parts flour. Also, a customer had asked me to create a 'sweet' version of my Three Friends Levain (Tom[ato], Olive and Rosemary) that she could have with peanut butter and jam. So, a double challenge!

My first version was bread flour and whole wheat flour, 100% hydration fresh levain, chopped Brazil nuts and dried figs, and a bit of cardamom. It turned out very nice, but still needed something. Oh, and just as an aside - I use Brazil nuts because they are about the most environmentally-sustainable tree nuts around. They grow best in an intact rain forest!

I had to try it with my home made nectarine jam, just to check! :)

Good, but still needed a couple of tweaks.

Today's version was much the same, but I toasted the chopped Brazil nuts and added a bit of honey and some poppy seeds.

Here's the formula:

Bread flour22575%
Whole Wheat flour7525%
Water20067%
Starter10033%
Honey207%
Salt62%
Chopped Brazil nuts3010%
Chopped dried figs5017%
Poppy seeds83%
Ground cardamom (1/2 tsp/loaf)00%
 714238%

The method was pretty basic:

  • Mix flours, water and levain and let sit for 30 minutes
  • Add salt and add-ins and mix [note, I mixed this in the big Univex mixer (Max) because I actually made six loaves today; you can mix and develop the dough in other ways]
  • Stretch and fold every 30 minutes over the next couple of hours, until the dough is strong, stretchy and springy
  • Leave in a cool basement to bulk ferment overnight [in the morning the dough had nearly tripled in volume and was beautiful - soft and jiggly but with a nice dome on it and still a lot of strength]
  • Bench, scale and pre-shape
  • Shape and let proof for about an hour
  • Load onto peels, then into hot stones (475F) with steam. After 5 minutes, turn heat down to 425F. Turn loaves after 15 minutes, then bake for another 15 to 20 minutes. Internal temperature around 205F

It looks a little rough at the pre-shape stage but was actually beautifully strong and springy.

You can see how nice and taut the shaped dough ended up.

Slashed and ready to load.

Very nice oven spring and burst, and a lovely colour on the crust.

The crumb is divine - very moist and chewy, and the flavour is now everything I was looking for.

So, over to you! See the 123 challenge on the Challenge forum for details... :)


Lazy Loafer's picture
Lazy Loafer

Having decided that I'm tired of trying to work with sloppy wet doughs, particularly in large batches, I've revised several of the recipes I use so that the overall dough hydration is in the range of 70% to 72%. This is my first experiment with the Harvest bread from FWSY, and it's a keeper!

I was making a batch of six loaves so I mixed it in the big mixer. That, and reducing the dough hydration, were really the only changes I made to the original recipe. Half the flour is pre-fermented in a poolish overnight. I used Rogers Silver Star bread flour and home milled whole wheat flour. The dough was mixed in Max (the big mixer) for about five minutes at around speed 1.5. It was then folded twice in the first hour and left to sit in a cool-ish basement kitchen for a total of 2.5 hours. It was silky, stretchy and strong, exactly as I wanted it to be.

Next, I scaled and pre-shaped it. It was pillowy and soft but still easy to handle.

When shaping, I gently popped some of the bigger bubbles but the dough was still standing strong, yet poofy and soft. After one hour proofing in floured napkins in the wireframe couche, it was onto the peels and scored for the oven (preheated granite stones to 500F).

Five minutes at 500F (with steam), 15 minutes at 425 then turn and another 15 minutes. Internal temperature was around 207F. Oven spring was ginormous - so much for the concept that higher hydration doughs have better oven spring. This was miles better than the pancakes I get from a 78% hydration dough sometimes.

Beautiful crust and ears...

And the crumb is dreamy - creamy, soft and with just the right amount of holes. This morning's melted cheese did drip through some of the larger holes, but there's still enough bread left around the holes to hold all kinds of toppings!

Next up - Overnight 40% Whole Wheat!


Lazy Loafer's picture
Lazy Loafer

Well, I nearly ruined a large bake (eleven loaves) of my best deli-style rye bread today, simply by following the recipe instead of my own smarts. I've baked this bread many times (I've got two customers who absolutely love it and order large batches fairly regularly).

The recipe is originally from Peter Reinhart's "Crust and Crumb". It takes a long time as there are three stages of starter, each one of which can be refrigerated overnight, so it takes some planning. The recipe recommends a shortish bulk ferment at room temperature, then shape and proof (three hours at room temperature, then overnight in the fridge, then an hour at room temperature before baking). I should listen to my own advice - based on my factors (room temp, flour, whatever) it never ends well when I do that.

Last time I made this bread it was lovely. That's because I bulk fermented overnight in the fridge, then shaped cold, proofed at room temp for a couple of hours and baked. The dough was a dream to handle and the finished loaves were beautiful

Yesterday / today I followed the recipe and did the room temperature bulk ferment, then shaped and proofed (2.5 hours at room temp, overnight in the fridge, then baked cold). The loaves were very overproofed and totally collapsed on the peels (I mean totally). There was a little bit of oven spring anyway and I'm hoping the customer is okay with skinny slices! Should still taste good, but here are the photos of today for comparison:

No more shaped overnight retarding for me! I'll stick with what works in my kitchen.

Lazy Loafer's picture
Lazy Loafer

Made another big batch of Rye Sourdough today (10 loaves for two customers), and it thankfully turned out quite lovely. However, I was so glad I've got enough bread baking under my belt to adjust as I went along, because there were a few things that needed extra attention this time!

One, the recipe comes from Peter Reinhart's "Crust and Crumb". I've used it many times before, but so far haven't gotten around to converting the recipe from cups and ounces to grams. There is a three stage starter build for this bread, spread out over three days, and the effort to figure out how much of each stage I had to make for 10 loaves made me realize that there is a bit of error that compounds over three builds to make a starter of a very different hydration than perhaps he meant in his original recipe. He assumes a cup of water weighs 8 oz., which is generally correct but multiplied by five makes quite a difference. Also, in the second build (the rye sponge) he says half a cup of the 'barm' sponge weighs 4 oz. which also isn't quite correct. I really need to re-calculate all the measurements into grams one of these days.

Second, I was a bit distracted with a lot of other things going on over those three days, so I inadvertently left the starter (the third stage firm starter) on the counter in the kitchen overnight instead of putting it in the fridge after it showed signs of life). Given we're having a bit of a heat wave here right now that probably made some kind of difference in both the 'sour' and the life of the starter. I did put it in the fridge the following morning once I discovered it.

Then I started making the final dough far too late in the day. According to the recipe you're supposed to mix the dough and let it proof for around 3 hours at room temperature, then shape it, let the shaped loaves proof for another 3 hours and then put it in the fridge overnight (in baskets). I finally got around to making the dough around 7:30 or so in the evening and wasn't about to sit around for 6 hours waiting for this to happen! That, combined with a very wet dough (from the compounded miscalculation of hydration in the starters no doubt) led me to let it rise in the big bucket for about 3 hours with a couple of stretch and folds over that time. I then just put the whole thing in the fridge and went to bed.

This morning I shaped the cold dough (so much easier to handle now!) and let it warm up in the couches for about an hour, then baked (pre-heated stones to 475F, steam, down to 450F for a total of about 35 minutes). And it's lovely. It was so much easier to shape and score cold, and still had a lot of push for a nice oven spring, burst and ears.

I think, from now on, the only time I'm going to proof shaped dough in the fridge overnight is when I proof it and bake it in pans and don't have to transfer it from baskets to peels to the oven, or to iron pots.

Lazy Loafer's picture
Lazy Loafer

It must be spring - I have garlic scapes in the garden! Of course, that inspired this week's test loaf - Roasted garlic scape and Asiago cheese levain. The scapes were chopped and roasted with a little EVOO for about 15 minutes in a covered dish at 400F. I baked demi-loaves (scaled around 400 grams) because this is a specialty bread, not an everyday kind of bread. Each loaf had about 2 Tbsp each of chopped, roasted scapes and shredded cheese. The recipe for the dough was my usual levain dough made with freshly made levain (so not very sour but very tasty!) and a bit of whole grain flour (in this case, whole spelt).

It over-proofed a little so I didn't get quite the oven spring I wanted. That was my fault - I forgot to turn on the oven! It takes a while to pre-heat with the granite stones in there. Oh well, it turned out fine in the end, with a chewy crust and moist, tender crumb. Very fragrant and tasty too!

I might just eat the whole thing... :)

Lazy Loafer's picture
Lazy Loafer

I'm blessed in that I have a husband who not only washes dishes, but also makes excellent beer and wine. A couple of days ago he was mopping up the 'warm' cupboard after his beer primary foamed over. I handed him a small bowl and spoon and asked him to skim some foam of the top of the beer for me - real barm!

After sitting for an hour or two the bowl of barm had subsided to a murky, foamy puddle of about 2 tablespoons in the bottom of the bowl. Then the adventure began...

I added some flour and water and mixed it up. I didn't measure, but it ended up about the consistency of a 100% hydration starter when you first mix it up. I then literally watched it rise!

After 10 minutes...

After 20 minutes...

After an hour and 45 minutes...

It filled the jar just before 2 hours. The dome collapsed slightly just after this.

I then stirred it down and took off 100 grams for a new build. This one had 100 grams of barm starter, 200 grams of water, 100 grams of bread flour, 50 grams of whole wheat and 50 grams of coarse rye flour. I then added water and bread flour to what was left in the jar and let that go again. It doubled after 2 hours and eventually filled the jar again.

Once the starters were risen and bubbly again I made dough with them. The white dough was 100% bread flour, 68% water, 29% barm starter (100% hydration) and 2% salt. The multigrain dough was 71% bread flour, 29% whole wheat flour, 68% water (note that I later added a bit of water), 29% multigrain barm starter (100% hydration) and 2% salt.

Beautiful silky dough! I did a few stretch & folds, then put the dough in the fridge overnight (and half the next day; I was busy making dough for the shop). When I had time I folded and shaped the dough into boules and into baskets to proof for a couple of hours. I had a certain time in mind to bake it (I was baking a bunch of different things) but when I poked it to make sure it was ready it poked back! This stuff is strong like ox and had a huge amount of push left! I had to bake it though, so onto peels, scored and into the oven. Five minutes at 475F, then about 20 minutes at 425. Finished temperature was about 204F inside. Fabulous oven spring!

I cut the multi-grain loaf today. I was very pleased at the crumb - fairly open and very moist.

And the great thing is - no sour! Basically this is just S. cerevisiae without the bacteria that make sourdough sour, so it makes a sort of 'sweet' starter. I'm interested to see how it keeps in the fridge, and whether it later develops any additional characteristics. Next time I will also cut down the percentage of starter to about 20% of the flour.

Next adventure - bread made with the sludge from the bottom of the beer primary!

Lazy Loafer's picture
Lazy Loafer

For some time now I've been baking an Ale & Yeast Poolish bread, originally from Richard Bertinet's "Crust". I make it with my husband's home-brewed light hoppy ale, and it is a customer favourite (and family & friends too). It's a delightful all-purpose bread, good for sandwiches, toast, with soup or cheese or whatever. And it is probably the best-behaved dough I've ever worked with. It seems infallible!

The only thing I wanted to improve was the fact that it's almost all unbleached bread flour with only about 6% whole wheat flour (just enough to put some little flecks in it). So yesterday I set out to tweak it a bit. I hate messing with a good thing but I'll still bake the Ale & Yeast, I just wanted to add a 'Dark' to the menu!

First thing I did was rejig the poolish pre-ferment. Instead of half 'n' half bread flour and light ale, I used a combination of bread flour and the bits sifted out of whole wheat flour, mixed with an equal amount of dark mild ale and about a scant 1/8 tsp active dry yeast for each loaf.

The dough flour was 69% bread flour, 25% sifted whole wheat flour and 6% barley flour. Water, the poolish, and a tiny bit more yeast, and into the mixer. Autolyse for 30 minutes, add the salt and mix until smooth and stretchy. I let it proof at room temperature for a couple of hours, stretching and folding halfway through. The dough was beautiful and formed a nice smooth ball.

The next morning it had risen nicely, so I scaled and pre-shaped it while I prepared the 'wireframe' couche (lined with floured napkins).

It's bubbling nicely! This dough is a joy to shape, really. So much easier than a high-hydration dough (it's about 67% hydration).

Into the couche to rise for a couple of hours:

After 2 hours, onto the peels, slashed and ready to go in the oven. It will be baked on granite stones preheated to 475F with steam. Five minutes at 475F, then down to 425F for 10 minutes, rearrange the loaves and bake for another 10 minutes. This bread bakes fairly quickly and is actually better if not overbaked. The interior is still over 205F after this 25 minute bake.

And here are the lovely loaves, fresh out of the oven.

This has a more delicate crust than a sourdough but still crispy. The crumb is wonderful - creamy, chewy, soft and with shiny holes. And the taste - well, this loaf will be gone really quickly! It's just good, honest bread, the way bread is supposed to taste.

I'm off to a pot luck dinner shortly. Guess what I'm taking! :)

Lazy Loafer's picture
Lazy Loafer

Once again, I'm experimenting with baking high hydration sourdoughs in loaf pans. This time I did the Country Blonde from FWSY. I did it mostly to make customers happy (some of whom, for some reason, find it difficult to cope with slicing a boule), but I also wanted to make it easier for me! It's not bad shaping and then transferring a very wet dough when you're doing one loaf at a time, but when I'm trying to cope with a large puddle of dough for 8 loaves, it's just too much trouble!

And this was a large puddle of dough. Tipping it out from Max's big mixing bowl onto the counter / work bench, it spread to the point where I almost had no more room to scale and shape the individual 'blobs'. It was also annoyingly sticky so I had to flour everything just to be able to cope. I loosely folded and rolled each piece, then plopped it into greased bread tins. After about 3.5 hours I managed to score the loaves (though still wet, soft and sticky) and put them in the oven (450F for a total of 45 minutes, with a spritz from a spray bottle at the start).

They actually turned out quite lovely. I kept one loaf for us and just had a piece with butter. The crust is definitely a lean bread crust - chewy and thicker than an enriched sandwich bread would be, and the crumb is really, really nice. Very pleasant flavour with a slight sour tang to it. I like this! :)

I had to flour the tops just so I could score them.

Nice burst and blistering; good colour.

Beautiful crumb, texture and aroma. This loaf is a little small - I kept this one for us because it scaled about 30 grams less than my normal market breads (due to the loss from all the wet dough that stuck to my hands and everything else!)

Pages

Subscribe to RSS - Lazy Loafer's blog