The Fresh Loaf

A Community of Amateur Bakers and Artisan Bread Enthusiasts.

Salome's blog

Salome's picture
Salome

I've actually never been much into white bread. I still like to bake it occasionally, to mix up my diet and to have new challenges in my baking, the breads I'm the most fond of though are definitely breads which include some whole grain, some seeds . . . which are overall somewhat nutritious. This is the kind of bread which I like the best as an everyday bread.

I think, the bread I'm about to introduce here, definitely falls into this category. It is a German Bread called the "Herbstsonne" (eng: autumn sun) because of its tipical scoring. I had again some problems with the bread's height, I made a very wet dough (therefore I adjusted the amount of water in the recipe below) and wasn't able to shape it well. I let it proof well, so when I scored it it deflated to much after my taste and didn't get an extraordinary oven spring. Next time, I'd probably bake it as it is or just score a cross in the middle.

Herbstsonne


liquid levain

30 g mature culture

165 g rye flour (I used a medium rye, something inbetween white and whole grain rye)

165 g water

soaker

33 g oats

33 g sunflower seeds

23 g flaxseeds

90 g water

10 g salt


final dough

all but 30 grams of the liquid levain

all of the soaker

166 g rye flour

66 g whole-grain rye flour

80 g water (adjust amount as required)

flaxseeds and oats

  1. 1. mix the ingredients for the liquid levain, set aside until it's ripe
  2. at the same time, mix the ingredients for the soaker, put in the fridge
  3. Mix the soaker, the liquid levain and the remaining flour and water together, knead in a mixer three minutes on low speed, then three minutes on somewhat higher speed.
  4. let the dough rest for 30 minutes.
  5. shape into a round boule (it's sticky!), if required, wet the dough a little bit so that the flaxseeds and oats can "glue" to the boule (roll the boule in the flaxseeds/oats mixture). Put the boule into a floured proofing basket.
  6. let the dough proof - I retarded it in the fridge: I kept it in the fridge for about twelve hours, and let it finish proofing at air temperature for about another two hours. I poked the dough and it reacted slowly.
  7. I dropped the dough gently on a baking sheet and scored it like a sun. (What I wouldn't do the next time, because it deflated the dough to much in my opinion.)
  8. Baking: 20 min at 230°C, another 25 minutes at 210°C, then I turned the oven off, opened the door and let the bread in there for another 10 minutes.
  9. Let cool overnight.

There's a lot of flavor in this bread! It's very moist, of course it's not airy like a white bread, but that's not what I was looking for anyway. I remember that it had a very good keeping quality the last time I baked it, which isn't surprising because of the soaker.


I used some slices for a sandwich today, which I stuffed with lettuce and a home made cottage-cheese-dried-tomato-spread. Yumm! (the spread is very easy. Take some spoonfulls of cottage cheese, cut some tomatoes (the kind in the oil) into pieces, add some salt and pepper, some basil if you've got it on hand, and a tiny bit of honey and mix it briefly. tadaa!)

Salome

Salome's picture
Salome

Of course I had a look at this week's yeastspotting. And there I spotted this: Barley-Flatbread by Dan Lepard. It looks gorgeous, doesn't it? I've ever since I lived in Sweden for a year been fond of flatbreads, crackers, crispbread. There, crispbread or as they say, "Knäckebröd", is a staple food. They've got an endless variety and have it with every meal. Here in Switzerland flatbread exists as well, but only in a limited choice. I prefer to bake my own, so I decided that it's time again. I didn't follow Dan Lepard's formula though, I made up my own! I am very pleased with the outcome. I wanted that the oat-flavor really comes out, and I achieved this goal. I love the mildness of these crackers! They turned out wonderfully crisp and light. I'm sure that they won't last long, the next time I'll make double the recipe. (I always work with small amounts when I'm experimenting because I hate to throw things out.)

It's actually pretty easy. I think if you haven't got a grain mill at home or you can't get your hands on whole-grain oat flour, you could probably blend some oats so that it resembles flour somewhat. I used very coarse flour as well, so I'd say that should work. No guarantee though, I haven't tried it myself!

Whole-grain Oat Crackers

liquid levain 15 g mature starter 60 g coarsely ground oat 60 g water soaker 75 g coarsely ground oat 10 g whole-grain rye flour 75 g milk (I used skimmed milk) 4 g salt final dough all of the soaker all of the liquid levain 50 g of whole-wheat flour oats to sprinkle

  1. mix the ingredients for the liquid levain the evening before you bake.
  2. combine the ingredients for the soaker at the same time
  3. the next morning, mix the soaker and the liquid levain with the whole wheat flour and knead for about five minutes. Don't expect any gluten to form, it will remain a rather "grainy" ball. The dough is not sticky or tacky.
  4. put the dough into a small bowl, transfer it into a plastic bag. Let it rest for about half an hour in a warm environment. (In my case the microwave with the light on and the door somewhat open.)

  5. roll the doughevenly to around 3 mm thick. brush sparingly with water, sprinkle with oats and roll again, to around 2 mm thick. I used my old pasta dough machine for that.
  6. Place the dough on a baking sheet with a parchement paper. cut into rectangles as desired, let it proof uncovered for one hour.

  7. bake one baking sheet in turn in 230°C for about 12 minutes, or until the edges are brown. Turn the rectangles upside down after a couple minutes.
  8. let cool on a rack and store in an airtight box when they've cooled down.

Salome

Salome's picture
Salome

I could withstand the Leader's "Alpine Baguettes" and decided to give Hamelman's "5-grain levain" a try. I thought that there can't be anything wrong with a bread that Hamelman himself describes as "one of the most delectable breads".

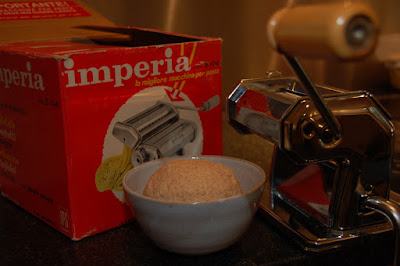
It's made of whole-wheat flour, bread and high gluten flour, and it includes a soaker (sunflower seeds, flaxseeds, chopped rye and oats.) In my case it includes as well some sesame seeds as I was running low on sunflower seeds and had to substitute some of them trough sesame. The fermentation process is speeded up by a little addition of yeast. I can't get high-gluten flour here in Switzerland, therefore I added 12 grams of Vital Wheat Gluten to the flour.

While I was letting the dough ferment for the first time, I was thinking about how I should shape this batch of bread. I felt a little bit bored by my "standard shape", the round loaf baked in the iron pot. I remembered the special Couronne shaping that I discovered a long time ago on wildyeastblog.com and that I had on my to-do-list for a long time. So I gave it a try. Thank you Susan, You're a great inspiration to me and your directions are clear and easy to follow, thanks for that!

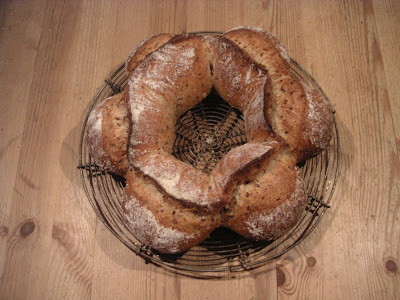
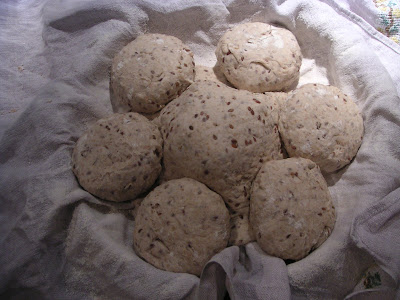
Well, my Couronne doesn't exactly look as perfect as Susan's. It's a little bit out of shape because my "proofing banneton" was probably a little to big, so the balls didn't form a tight unit and moved around when I slided them into the oven.

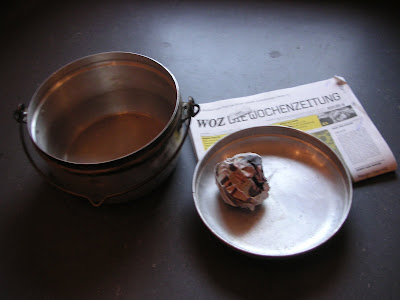
That's the way I constructed my "banneton", inspired by Susan's description. I used the lid of my scouting cooking pot and a newspaper-ball. (I'm sorry for the bad image quality, all the good cameras are out today and I had to use my old camera, bought in 2002.) I covered this "banneton" with a well floured towel to prevent dough from sticking.

I had about 1.1 kg of dough alltogether, so I used 750 grams as recommended for the Couronne and made a small boule out of the rest.

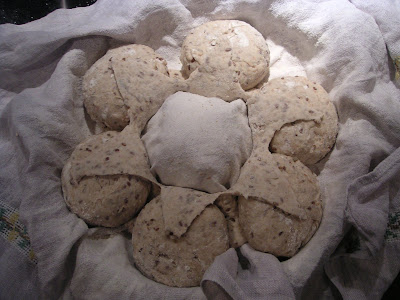
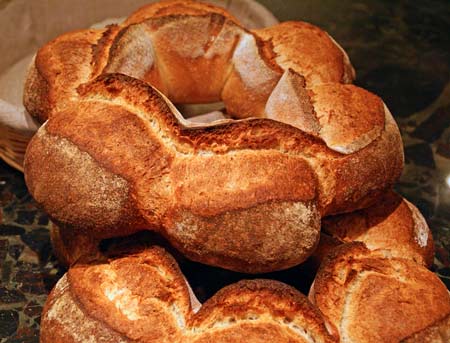
To shape a couronne like the one above, divide the 750 grams of dough into six pieces of 100 and one piece of 150 grams. Shape the pieces into balls and let them rest for about 10 minutes. Roll the 150 gram - ball into a flat disk, about 15 cm wide. Place it over the newspaper ball, then arrange the other six balls seamside up around it. Then you have to cut a "star" into the flat doughpiece in the mittle with a sharp knife (look below or read Susan's instructions) and fold the "star-edges" over the balls.

Then let it proof as usual (cover it with a towel while proofing) and bake as you'd bake your recipe normally, maybe slightly shorter, because this shape is not as compact as a normal boule or batard.

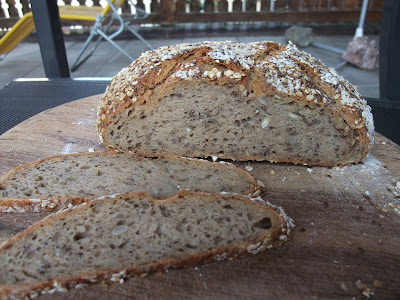
I just tried two slices of the small boule - I planned on giving the couronne away, but now the person who was supposed to receive it isn't at home, therefore I put it into the freeze and I'll have it another time when more people are around. Right now, I'm not able to eat 750 grams of bread on my ownin a reasonable time. (as I said, everybody's gone, like the cameras . . .) I'm better off with 300 grams . . .

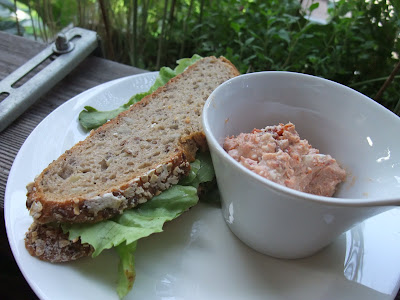
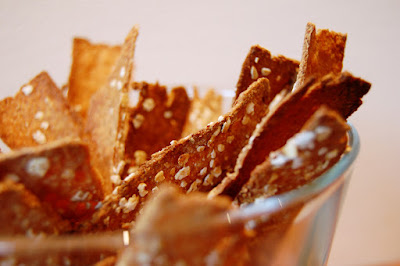
The flavor of the 5-grain levain is very good, as far as I can say right now. The bread is still somewhat warm. Nearly every bread tastes great while it's still warm. But I'm optimistic that the bread will taste great tomorrow for breakfast, as well.

I'm planning on baking this one again. Not only because it seems to be a tasty bread, but because I've got the feeling that I could simply do better. It was a hot day today, so the fermenting and proofing was difficult to get right, especially because the dough turned out to warm as well.

I'm sure that I'll shape Couronnes again. But then I'll probably scale the "banneton" a little bit down. The newspaperball more like 9 and the "pot lid" around 23 cm in diameter.

Pages

Subscribe to RSS - Salome's blog