The Fresh Loaf

A Community of Amateur Bakers and Artisan Bread Enthusiasts.

seasidejess's blog

seasidejess's picture
seasidejess

Today I started an experiment to see if I can make a wheat-based (or mixed wheat and rye) version of Concentrated Lactic Acid Sourdough (CLAS). I wanted to see if I could get the flavor and acidification benefits of the CLAS without using as much rye flour in the mix.

My reasoning is that rye makes the dough more difficult to handle, and the 100% whole wheat breads I make are already quite challenging for me. Another way to say it is I wanted to be able to add more CLAS without adding (as much) more rye.

Also, I just thought it would be interesting to see if it works.

If anyone is interested I can post my procedure for following the method that Andrey (AKA) Rus Brot published for starting a CLAS from scratch. Or you can just take a look at his blog here: https://brotgost.blogspot.com/p/clas.html

My impression is that if you have access to organic whole-grain rye flour and a way to tightly regulate the fermentation temperature, your odds of success are very high. I found it to be straightforward.

Once you have an established CLAS ferment/starter, you can add it to bread. Like any starter it is kept alive by refreshment, that is by removing some of the ferment and adding new flour and water. Note that CLAS is maintained at 190% hydration.

The standard formula for 90% CLAS refreshment is:

  • 33g CLAS
  • 190 ml Water @ 113°F (45C) (65% of 290)
  • 100g organic whole grain rye flour (35% of 290)

This 1:9 refreshment is the smallest amount of CLAS to new feedstock that Andrey recommends.

The water, flour, and CLAS starter are mixed thoroughly, placed in a loosely lidded container, and held at lactobacillus fermentation temperature (105°F ± 35°F) for 12 hours. I use an Instant Pot on Yogt setting.

For this experiment I used a 75% (1:3)  refreshment:

  • 110 grams CLAS
  • 214 grams H2O
  • 116 grams flour

I made two batches. One with coarsely ground rye flour (the regular/control batch) and one with coarsely ground hard red winter wheat (the experimental batch.) I put them into wide-mouth 1-pint mason jars, loosely lidded, and placed them both into the Instant Pot on Yogt setting for a 12 hour ferment. tomorrow I'll check them out and see if the wheat one gets as sour as the rye, and how the flavors compare. My established rye CLAS ferment smells and tastes clean, fresh and tart. It is similar to a sour apple flavor with emphasis on the sour rather than the apple.

seasidejess's picture
seasidejess

So, DanAyo suggested that I pick one bread to bake again and again as a way to build my skill at baking with 100% freshly-milled while wheat flour.

I'm using a variation on the Laurel's Kitchen Bread book 'Loaf for Learning.' The difference are that I'm using spelt and khorasan wheat, and adding a tablespoon of Russian rye sour CLAS for added flavor and a little acidity in the dough. I'm using these wheats because I suspect that there's something wrong with the hard red winter wheat I've been getting. Today was my first bake of this bread. Here is the recipe:

Note: This is the Basic WW, page 80 in Laurel's Kitchen, using the hydration from Breadtopia Spelt/Kamut sourdough recipe plus CLAS for flavor.
(Total 68% hydration not counting the CLAS.)

Dry Ingredients
387 g kamut (43%)
513 g spelt (57%)
(900 grams total flour)
7 g  (2 tsp) instant dry yeast
14 g (2 1/2 tsp) salt
-Whisk dry ingredients together

Wet Ingredients
612 g warm water
2 tbs honey
2 tbs EVOO
40 g (2 tbs) CLAS
-Whisk wet ingredients together

Final Dough
Make a well in the center of the dry ingredients. Pour wet ingredients in. Mix. Let stand for 10 minutes, then adjust hydration if needed. The dough should be soft and very sticky, but have some body: not be wet and gooey like a batter.  

Kneading:
Knead by hand, about 20 minutes, using the method in the Laurel's Kitchen book.

The dough should remain soft and become elastic and smooth. Towards the end of kneading it should be lustrous, supple and elastic. The color will be pearly, with darker bran flecks. It should display windowpane after a 10 minute bench rest.

1st Bulk Fermentation:
Form the dough into a smooth round ball and put it into a big clean bowl to rise. Do not oil the bowl. Protect the dough from drying out by placing a platter or plastic sheet over the top of the bowl.

* COLD BULK: place dough in refrigerator overnight.
* WARM BULK: Keep it in a warm, draft-free place to rise. At about 80 degrees this will take about 1 1/2 to 2 hours, at 70 degrees, about 2 1/2 hours.
Wet your finger and poke it gently into the dough, about 1/2 inch. If the hole does not fill, the dough is ready. For best results, do not wait until the dough sighs deeply when poked.

2nd Bulk Fermentation:
Leaving the dough in the bowl, gently press out all the accumulated gas. Tuck the sides under to make the dough into a smooth round again, and cover for the second rise. The second rise will take about 1/2 as long as the first. Use the finger-poke rest again to test the second rise.

Shaping, Panning, and Final Fermentation:
Turn the dough out onto a lightly floured surface. The best way to remove it from the bowl is by gently pressing a rubber spatula around the edges, and turning the bowl over. Cut the dough in half using a bench knife.  Keeping the smooth top surface carefully unbroken, deflate the dough by pressing it with wet or floury hands or a rolling pin from side to side, expelling the accumulated gas. Form each deflated dough half into a smooth round ball. Let the balls rest, covered, for about ten minutes.

Shape dough into loaves, place into two greased 8 x 4 loaf pans. Preheat oven to 425 F. Place panned loaves, covered, in a warm draft-free location for the final rise.

After 30 to 45 minutes, the dough should touch all sides of the pan and arch over the top. The dough will be spongy but not soggy and a gentle indentation from your wet finger will fill-in slowly.

Baking:
Place pans in the hot over. After 10 minutes, reduce the heat to 325 F. Bake for 45 minutes to an hour, until the bread registers 195 to 200 F.

The loaves should leave the pans easily and be an even golden-brown, with no pinkish areas. If you thump the bottoms with your fingertips they should sound hollow.

seasidejess's picture
seasidejess

Here is my latest attempt at the Laurel's Kitchen porridge bread. This one used 1/3 Kamut khorasan, for extensibility; 2/3 hard red winter, for strength.

All the flour was freshly milled on the finest Mockmill setting. I used a relatively coarse (kitchen strainer) screen to sift the big bran and added it to the porridge. The oats were run through my mill on the widest setting that would still grab them and beat them up a little. I used my ultrafine Chinese soup-skimmer strainer to sift off the finest, most powdery portion of the milled oats to add to my catch-all tub of 'white' flour and used the rest in the porridge.

I did a 1.5 x recipe which used 240g of dry oat and 1,125 g flour. Half was given a single bulk proof, then shaped into buns, proofed, brushed with milk, sprinkled with sesame seeds before baking. They took 15 minutes at 400 F and were soft and delicious, although kind of enormous.

The other half of the dough was bulk proofed twice, then shaped as a batard and put into an improvised (cloth lined basket) banneton to final proof.There the bottom seam opened up and I messed about with it and pinched it back together, which ended up tightening the crumb on the bottom of the loaf.

I turned it out on a cookie sheet, scored it, and put it in the oven on top of a pizza stone at 450 F with a towel-filled steamer. At 20 minutes I removed the cookie sheet and steam pan. I took it out after another 30 minutes.

In retrospect 450 was too high a heat for this moist, honey-enriched dough. By the time the internal temp hit 208, the crust was overbaked and got a little scorched on the bottom at the ends.

The crumb is fine, even, soft, moist, and very pleasing. This is a really nice everyday bread for toast and sandwiches. It's also good sliced thin, toasted until crisp, and dipped in coffee.

Mandatory crumb shot:

seasidejess's picture
seasidejess

This was my first attempt to make a bread that uses a straightforward single dough, rather than the biga-plus-soaker method in the Peter Rinehart ww book. I was inspired to make this bread after reading so many posts here on TFL about this book, especially txfarmer's posts. I wanted to learn about proper, full gluten development in a 100% ww dough.

This bread was a great learning experience for me. I did finally achieve a true windowpane. And the way that, in turn, affected the dough handling, and the way it held on to the gas bubbles, was totally eye opening. 

I learned that I need to be much more thorough in my degassing for this style of bread. I also learned I need to be more careful not to get excess flour on the dough when I'm degassing and shaping. There is a jelly-roll spiral of dry flour in the loaf.

Altogether I'm very happy with this bake and what I learned from it. (It tastes good, too!)

seasidejess's picture
seasidejess

 Khorasan Chia 100% WW

Hi Friends!

After a yeasted bread baking hiatus, I've been trying again to learn to make bread with 100% home milled whole wheat. It's going a bit better this time. I'm using Peter Reinhart's "Whole Grain Breads" with enough resulting success to keep baking. It helps that I'm currently feeding a household of two adults and three 18-year-olds on a tight budget! Past me was kind enough to purchase lots of nifty tools, like a grain mill, a pizza stone, a Dutch oven, etc etc, so I can make bread for the price of the grain in my local bulk bins (pretty darn cheap.)

Here is a picture of 50% hard red winter, 50% Kamut brand khorasan wheat, with chia seeds added.

This is PR's recipe for whole wheat focaccia, with two modifications: chia seeds added, hydrated separately as how Janet described in her chia sourdough post; sifted-out bran,  hydrated with boiling water before cooling and returning to the dough. 

The khorasan makes the dough very strechy. I was expecting a more open crumb but probably over-handled the dough making the boule and degassed it. Nonetheless I was very happy with the crust, crumb, and flavor.

I have also subsequently used this same dough to make two long loaves, more like ciabatta style, which came out (slightly) more open, with an extraordinary sweetness to the smell of the crust. I have no idea why. 

seasidejess's picture
seasidejess

Hi everyone. Before I say anything else in my inaugural blog entry I want to thank everyone who has contributed to the forums and made blog posts on this site. It's been very helpful. I especially want to thank the folks who have been candid about the difficulty of working with 100% whole wheat flour.

I took up bread baking for two reasons. First, I'm not supposed to eat refined flour or sugar any more and I don't really care for the 100% whole wheat bread without sweeteners at the store. Second, things have been stressful with my twin teen boys, and baking is really helping me: it gives me something to think about and engage my mind that isn't stressful. 

I started baking with purchased sprouted flours and using Peter Reinhart's Bread Revolution book. However, these flours are not economical, and I also wanted to be able to do an overnight retard in the fridge and with these flours that seemed to cause over-proofing. So I bought a grain mill, the Mockmill 100!

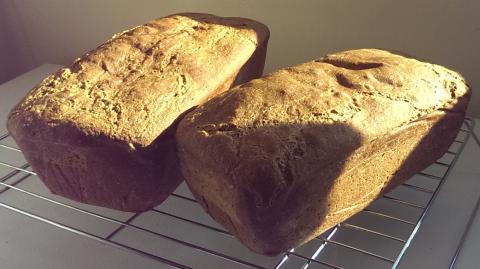
This is my first bake with fresh-milled flour from the new mill. Ironically, it also overproofed in the fridge overnight. But I think they will still taste good. 

I looked long and hard for a simple, non-dairy, no sugar, 100% whole wheat loaf that uses an overnight refrigerated fermentation. I haven't found that recipe but this one comes close, even though it has sugar added. It is from Moontripper's comment at the end of this thread:

http://www.thefreshloaf.com/node/3686/want-100-ww-yeasted-sandwich-loaf 

The rest of this post is Moontripper's slightly edited words, interspersed with my comments in italics.

----------------------------

It's a yeasted bread, 100% whole wheat, using long fermentation, no kneading, just stretch and fold.

840 g WW flour, 630 g water (Too dry w/freshly-ground whole wheat. I added more to make 100% hydration. Dough very wet, but firms up with stretch and folds. Next time could try 750 grams total water for an 89% hydration?)
2 Tbsp instant yeast, (Used active, not instant, and it was PLENTY)
14 g salt,
2.5 Tbsp oil,
1/4 cup muscovado sugar
  1. Mix the flour with 580 g (700?) of the water and leave it to autolyse for half an hour.
  2. Whisk the yeast in the remaining 50 grams water in a separate bowl, and mix into the dough. Let rest for another half hour.
  3. Add all remaining ingredients to the flour mixture and mix together. 
  4. Cover and refrigerate.
  5. Stretch and Fold twice at 1 hour intervals (dough is very wet and sticky) and place back to the fridge each time. Leave overnight.(Came out of the fridge overproofed after 18 hours. Need to either divide the dough after the 2nd stretch and fold or put it in a wide, flat tub to chill it faster so it won't overproof in the fridge.)
  6. Next morning do another stretch and fold, then put back into fridge. 
    (Skipped this step because of already overproofing. Instead, I did a final stretch and fold and went straight to preshaping to try to make sure the yeast got some new food.)
  7. At around 3 pm (about 18 hours from start of bulk ferment) take out the dough, divide, preshape, rest.
    (I'm giving it 40 minutes bench rest to allow it to come to room temp and hopefully also to do a bit of final bulk fermentation.)
  8. Shape and final rise in 2 bread pans, about 50 minutes. 
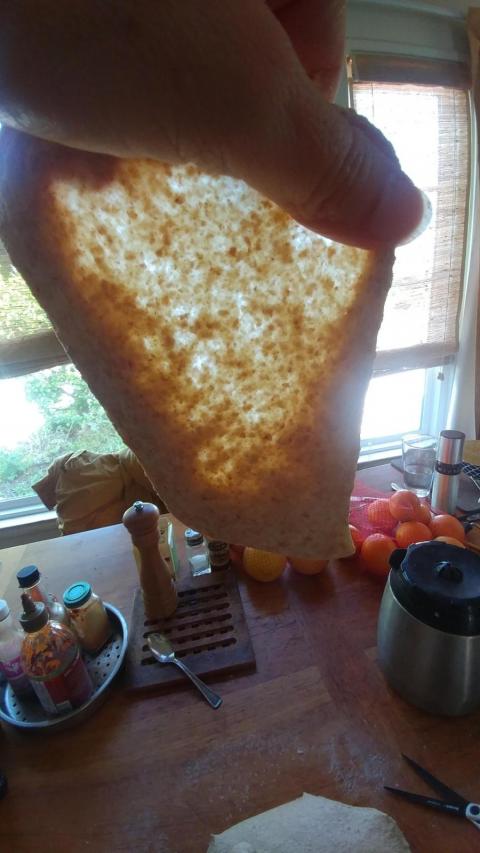
    Used the 'medium' pans and they were much too small! Use the larger loaf pans next time, or one medium and the covered 13-inch pullman pan.
  9. Spritz and slash loaves. Put into a COLD oven set to 325-350. Total bake time 40 minutes.

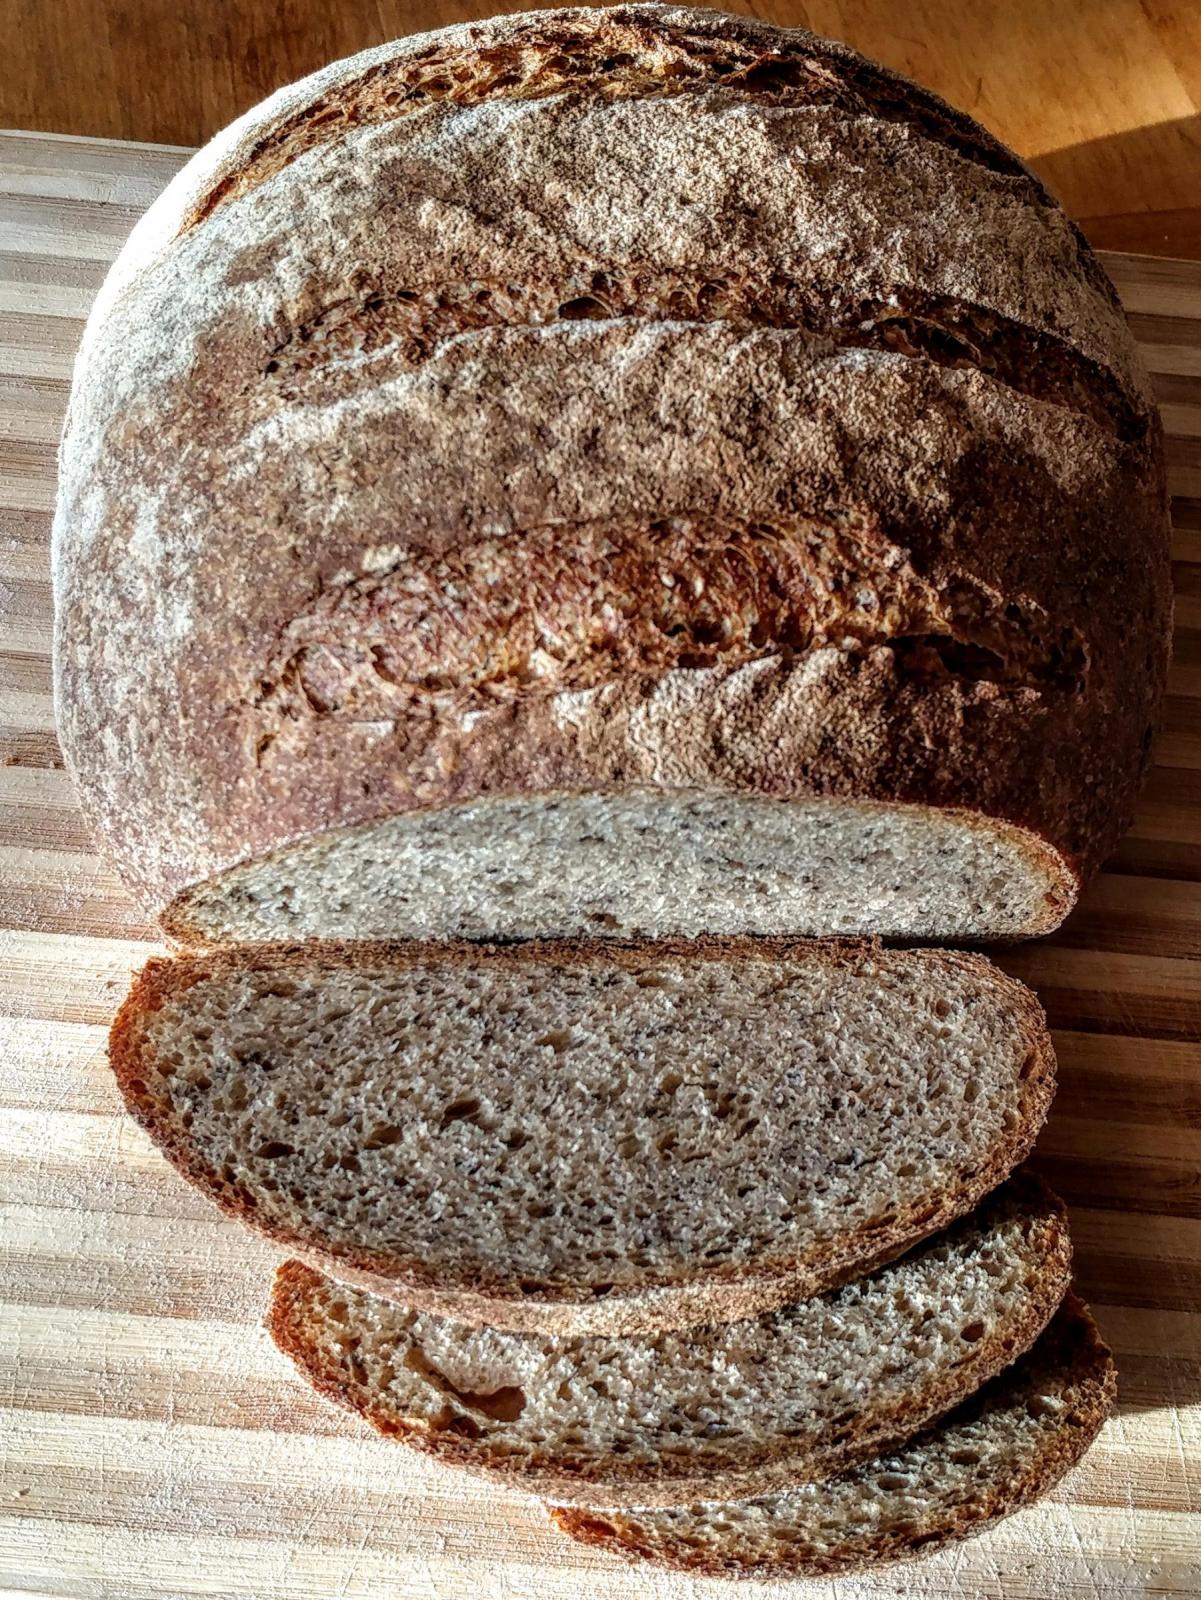
So, the loaves had a little bit of oven spring, but not much. We'll see when I cut into them tomorrow how the crumb is, but I'm kind of expecting dense and gummy. 

Pages

Subscribe to RSS - seasidejess's blog