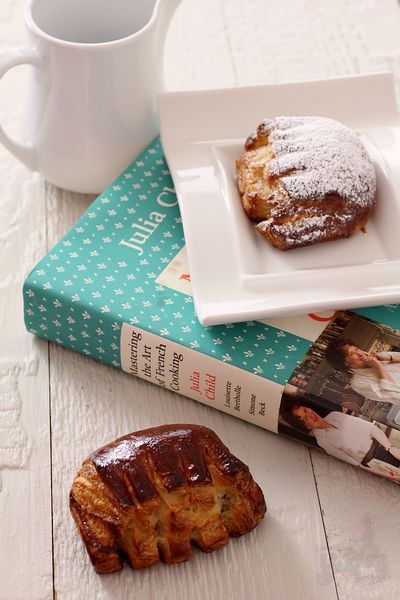
Sending this to Yeastspotting.
Click here for my blog index.

This is the theme for this month's Daring Bakers' Challenge. One look at the original recipe (see here), I knew it wouldn't produce the croissants I want. Don't get me wrong, I worship Julia Child, but I think she made some compromises here so that it's less daunting for the home bakers, however, the quality suffers as the result. All the changes I made were based on the lessons I learned over the last few months of croissant marathon, you may find that they correspond closely to the tips I gave in this original croissant post.
1. Reduced the water amount by A LOT
2. Reduced the oil amount by A LOT. The original recipe yields incredibly wet doughs, while it's easier to roll out, it affects crumb negatively. The first 2 changes mean to make the dough drier, and crumb more crisp. Note that this recipe uses oil rather than butter in the dough, which makes the dough more extensible(i.e. easier to roll out). It would make the dough stronger if I replace it with butter, but I kept oil to stay somewhat true to the original recipe - I can get the dough strength in other ways.
3. Reduced salt. The original recipe yields VERY salty croissants.
4. The original recipe soften the roll-in butter then "smear" it onto the rolled out dough. It may see easier than making a butter block then enclose it, but softened butter is warmer butter, which means it's easier to melt, a big NO NO if you want clear flaky layers. In addition, smearing doesn't produce even butter layers either. I still used my usual method to enclose butter: make a butter block, fridge, enclose into dough. (picture below with recipe)
5. Used bread flour rather than AP flour.
6. Kneaded the dough much longer than what the recipe required. Both 5 and 6 aim to increase dough strength. Stronger dough rises higher during baking, creating clear layers and open honeycomb crumb. Yes, stronger dough is also harder to roll out, but it's worthwhile.
7. The original recipes requires 4 bookfolds, which IMO, is way too much for such small croissants (much smaller than the standard size I made before). More folds == more layers, good in theory, easy to have leaky butter in practice. Even if the butter doesn't leak, more layers in such a small roll would just make the crumb less "open". I only made 3 bookfolds as usual.
8. The original recipe doesn't produce a lot of dough, yet still makes 12 croissants, so each one is tiny-mini. On top of that, the shaping process has unusal sizes (bottom and sides are of the same length for each triangle, which means each croissant is very long, but doesn't have a lot of layers), and too much stretching (easy to melt the butter). I changed the sizes to make 8 croissants (still much smaller than standard size, but at least each croissant is rolled up enough times to create a layered crumb).
9. Extended proofing time from 1.5 hr to 3.5 hr. Croissants MUST be fully proofed for a good crumb.
Note: this recipe requires a builk rise , which is different from all the other croissant recipes I tried before. Bulk rise made the dough extra strong - again, harder to roll out, but crumb is better.
Croissants (majorly adapted from Julia Child)
Note: Makes 8 small croissants
Note: for details and tips, please see this post
Note: for more tips on making croissants in warm weather, see here
Bread Flour, 228g
Milk, 120g
Water, 13g
Sugar, 14g
Salt, 5g
Instant Yeast, 2.7g (a scant tsp)
Oil, 15g
Roll-in Butter, 125g
1. Mix everything together but the roll-in butter. Knead @ low speed for 3min, @medium speed for 7min, the dough should be very smooth, relatively strong, a relatively weak windowpane.
2. Bulk rise at room temp (24C) for 3 hours until doubled, mine even tripled. Knead to get rid of air, press flat, put in fridge for 2 hours or overnight.
3. Tap roll-in butter between two sheet s of plastic, roll into 5inch square. Put in fridge for at least one hour.
4. Roll out dough into 7inch square, enclose butter block as following, seal well

5. Roll out to 6X14inch rectangle, do first bookfold along the longer side. Don't forget to trim the edges.
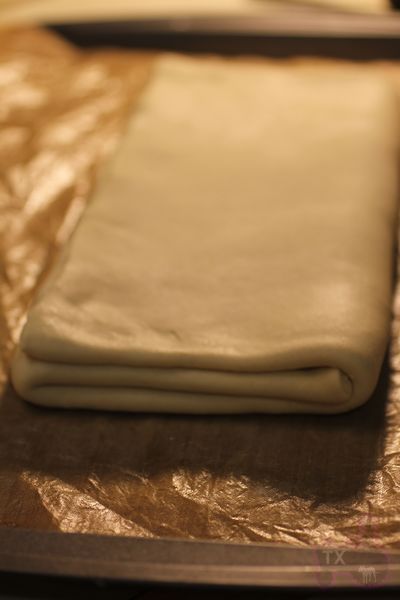
6. Put in fridge and rest for 1 hour. Take out dough and repeat the rolling and folding 2 mroe times, which gives 3 folds in total.
7. Put in fridge and rest for at least 120min.Roll out to 8X16inch, 1/8inch thickness. You may need to rest the dough in fridge several times.
8a. For classic croissants: cut into 4 rectangles, each 8X4inch. Then cut each rectangle diagonally into 2 triangles. Trim edges, stretch lightly into skinny long triangles.
8b. For Bear claws, cut into 5X3inch rectangles.
9a. For classic croissants: roll up fairly tight, stretch out the tip with one hand when you roll the bottom with the other hand. Since they are smaller, you won't get as many layers as the standard ones
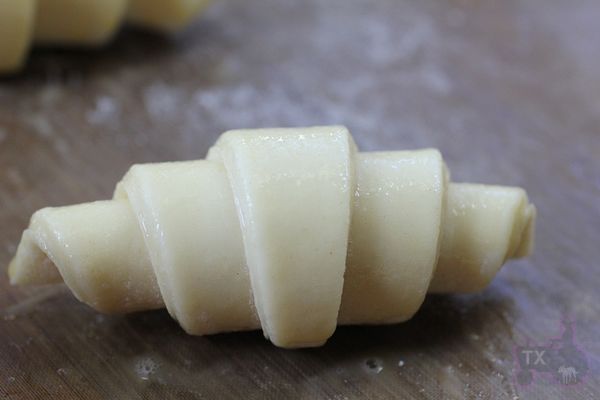
9b. For bear claws, put a TBSP of almond filling on the dough, fold in half along the longer side. Seal, and make 4 cuts for the "claw" effect.
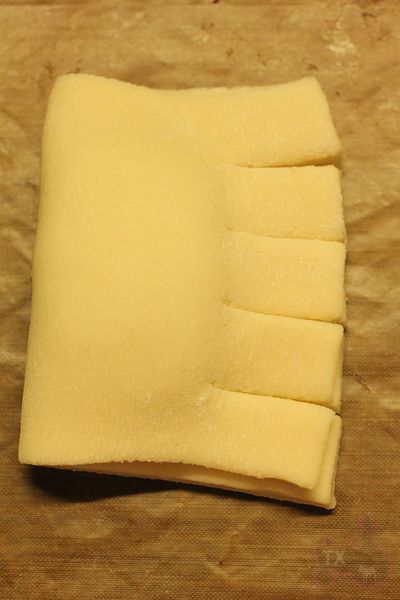
10. At this point, you can proof right away, fridge overnight and proof next day, or freeze (defrost overnight in fridge before proofing). Brush with egg wash (1 egg beaten with 1 TBSP of water), then proof @ about 80F until very soft and jiggly. About 3.5 hours for me. Brush another layer of egg wash after proofing.
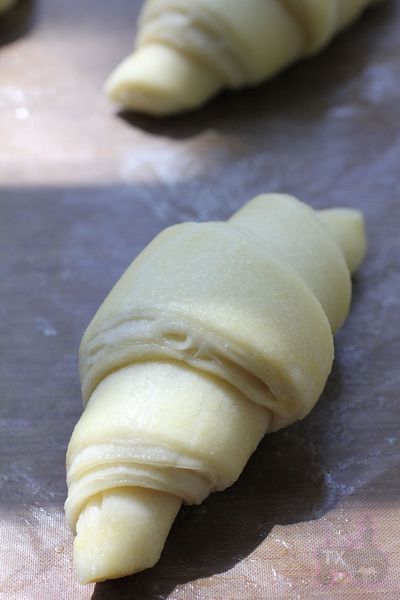
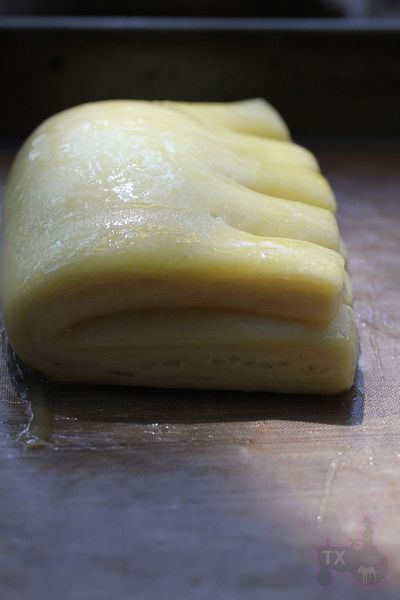
12. Bake at 425F for 10min, 375 for 15min.

The very round cross section indicates enough dough strength. The crumb is open with a clear honeycomb effect.
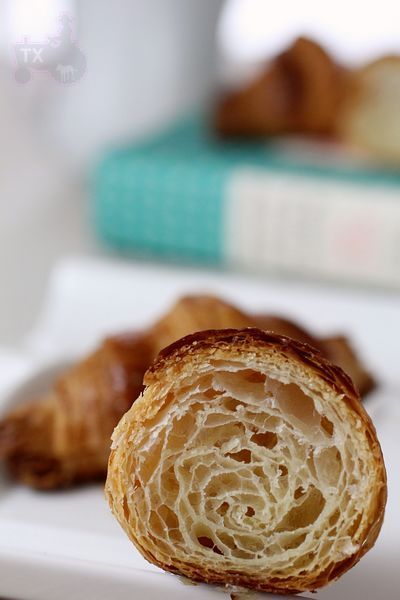
I am fairly happy with the crumb, but there's always room for improvement. The smaller rolls has less layers than standard ones, which means the crumb has less "holes".
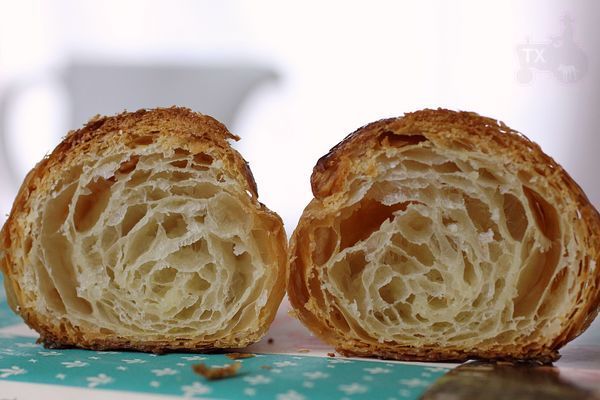
The bear claws came out pretty well, with or without powder sugar. And I used the leftover dough from bear claws for some mini chocolate croissants.

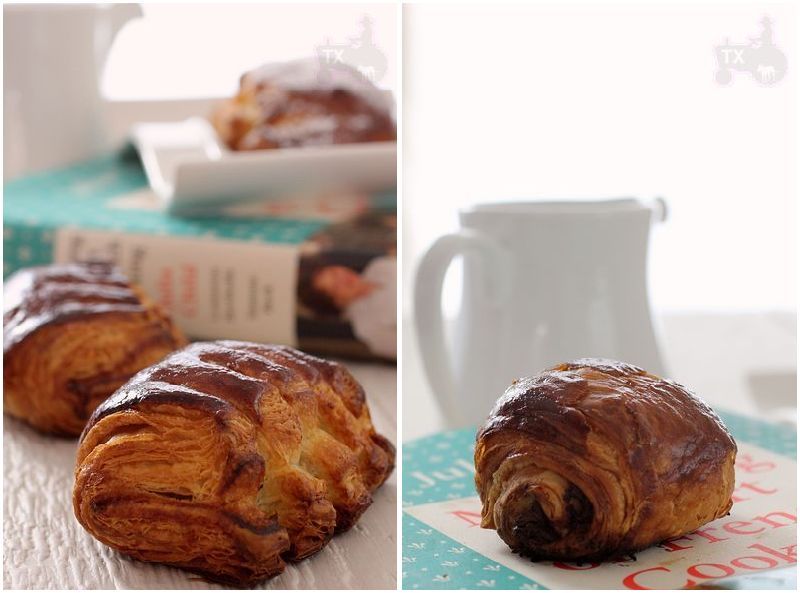
Bear claws and chocolate croissants were rolled up in less turns than croissants during shaping, so the layers are very clear and very flaky - easier to make than the standard ones IMO.
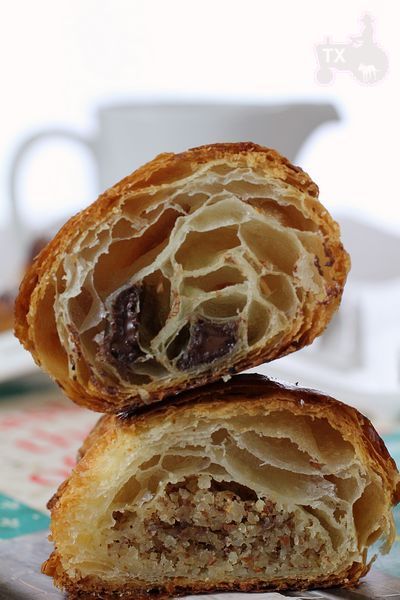
With some major overhaul, this recipe produces very good results.
