The Fresh Loaf

A Community of Amateur Bakers and Artisan Bread Enthusiasts.

Most bookmarked

Rosalie's picture
Rosalie

Pancakes and Waffles: What's the Difference?

I like to make pancakes.  I used to have a (cheap) waffle iron, but it bit the dust.  I never replaced it, thinking it was too specialized and not necessary.

Although pancake and waffle batters are very similar, each recipe is specifically "pancakes" or "waffles".  But what makes this a pancake recipe and that a waffle recipe?

I found a thread online - Cooking Light forum November 2002 - that discussed this.  A couple people thought that waffle recipes are oilier to keep them from sticking to the iron; but that with modern non-stick surfaces that difference was becoming moot.

So what do you erudite breadmakers think?  Is that the only difference?  Can I take a "waffle" recipe and use it for pancakes, maybe just cutting back a bit on oil?  I'm tired of passing up waffle recipes because I don't have that appliance.

Rosalie

rainbowbrown's picture
rainbowbrown

Pain à l'Ancienne

Pain à l'AnciennePain à l'Ancienne


The other day I made the Pain à l'Ancienne from Reinhart's BBA. I can't even believe the flavor this bread had. Really, I was thoroughly taken aback. I feel like I can't even talk about it...but it was...yeah...it was...

I know many of you have this book and if you haven't yet, try this recipe. Really. Try it. It was a very simple recipe. Do it. Now.

and have fun.

mcs's picture
mcs

sticky bun - video

Hey there, In the spirit of JMonkey who has nudged the fresh loaf in a sticky bun direction, I'm putting up video #4, "Sticky Buns". It's more of a recipe specific type of video, not really a tutorial, and without commentary. It's a little different than the others, but maybe you'll find it inspirational enough to make some. Hope you like it.

-Mark
http://TheBackHomeBakery.com


foolishpoolish's picture
foolishpoolish

Anpan

Anpan 1


Anko paste (easily enough for 8 to 10 Anpan)

1 cup Azuki (aka Adzuki, Aduki) beans
100g Caster Sugar (adjust to taste)
4 cups Water (enough to cover the beans and then some)
  • Rinse the beans thoroughly. 
  • Cover the beans with water in a saucepan and bring up to a simmer.  
  • Cover with a lid and continue to cook at a gentle simmer until the beans are very tender (about 1hour)  If needed, add more water during cooking to keep beans submerged.
  • When beans are cooked, strain and retain some of the cooking liquor.  
  • Mash and pass the strained beans through a sieve (retaining some whole beans to add to the final paste if you like the texture)  
  • Add sugar, to taste, to the sieved/mashed beans. The mixture will noticeably slacken. 
  • Return the mixture to a saucepan on a medium low heat and continue to cook until the mixture colour darkens to a deep red/burgundy (about 15 minutes). Add some of the strained bean liquor if the mixture becomes too dry. 
  • Leave the paste to cool (it will clump into a smooth ball). It's ready to use!

 You can keep Anko for at least a week in the 'fridge.

Dough (makes 8 large Anpan):

500g All Purpose White Flour (or a 50/50 mixture bread flour and cake flour)
300g Milk (I use semi-skimmed)
60g Caster Sugar 
1/2 tsp Salt
60g Butter/Shortening (or 80 to 100g vegetable oil)
1 tsp Instant or Active Yeast 


For glazing:

2 tbsp Butter (melted)
2 tbsp Milk
1 tbsp Caster Sugar


For sticky, shiny finish:

      <beaten egg optional> 

1 tbsp Golden or Corn Syrup (warmed)
1 tbsp Water
  • Mix the dry ingredients and add the milk.
  • If you're using active yeast then activate by whisking into warm milk to which a teaspoon or so of sugar has been added.
  • Knead until you have a smooth dough with medium gluten development. 
  • Let the dough rest for 5-10 minutes. 
  • Mix/Knead in butter/shortening/oil bit by bit until (this can get messy initially!).  Keep going until you have a smooth dough once again (few minutes more kneading)
  • Leave the dough to bulk ferment until doubled in size (about 2 hours)
  • Degass the dough. (Can stretch and fold if desired)
  • Divide the dough into 8 portions and roughly shape each into a ball.
  • Let the dough balls rest for 10 minutes
  • Flatten and stretch each ball into a circle about 3 to 4 inches in diameter.
  • Place a 1 1/2 inch (or more if you like!) ball of anko paste in the centre and bring the dough edges over to envelop the anko and squeeze to seal.  
  • Lightly press and roll the ball, seal side down, on a slightly tacky surface to ensure seal.
  • Leave the buns on a lined baking sheet to prove until doubled in size again.  
  • Heat the oven to 180C /  350F (I'm basing on my less than wonderful fan assisted electric oven.  You many need to adjust)
  • Brush each bun with the melted butter/milk/sugar mixture and bake in the oven for 20 minutes or until nicely browned.  
  • For a shiny sticky glaze brush each bun with the syrup/water mixture towards or at the end of baking and leave in the oven for an additional minute. 
  • Allow buns to cool.  The crust should soften fairly quickly although I find covering with tin foil for 10 minutes immediately after baking does help.

Note:

Many recipes call for adding egg to the dough. Having made two different batches in the last two days I'm of the opinion that an eggless dough gives the result closest to the sweet asian bread dough I'm familiar with. Not a strict rule by any stretch of the imagination. Some Anpan (Sakura Anpan) use salt-preserved cherry blossom as a garnish placed on top of the bun in the centre and pressed in to form a 'belly button'. Other variations include white bean paste filling and sesame seed garnish. You can also use the dough as the basis for Melon Pan and other sweet asian breads. 

Apologies for mixing volume measurements with weight measurements.  If, for example, the yeast you use is composed of larger granules then increase to 1 1/2 or 2 tsp.  


<modified 14/2/2008 --FoolishPoolish> 


dmsnyder's picture
dmsnyder

Leader's Silesian Light Rye

 Silesian Light Rye 1

Silesian Light Rye 1

Leader's "Local Bread" has three formulas for Polish ryes. I have made the Silesian Dark Rye once and the Polish Cottaqe Rye many times. Today, I made the Silesian Light Rye for the first time.


Leader describes these "glossy golden loaves" as having "a delicate rye flavor, a spongy crumb, and a thin, chewy crust." That about sums it up. This rye bread is the farthest you can get from a dense, super-sour, dark german rye. But then, it only has about 100 gms of light rye flour to 500 gms of bread flour. The chew and taste are light even compared to a French levain with a bit of rye flour in the dough. It is more like a (extraordinarily good) sandwich bread. The crust gets very soft, and it is thin yet chewy. The whole loaf feels light and spongy. 
 

I expect it will make lovely toast tomorrow morning to eat with my usual homemade almond butter and apricot jam or marmelade. I also think it would be great for a tuna or egg salad sandwich. I'd want a more substantial rye for corned beef, myself.


silesian Light Rye Crumb Silesian Light Rye Crumb

David

bakerb's picture
bakerb

B’s Five Layer Hidden Focaccia

OK! OK! OK...I had this idea to use pesto, olives, & cheeses, you know, yum Italian flavored stuff, in a bread loaf, and I thought I'd just use the rolled-out, then rolled-up technique, but then I thought of trying this:

B’s Five Layer Hidden Focaccia½ the dough of Floyd’s Italian Bread…nice wet flippy dough…1 jar Organic Bella Terra Sun-Dried Tomato Pesto, 3 oz.7 pimento stuffed green olives, sliced¼ t. fennel seeds, toasted & slightly crushed4 hunks sun-dried tomatoes, chopped2.2 oz. freshly grated Parmesan Reggiano1 oz. fresh mozzarella piecesDivide dough into 3 pieces, 2 large & 1 small…Stretch or pull one of the large pieces to about 10 - 11 inches in diameter …place on peel on cornmeal sprinkled parchment…spread ½ of the pesto, ½ of the olives, ½ of the fennel seeds, ½ of the tomatoes, & ½ of the cheeses onto the dough within ½ inch of the edge…Begin to preheat  the oven, stone, & water pan to 550 degrees, convection…Stretch or pull the small piece of dough to just barely cover the toppings…spread on the rest of the toppings, in the same order as above, to the edge of the second dough…Stretch or pull the last large piece of dough the same size as the original…mist the bare edge of the original dough with water…place the last piece of dough on & press & seal the edges…check for large air pockets between the top dough & the toppings underneath & poke a hole to release the air…My prebaked loaf was about 1 inch high x 12 inches diameter…it sat for about 15 minutes while the oven finished heating…Thoroughly mist the loaf with water…slide the parchment & loaf onto the stone, pour 1 c. hot water into water pan & mist the loaf again…mist 4 more times, 30 sec. apart…lower temperature to 450 degrees, convection (lower temperature 25 degrees if no convection)…bake 22 minutes, rotating once…207 degrees internal temp…

My baked loaf ended-up measuring 2 inches high x 11 inches in diameter… I did not slash it, it didn’t split as it baked and only leaked slightly on the top in 2 places…the crust was dark, doughdoughloafloafloafloafcrumbcrumbcrumbcrumbcrumbcrumbcrumb layerscrumb layersthin and crispy, the crumb was airy & moist and the” toppings” were oh so flavorful…I guess, if anything, I would add more olives & cheese...

NOW IF I CAN JUST GET THE PICS IN HERE, NEVER DONE THAT!...
zainaba22's picture
zainaba22

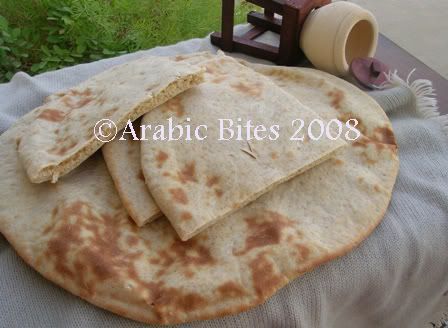
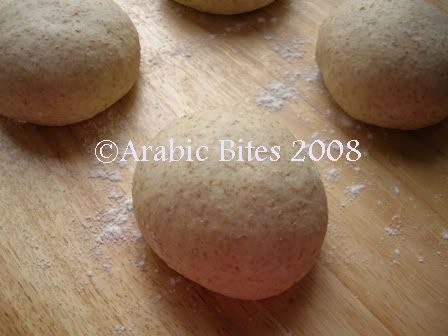
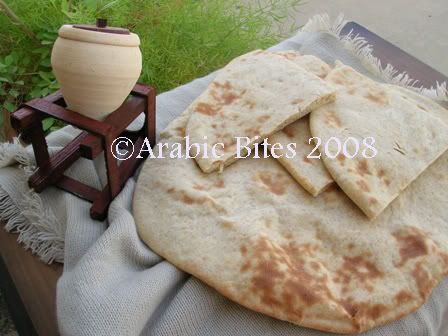
Quick 10 Minutes Dough flat bread

Makes 4 large or 8 small.

 1 recipe 10 Minutes Dough ( I use 2 whole wheat flour cups +3 white flour cups in this recipe).


1) Preheat the oven to 550F.


2) Divide dough into 4 or 8 pieces.


3) Shape each piece into a ball.

4) Roll each piece to round.


5) Place onto oven trays or hot baking surface for 2-3 minutes.


zainab

http://arabicbites.blogspot.com/

woefulbaker's picture
woefulbaker

Bread Science

Bread Science: The Chemistry and Craft of Baking Bread  (Emily Buehler) Having read the excerpts, I feel sure I would enjoy this book.  I really want to learn more about the science behind the bread (and applying it to improve technique, of course).  This looks to be the perfect book for me.  Some complex microbiology and organic chemistry explained in easy-to-follow diagrams and description. Does anyone have this book? Love to hear opinions.I'm hoping to order a copy soon (hope they can ship to the UK).   --Toby 

ejm's picture
ejm

ISO Portuguese cornbread (not sweet)

I believe that bread I'm looking for is called broa de milho. It is quite crusty on the outside but very moist inside with a dense almost white coloured crumb.

In the thread entitled 'looking for a recipe for Portugese Bread', pumpkinpapa posted a recipe for Broa. I tried replying in that thread but foolishly put the reply deep inside the thread to ensure that it would surely get lost. I hope it's okay that I am reposting my questions.

  1. Is the cornmeal yellow or white?
  2. Is the resulting bread quite dense and moist?
  3. I don't suppose you have a photo of the crust and the crumb, pumpkinpapa?

Many thanks!

-Elizabeth 

P.S. A while back, I tried making Portuguese Cornmeal White Bread (Pao A Moda De Sao Miguel) from Gourmet 2000 but it wasn't quite right. The bread was good, just not what I was hoping for.

ehanner's picture
ehanner

DLX Question

Hey all you DLX users, I just took delivery of a new DLX Assistant mixer which looks like it will be fun. I have read where the first thing to know is that the water goes in first and the flour as it becomes incorporated. I'm wondering about the roller position is a little confusing. The manual says fix the roller 1 inch away for a 2 loaf batch and 1.5 inches for 3 loaves and so on. Others seem to say leave it loose and let it ride the edge.

I searched the forum for nuggets and ran a test batch to experiment with 1100 grams of dough at 65% hydration. It was dry enough to put up a fight as the roller followed the dough. Just wondering what the best advice is for the roller position.
Thanks in advance.

Eric

Pages