The Fresh Loaf

A Community of Amateur Bakers and Artisan Bread Enthusiasts.

Most bookmarked

crumbbum's picture
crumbbum

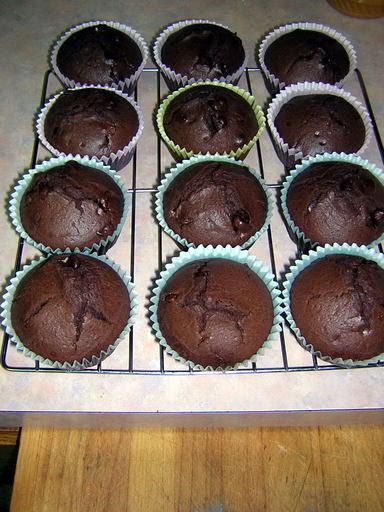
Chocolate Chocolate Chip Muffins

I was going to make the valentine's day pain rapide au chocolat tonight because my boy wanted me to buy him chocolate chocolate chip muffins at the grocery. Well, I just couldn't see myself making mashed potatoes just for that, so I went to google and dug up two C-C-C muffin recipes and between the three recipes I came up with this. And they're quite good, like the bread recipe, not too sweet, but in the middle they have some melty chocolate chip goo that makes them just right.

1/2 cup sugar
1-3/4 cups all purpose flour
2 Tbsp. powdered milk
6 Tbsp. unsweetened cocoa
2-1/2 tsp. baking powder
1/2 tsp. salt
1 cup semi-sweet chocolate chips

mix all the dry ingredients together, and if necessary, squish out any hard, rocky lumps in the baking powder.

in a smaller bowl or 2-cup measure, mix together:

3/4 cup water
2 eggs, lightly beaten
1/3 cup butter, melted
1 tsp. vanilla extract
I also splooshed in 2-3 Tbsp. Irish Cream, lacking rum or any other appropriate spirits

Make a well in the dry ingredients and pour in the liquids, mixing just until blended--as usual for muffins, leave it slightly lumpy.
Spoon into a 12-cup muffin tin, greased or lined with paper accordion cups. Bake at 400F about 18-20 minutes. A toothpick should come out clean unless you've struck a chocolate chip.

and of course, you can use 3/4 cup dairy milk in place of the water/powdered milk ingredients.

sonofYah's picture
sonofYah

Real Pumpernickel Bread

I am looking for a recipe for the real Olde World style Pumpernickel Bread.

The closest I have found so far is from Jeff Hamelman's book, BREAD, page 222.

Gordon

scarlett75's picture
scarlett75

Starter question.

I started my starter on Tuesday and have been following the instructions found on the link in one of the lessons. This morning, I went out to find my jar of starter had an inch thick layer of "hooch". I poured some of it off before I fed my starter (whom I've named Earl).

I used whole wheat flour and warm water as the basis of my starter. It's very bubbly and is starting to smell rather sour. When I observe Earl, he will bubble and foam before my very eyes.

My questions are:
1. Did I do the right thing by pouring off the layer of fluid?
2. I've been keeping a very light lid on the jar, but I've noticed that (in pics I've seen here) there's no lid on the jar while it's "starting". Am I screwing up my starter with a lid?
3. The link says that your starter is ready to use when it's bubbly and sour smelling, but just how bubbly and sour smelling should it be?
4. I noticed that FloydM says that he just keeps some of his starter aside, but the article says to use it all to make your sponge... is that just a first time thing? HELP!! LOL

Floydm's picture
Floydm

Orange Oatmeal Bread

I tried this recipe from Bernard Clayton's New Complete Book of Breads today. We liked it a great deal.

Orange Oatmeal Bread

1 orange
2 tablespoons plus 3/4 cup sugar
1 1/2 cup all-purpose flour
1 tablespoon baking powder
1/2 teaspoon salt
1/4 teaspoon baking soda
1 cup rolled oats
2 eggs
2 tablespoons softened or melted butter
2/3 cup warm water (105-115 degrees)

Preheat the oven to 350 degrees.

Grate the orange rind into a bowl. Cut out as much of the meat of the orange as you can and add it to the bowl. Also squeeze as much juice out of the orange as you can and add it into the bowl. Sprinkle the orange with the 2 tablespoons of sugar and set aside.

In a large bowl combine flour, 3/4 cup sugar, baking powder, salt, and baking soda. Stir in the oats.

In a seperate bowl, combine eggs, butter, warm water, and orange mixture. Blend the liquid ingredients into the dry ingredients.

Pour the batter into one large or two small greased loaf pans. Bake at 350 for approximately 35 minutes for small loaves or 50 minutes for large loaves, until a toothpick inserted into the center of the loaf comes out clean.

Remove the loaves from the oven and allow to cool for 10 minutes before attempting to remove from the loaf pans.

Excellent with a pot of tea.

crumbbum's picture
crumbbum

White Bread: sandwiches and toasting

This is a white bread I finally settled on about 20 years ago, when I was baking all the bread for my family of four. We ate so much, I just worked it up for two loaves, so that's what I've got here. It's followed by the single loaf approximations I used earlier this week for the loaf pictured here. It's a good, tasty white bread for toasting or making sandwiches, and if it gets stale, it makes fantastic french toast.

WHITE BREAD
(two 9x5 loaves)

7-1/2 cups bread flour
1/2 cup sugar
1 Tbsp. salt
1-1/2 Tbsp. instant yeast (or two 1/4-ounce packets)

mix 4 cups of the flour with the other dry ingredients.

heat to 120F:
2-1/4 cups milk
1/4 cup butter or margarine

add this, along with 1 egg, lightly beaten to your flour/yeast dry mixture and blend until evenly incorporated.

add the remaining 3-1/2 cups flour, a cup at a time, into the dough. it should begin to hold together after about two cups additional. if you're using a mixer, you can continue with that process, or turn the dough out to work the rest of the flour in by hand.

grease a large bowl, plop your dough ball into it, and turn it, cover with a kitchen towel, and set it to rise until doubled in bulk. depending on your ambient temperature, it could take 1-3 hours.

when it's doubled, punch it down in the bowl, and turn it out onto a floured work surface. knead it a few minutes to work out the bubbles, add a little flour if it sticks to your hands. flatten it out into a rectanglish-shape with your hands, and divide it evenly. flatten the pieces out a little more, then roll up tightly as you can, pinching the closing seams together, tucking the ends in if need be, and set them to rise (covered) in greased loaf pans. the second rise goes much faster, again, depending on ambient temperature, 30-60 minutes is typical.

preheat your oven to 375F, and bake for 10 minutes, then reduce to 350F for an additional 30 minutes. keep watch on it, I think my oven runs about 25 degrees hot, at least as compared to Floyd's temperatures. if all goes well, it should just roll out of the loaf pan when tipped on its side. cool it on a rack, resting on its bottom, and the rack will leave cutting guides for you.

Notes
If you coat the top crust with melted butter or margarine while it's hot, it will stay soft. The advantage to this is that slicing the bread won't crush the loaf. But you already know that a loaf like this should be sliced laying on its side anyway, right? It's another deterrent to crushing, and it exposes the cutting guides you made on the bottom of the loaf. And don't forget to use a serrated bread knife!

I skip the step of trying to heat milk without scalding it on the bottom of the saucepan by using powdered milk (1 cup) and the same amount (2-1/4 cups) of comfortably warm tap water in place of dairy milk.

This recipe can also be made into six mini-loaves if you want to have a special little dinner where everyone gets their own loaf of bread. Temperature is the same, adjust your own timing.

Single 9x5 Loaf:

about 4-1/2 cups bread flour
1 Tbsp. or one 1/4-ounce packet dry yeast
3 Tbsp. sugar
1-1/2 tsp. salt
1/3 cup powdered milk
1 cup warm water
2 Tbsp butter
1 egg

start your dry mix using 2 cups flour, add the remaining in after the liquids.

Floydm's picture
Floydm

Dill Casserole Bread

Another one from Bernard Clayton's New Complete Book of Breads, my latest library find.

Clayton says this bread is traditionally baked in a casserole pan. I baked it that way, but I see no reason why this wouldn't be excellent baked in a loaf pan.

Dill Casserole Bread

1 cup cottage cheese
2 tablespoons sugar
1 tablespoon powdered onion
1 tablespoon dillweed or dillseeds
1 teaspoon salt
1/4 teaspoon baking soda
2 eggs
1 package dry yeast or the equivalent amount (2 1/4 teaspoons) of instant yeast
2 1/2 cups flour
a pat of butter
a dash of salt

Zap the cottage cheese in the microwave for 30 seconds to get it to room temperature. Mix in with it the sugar, onion, dill, salt, baking soda, eggs, and yeast.

Add the flour, 1/2 cup at a time, and mix it in with the wet ingredients with a wooden spoon. Clayton says that this will make "a heavy batter, not a dough, and not be kneaded." Mine ended up thick enough that I had to use my hands to do a brief knead to do the final mixing.

Cover the dough and allow it to rise until doubled in size, about 1 hour.

Deflate the dough/batter by stirring it or punching it down. Pour it into a greased casserole or loaf pan. Cover and allow it to rise until doubled in size again, around 45 minutes.

Bake at 350 for 40 to 45 minutes, until a toothpick or skewer stuck into the center comes out clean. If the top of the loaf is looking too dark, cover it with foil for the final 15 minutes of the baking.

After you pull the loaf out of the over, rub the top of it with the pat of butter and sprinkle it with salt.

dstroy's picture
dstroy

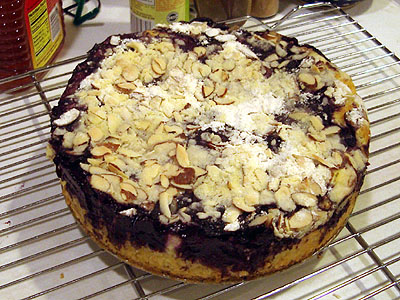
Blueberry-Cream Cheese Coffee Cake


From a recipe we found in Sunset Magazine (Jan 2005)

1 cup fresh blueberries, rinsed, or frozen blueberries
1/4 cup apple juice
1 teaspoon cornstarch
2 cups all-purpose flour
1 cup sugar
1/2 cup (1/4 lb.) cold butter, cut into chunks
1/2 teaspoon baking powder
1/2 teaspoon baking soda
1/4 teaspoon salt
1 teaspoon grated lemon peel
3/4 cup plain low-fat yogurt
1 teaspoon vanilla
2 large eggs
6 ounces cream cheese, at room temperature
1 teaspoon lemon juice
1/2 cup sliced almonds

1. In a small pan over medium heat, bring blueberries and apple juice to a boil. Lower heat and simmer, stirring occasionally, until blueberries pop (a couple minutes). In a small bowl, mix up the cornstarch and 2 teaspoons water. Add to the blueberry stuff; and stir until it thickens, about a minute.
2. In a separate bowl, mix flour and 3/4 cup of the sugar. Cut butter in with a pastry blender (two forks work fine if you don't have one or can't find it) until the mixture looks crumbly. Save about 1/2 cup; pour the rest into a large bowl. Stir in baking powder, baking soda, salt, and lemon peel.

3. In a bowl, mix yogurt, vanilla, and 1 egg until blended; stir into flour-baking powder mixture until it's all mixed up. Spread batter into a buttered 9-inch round cake pan with a removable rim.

4. Take the bowl from step two and mix in the cream cheese, the rest of the sugar (1/4 cup), an egg, and lemon juice until it's pretty smooth. Spread it over batter in the pan, leaving about a half an inch border bare. Gently spread blueberry mixture over cream cheese mixture, leaving some of the cheese visible. Stir almonds into reserved flour mixture and sprinkle over cake. *The recipe says to concentrate the sprinkling of the almond crumble stuff most around edge of batter - we didn't and when we baked it, the center sank in the middle a little, so that may be why.

5. Bake in a 350� oven until center of cake barely jiggles when pan is gently shaken and the top of the cake is golden brown, 30 to 40 minutes. Let cool on a rack for 15 minutes, then remove pan rim.


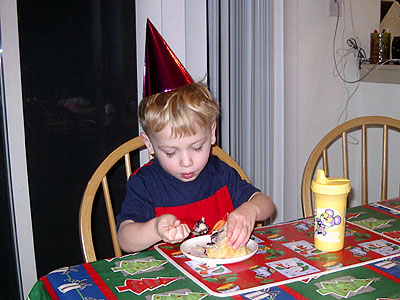
Serve warm or at room temperature. Party hat is optional.

dstroy's picture
dstroy

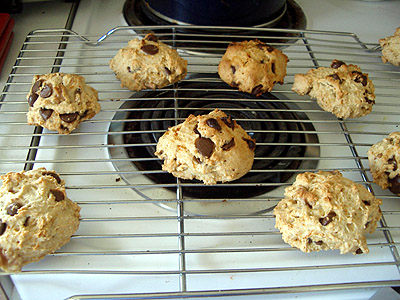
Guilt-free "Hippy Cookies"

Guilt-free "Hippy Cookies"

- 3 cups flour
- 1 teaspoon baking soda

- 3/4 cup applesauce
- 3/4 cup honey
- 2 teaspoons vanilla

- 1/2 cup walnuts
- 3/4 cup carob chips

Mix solids and liquids in separate bowls, then mix together.
Add nuts and chips.
Bake 15 minutes at 350 degrees.


Winner of the 2005 James Beard Award for best baking book, Maggie Glezer's A Blessing of Bread: The Many Rich Traditions of Jewish Bread Baking Around the World is a significant work of scholarship. Is it one for you to add to your collection? Click "Read More" for my take on it.


This is by far the most thorough book on Jewish baking traditions I've ever seen. If this is a particular interest of yours or a tradition that you participate in, then this is a no brainer: you need this book. It is a major scholastic accomplishment, as much a work of anthropology and oral history as it is a baking book, and worthy of the accolades that it received this year. Buy it today.

For someone like me, who read Gershom Sholem and some of the Talmud in college but grew up in an area with little overt Jewish culture, this book is less essential. As I mentioned in my review of her previous book, Artisan Baking Across America, Glezer tends to emphasis the anthropological over the instructive, preferring authenticity over simplicity. The bagel recipe she includes in this book is insanely complicated, requiring mail-ordered ingredients, a special food processor (stand mixers aren't good enough), and custom built baking utensils. If you are already an accomplished bagel baker this recipe may be the one that will push your bagels over the top from good to world class, but if you are trying to bake bagels for the first time this is not to recipe to take on.

My own interest in baking books is still primarily as a source of instruction, and on that level this book is of less value. That said, the shaping instructions at the beginning are quite nice, even for amateurs. If you are interested in elaborate braiding techniques, this book has merit.

I suspect that, once the buzz around this book has died down and I can find a copy used or in paperback, I'll probably pick up a copy. There is a lot to explore here: Glezer certainly deserves credit for exposing the breadth of the Jewish baking experience. Challah and bagels are what most gentiles think of when they think of Jewish baking, but Glezer shows us how much broader we should think. Jews in the Diaspora have incorporated the flavors and styles of many other traditions, from Middle Eastern flat breads to North African spiced breads to Central Asian crackers. All of these have been adapted to be expressions of the Jewish religious experience, an interplay of the sacred and the day-to-day, which Glezer makes clear, continues to this day.

North African and Central Asian baking traditions are areas I have not explored; I probably wouldn't know how to begin exploring them even if I wanted to. This book offers a decent introduction to those traditions.

A Blessing of Bread: The Many Rich Traditions of Jewish Bread Baking Around the World


Jeffrey Hamelman's Bread: A Baker's Book of Techniques and Recipes is an solid baking book, but not one I would recommend to everyone. Read more to learn why.

Simply put, the intended reader of this book is the professional baker. Here and there Hamelman makes a nod to the home baker, but it doesn't take long for the amateur baker to realize that Hamelman is not all that interested in his or her plight. The continual references to steam injectors and oven vents, proper posture when lifting 75 pounds of dough, and potential injury from improperly holding 7 to 8 foot long peels while unloading dozens of loaves of bread quickly make the amateur realize this book was not intended for him.

That said, Hamelman is a world class baker, and this is a serious bread book, full of a ton of information that the home baker could use to improve his or her understand of baking and the quality of his or her bread: all of the recipes I've tried from this book have been solid; the diagrams and instructions for shaping loaves are meticulously detailed and helpful; and the final hundred page section of the book on braiding and other decorative techniques is without rival. It is easy to see why Hamelman is one of the coaches of Team USA in the Coupe du Monde de la Boulangerie.

I'm perplexed as to why the editor of this book didn't send the manuscript back to Hamelman and tell him to add more tips for the home baker (or just hired an intern to put more such tips in if Hamelman wasn't willing to). The blurbs on the dust jacket repeatedly mention the "seasoned" or "serious" home baker; I think it is clear that the publisher wanted to sell this book to more than just professional bakers. But as the reviews on Amazon show, many buyers who consider themselves decent bakers get this book home and are flummoxed by how advanced it is. Thus they rip the book on Amazon, which I'm sure has had depressing effect on sales. Simply a few more sentences here or there stating things like "Home bakers can skip the lye bath and just boil the pretzels in water" (see my pretzel article for more information on what I'm talking about) would have made a huge difference. Instead, the home baker must use his or her own judgement to figure out how to adapt each recipe to work in his or her own kitchen. Yes, the recipes include the quantities scaled down for the home baker, but rarely are the directions simplified.

There was a thread in the forums here a week or two ago about whether this book is suitable for a beginning baker. Absolutely not: it would intimidate the begeezes out of a beginner. But it is an excellent bread book for the advanced bread baker who has experience and other resources to fallback on and one I'll probably add to my bookshelf in the near future.

Update: A year later, I have added this book to my shelf. I like it a lot, but I do also have a half dozen other baking books and a couple of years of baking experience under my belt. I still would not recommend this book to a new baker, but it is an excellent resource for a seasoned baker.

Bread: A Baker's Book of Techniques and Recipes

Pages