The Fresh Loaf

A Community of Amateur Bakers and Artisan Bread Enthusiasts.

Most bookmarked

ehanner's picture
ehanner

Eye opening techniques

I know when I first started baking I nodded dutifully when I was told to knead until the dough will pass the window pain test. If you can't stretch a piece until it is translucent and you can see light through it, knead some more. This advice is found through out the industry help and how to books and is considered to be a core understanding by many. Far be it for me who is a lowly novice in terms of time in the flour bin to question the conventional wisdom, however. There are a few misconceptions that have become accepted as gospel that I believe hinder the new baker and for that matter any baker who wants to truly understand what their potential is in the kitchen. The techniques I address here are not my ideas or content. These things were presented to me by others here on the forum in pieces over the last few years and together represent the basis of my capability today.

The first bit of advice I have is to stop what ever you are doing and watch this video. If you're like me it will take a few times to get the hang of what the poster is doing. This is Richard Bertinet doing a demo for Gourmet magazine. He is making a sweet dough but it doesn't matter. The technique is key. When I learned this move and method of handling dough, my results instantly went from unpredictable to reliable. 10 or maybe 15 seconds with your hands in the dough and that's it, you're done. No more kneading is required. You might do a couple folds every 20-30 minutes during the primary ferment. This will work with sourdough or yeasted recipes and white or whole wheat with the caveat that WW will need a fold or two during the ferment. Once I learned to do the French Fold, I have rarely used my mixer. When you understand how the dough is supposed to feel with your own fingers it is much easier to produce a dough that will perform to your expectations.

Further EDIT: A regular contributor to this forum has produced some really terrific video training aids that can be seen HERE. Mark Sinclair is the owner of The Back Home Bakery in Kalispell Montana. He is remarkably clear in the message he sends about how to handle several dough types and shaping.
Mark demonstrates how easily you can mix, stretch and fold and shape dough. His style is easy to follow and well done. I highly recommend you take a look at these instructional videos. He just posted a new video on shaping a high hydration baguette that is excellent. Many of his recipes are search-able here or if you email him he will probably send them to you. His bakery products are beautiful and the photography is inspirational.

Mark now has 2 DVD's for sale that take you from end to end with 3 different breads and another on technique. There are lots of places to get information on how bake good breads. Marks Video's are reasonable and very helpful to the new baker.

There is another video that should be included is the Julia Child/Daniel Forester baguette demonstration. This is a 2 part video that shows how to put together french bread dough by hand and uses the frisage method. Frisage is something that once seen, always understood. You can read about it repeatedly but it won't make sense until you see it in action. See it http://www.pbs.org/juliachild/free/baguette.html here.

Added by Edit: A great video is now available that I think is the essence of dough handling and shows how easy it is to mix dough without a mixer. If you can chew gum you can make great bread using Richard Bertinet's video HERE.

Secondly, Da Crumb Bum posted a concept that goes against all the common wisdom concerning pre heating your oven and using a stone for a thermal battery. Who hasn't thought that to get good rustic bread one must bake on a pizza stone or a tile surface? There are some instances where a stone and preheat is required like pizza and bread sticks but for the greatest majority of your baking, no stone or preheat is required. A link to the original post is http://www.thefreshloaf.com/node/1843/no-knead-preheat#comment-12597 . Most are skeptical this will work at first but trust me on this, you won't believe it until you see it with your own eyes. It is expensive to maintain 450F in a steel box both in terms of wasting money and by wasting the energy and resources of our planet. The minimal effect that preheating has on the crust is absolutely not worth the additional energy.

I share these thoughts and techniques as a way of thanking the many posters who have helped me to become at least a competent home artisan baker. The host of The Fresh Loaf (floydm) is top on the list with his lessons and frequent examples of solid baking. Hundreds of community members, posters, are here to answer your question or help with an issue. This is a great site because of the members. Don't be afraid to jump in, we are just like family.

ADDED EDIT:
It's been a while since I made this post and I wanted to come back and add a few things now that I have some experience under my belt.
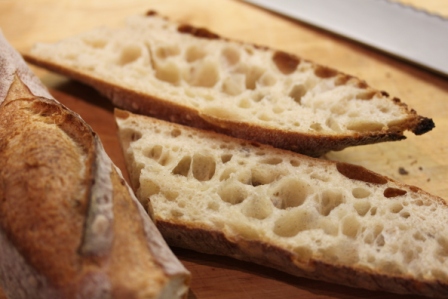
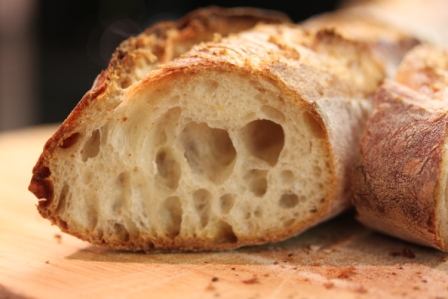
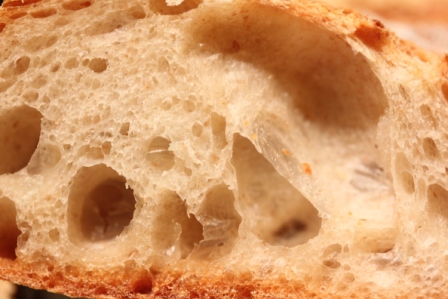
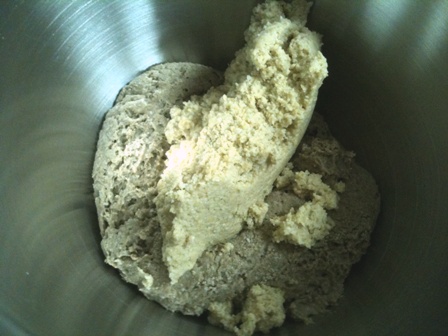
1.) I still almost never use the mixer. A brief hand mix to break up the dry clumps of flour followed by a 30-60 minute rest and stretch and fold or French folding as per the top video will develop the gluten just fine. Stretch and fold every 30-60 minutes for the duration of the bulk ferments. Time will be your friend here. Be patient. If you use a very small amount of starter for inoculation or yeast, you slow down the bulk ferment. If you increase the hydration slightly, you will find you can fold every 40-60 minutes for about 4 hours. The dough will be perfectly satin smooth and will easily windowpane.

2.) Instead of starting from a cold oven, I now am starting the oven when the dough looks ready and the proof is about done. The dough is proofing on parchment, covered with a floured towel or a moist tea towel. When it looks like the proof is done, turn on the oven. My electric will go to 450 in 7 minutes. Slide the dough in, steam for a great crust. I rotate after 20 minutes.

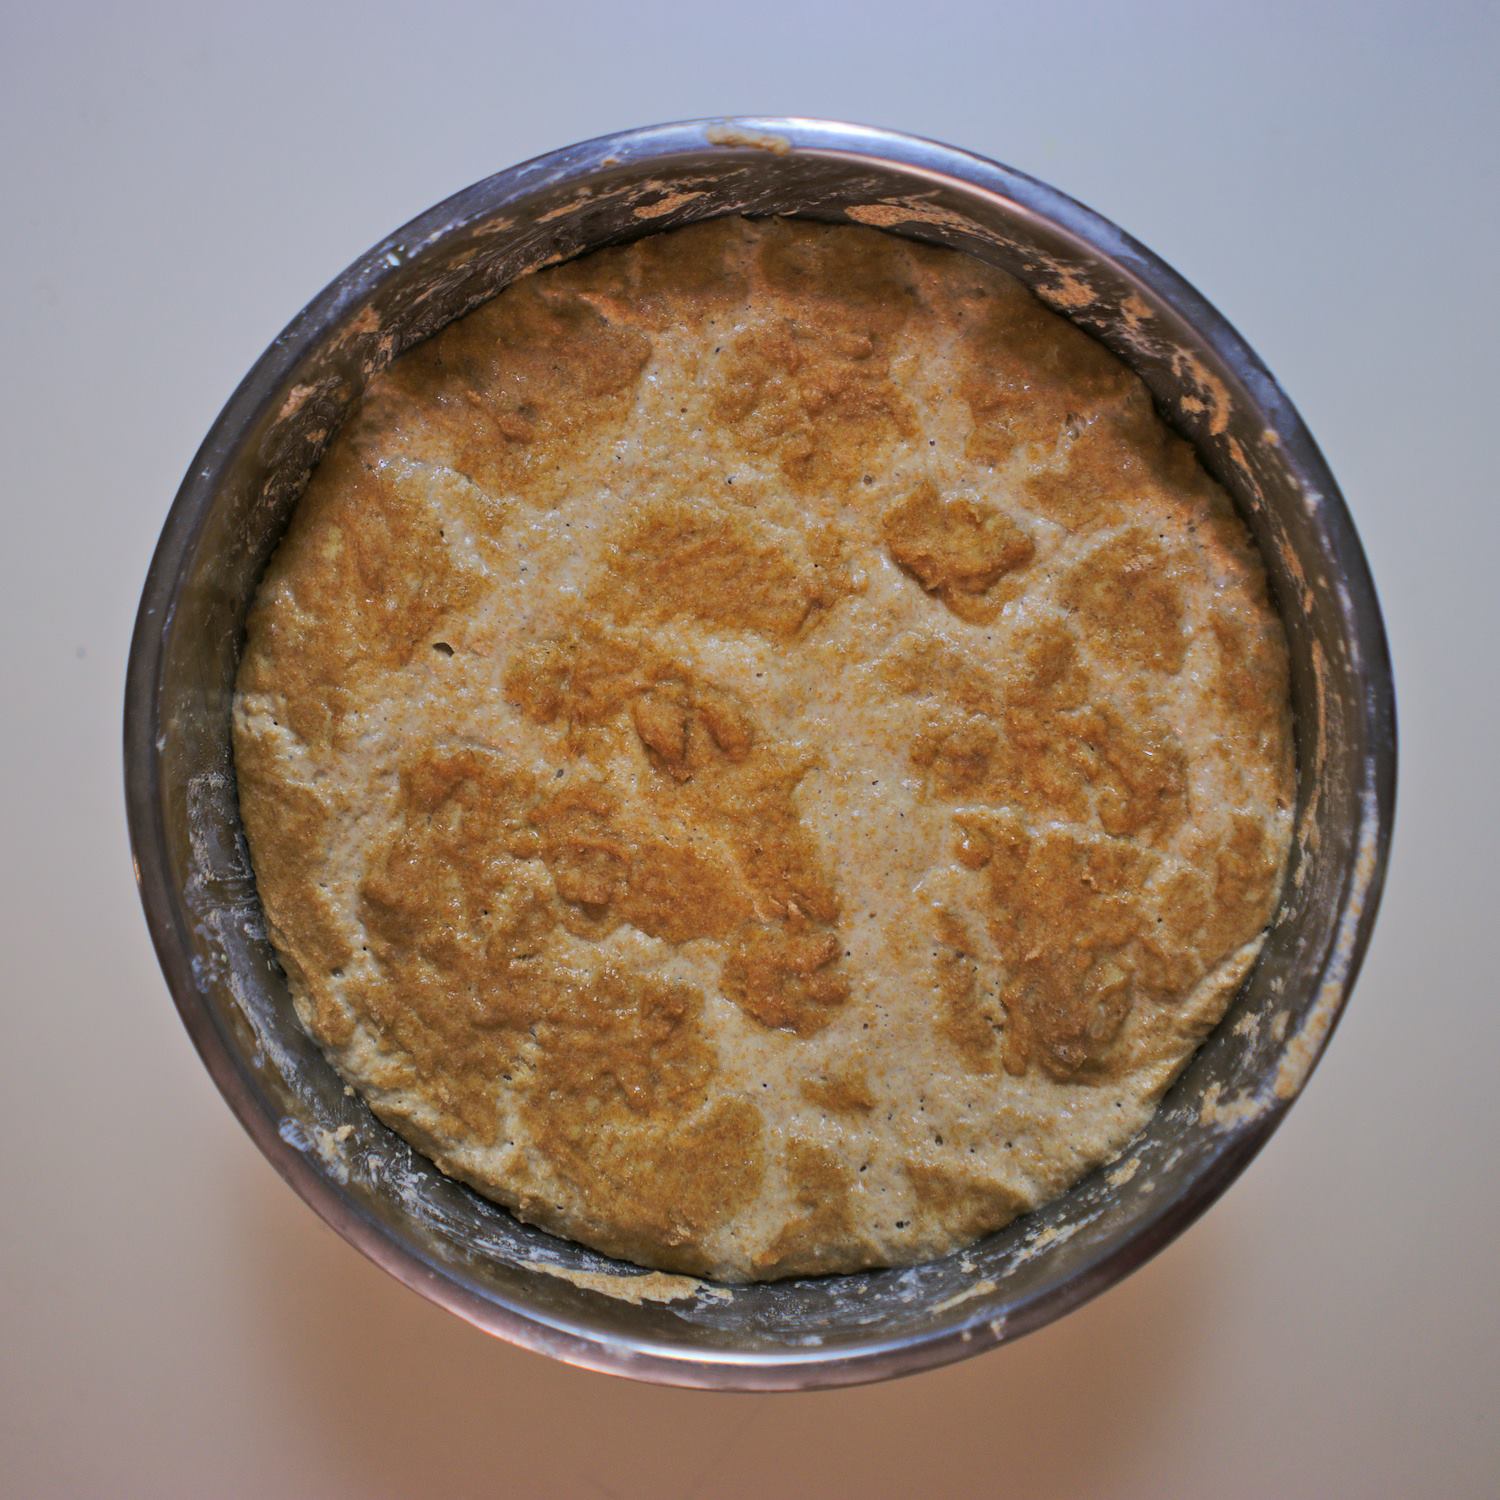
3.) I think many people over ferment and over proof. Try fermenting for 60 minutes at 78F, shape and proofing for 45-60 minutes. Remember, the warmer it is where your dough ferments, the faster the dough will rise. Temperature matters.

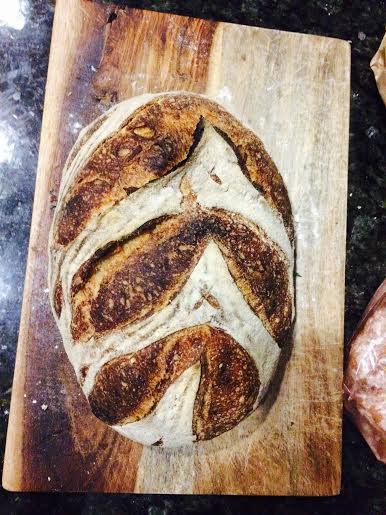
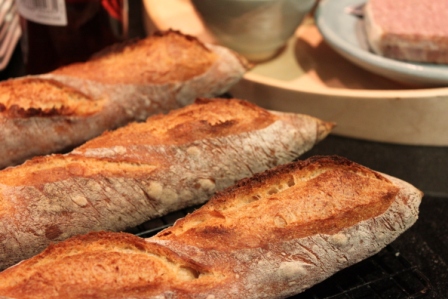
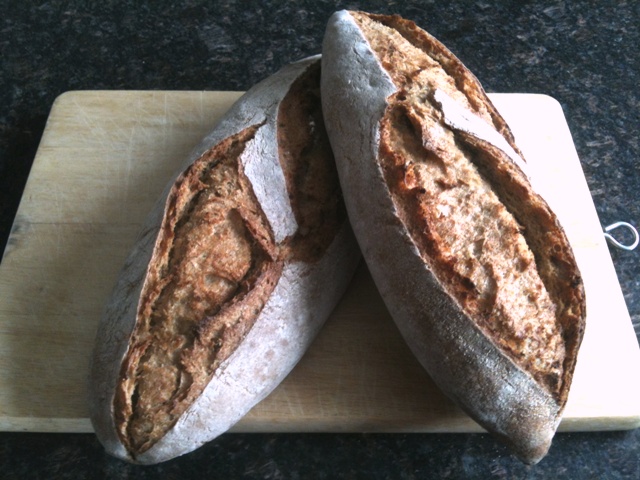
4.) Make your slashes deeper than a 1/4 inch. You might be better to go back and retrace your initial slashes to make them just a little deeper. Be modest in the pattern. Remember what the purpose is of slashing.

5.) Not so much a technique but a suggestion. Adopt a basic formula that you can make in your sleep. Nothing fancy, a basic yeast or sourdough bread your family likes and work from that. You will be surprised at how many different types of bread you can make using your basic master formula by adding one or two ingredients or changing the handling slightly.
Have fun and learn at your own pace. The collective knowledge at The Fresh Loaf is being plugged into your own private baking school.

Eric

"It's not you he wags his tail for, but, your bread".

Abelbreadgallery's picture
Abelbreadgallery

90% biga loaf (Italian method)

90% biga loaf, as I learned from italian maestro Ezio Marinato.

This means when you mix the dough, 90% of the flour is already prefermented. As a result we have a very digestive bread, also a lot of aroma and character.

Method:

Biga: 900 grams of bread flour + 405 ml water + 3 grams of instant yeast or 90 gr sourdough. Disolve the yeast in water. Add flour. Mix 1 minute at slow speed, just until you get wet flour threads. We don't want to develope gluten in this stage. Let the biga mature 14-16 hours at 14-16 degrees celsius inside the same mixer bowl, covered with kitchen rag.

Final dough: All the biga + 100 grams stoneground flour + 300 ml warm water + 20 gr salt.

Bulk fermentation: around 1 hour.

Divide and preshape. Let rest 30 minutes.

Shape. Final proof, 1 hour.


rushyama's picture
rushyama

Fig & Walnut Multigrain

I've been thinking of making a fig and walnut loaf for awhile and finally got around to trying it this week. It turned out very well and it's a formula I'd like to tinker with again.


Notes:

  • I build a little extra levain as a bit gets stuck to the side of my container. I end up adding as much as I can scrape out easily.
  • I held back about 75 grams of water to help with the addition of the levain and salt. In the end I probably left out about 15-20 grams, though a little got added with the turns when I wet my hands. The dough probably could have handled the full amount, but I wasn't sure how the figs would play into the mix so I decided to be conservative.
  • This made two loaves (the batard shown here and a boule not pictured -- being gifted.

The result:


This is probably one of my favorite loaves to date, hearty and flavorful. I really like the purple color walnuts bring to the game, and there's just enough figs to bring a touch of sweetness. If anything I'll add a touch more figs next time. The crust is crackly and thin, just how I like it. The loaves did color quickly, so I ended up dropping the oven temp to 425F for the last 10 minutes or so.

Hope you all are enjoying the Christmas season!


Lazy Loafer's picture
Lazy Loafer

Sage & Onion Levain

This is one of my favourite breads at this time of year. It smells just like stuffing and makes the best leftover turkey sandwiches! It's also great with turkey soup. This is a naturally leavened bread made with fresh, ripe sourdough starter so you can only imagine the smell permeating my kitchen when this bakes - sourdough bread with sage and onions! I usually bake the bread in the Italian bread pans in long loaves, but wanted to see how it turned out baked in the cast iron pots. In a word, it turned out good!

I used 100% hydration bread flour starter, fed and left to ripen overnight. The basic ingredient list is pretty simple:

  • 85% bread flour (I use Rogers Silver Star bread flour)
  • 15% whole wheat flour
  • 70% water (warmed to around 90 degrees)
  • 2% sea salt
  • 25% starter

Note that the overall hydration is higher than 70% as I just calculate the percentage of starter as a single ingredient, without breaking it down into flour and water percentages. As the starter is 100% hydration this affects the overall dough hydration. It works, at any rate.

The added ingredients are onion and sage. For the onion, I rehydrate dehydrated minced onion in an equal amount of boiling water and let it sit until cool. Use as much as you want (probably around a quarter cup of rehydrated onion per 750 gram loaf). The sage is sometimes chopped fresh sage from my garden, and sometimes rubbed dried sage from the bulk store, depending on the season.

Mix the flours, water and starter well and let sit for 30 minutes or so. Add salt, onion and sage and incorporate well, using whatever method suits you best. I sometimes do this in my stand mixer, and sometimes use Ken Forkish's method (folding and pincering; see https://www.youtube.com/watch?v=HoY7CPw0E1s).

I stretch and fold the dough three or four times over the next couple of hours, and the rest varies depending on what kind of time I have available or what my schedule is. This last batch was fermented at room temperature for about four hours, then in the fridge for another three or four hours. I then shaped it and put it in baskets lined with floured napkins (seam side down as per Ken Forkish). We then went out to see Star Wars and I left the proofing loaves, tucked into plastic bags, in the cool basement. My starter tends to be very vigorous so I didn't want them to overproof.

Once home, I pre-heated the cast iron pots in the oven at 475 degrees, for about 45 minutes. The loaves went into the pots seam side up so I didn't have to score them (they bloom naturally at the seams). 20 minutes with lids on, then another 20 minutes with lids off. The bottom crust was very dark, the top was awesome and the interior temperature was around 205 degrees. They sang as they cooled and I went to bed (late) with the scent of fresh bread filling my head!

This morning I cut a couple of slices to take to work with me, along with a pot of home made turkey soup. Very impressed with the crumb - it was moist, creamy and shiny. I had thought the dough was under-proofed when I put it in the oven, but any more proofing and it would have been a bit too holey for me. All in all, a success!


a_warming_trend's picture
a_warming_trend

A Weekend Roundup (And One Simple Formula)

Phew. I've baked for a number of friends over the last few days! Many of them just wanted or needed a very generalized designation of "bread" for events, so I was able to experiment a bit with sourdough baking.

Disclaimer: All ciabatte described are "pre-dabrownman-flip-recommendation," so don't judge me too harshly...I still haven't acquired a second pastry scraper, so all ciabatta experiments are on a temporary hold...

Saturday, I baked some whole wheat ciabatte and a few small simple batards.

also, a small parmesan-encrusted boule, and a small sesame-encrusted batard.


Then on Sunday, a few more ciabatte -- this time with cream cheese and chive. 


And then just this morning, Monday, before work: A simple 80% hydration batard with 5% levain. Still working on my shaping. Still striving for those ears. 

Because my friend just emailed me saying that this was her favorite bread I've given her, I'll post a very basic formula:

Ingredients:

425 g AP flour

50 g whole wheat flour

375 g water 

5 g wheat germ

11 g salt

10 g sugar (in place of 5 g malt)

50 g 100% hydration white starter 

Steps:

1) Mix flour and water, and autolyse at room temperature for 6-12 hours. 

2) Incorporate all other ingredients using the pincer method. This should take about 4 minutes. You'll notice that because the dough was already so wet, incorporating that small amount of 100% hydration levain, salt, sugar, and wheat germ is a surprisingly smooth process. 

3) Stretch and fold vigorously every 30 minutes for 3 hours. The number of turns depends on how the dough feels! Anywhere from 1-4 turns (4-16 folds), each session, performing the turns until the whole mass of dough wants to lift from the container.  

4) Rest on the counter for 8-12 hours, until dough has increased 80% - 100%, but no more.

5) Retard for 2-24 hours.

6) Sprinkle flour over the top of the dough in the container, and allow the flour to coat the edges as you gently release it. Pour onto a floured surface and rest for 10 minutes.

7) Shape and place seam-side up in a a brotform of some kind, cover with plastic, and proof at room temperature for 1.5 hours. 

8) Place  the brotform in the freezer for 15 minutes (I really like this freezer trick for high-hydration doughs proofed at room temperature...I genuinely think it helps with ovenspring!).

9) Score and bake at 460 for 20 minutes with steam, 25 minutes without.

The recipient has confirmed the appropriateness of the loaf for egg-dipping. 

More soon!

--Hannah

DonD's picture
DonD

Baguettes a l'Ancienne with Cold Retardation

My first post in April of last year was about a side by side comparison of two of my favorite baguette formulations by Philippe Gosselin and Anis Bouabsa that David Snyder had previously published here on TFL. It was a tough choice to decide which one was better. The Gosselin baguette had an unequaled sweetness due to the overnight cold autolyse and the Bouabsa baguette had an incredibly complex taste due to the cold retardation. I was thinking why not have the best of both world so I started to experiment with combining the two formulations. After a couple of tries, I have succeeded in making a baguette that has the best attributes of both.

Yesterday, at the request of my wife, I made a batch of Baguettes a l'Ancienne with Cold Retardation for her monthly Book Club Party. The formulation follows David's transcription of Gosselin's Pain a l'Ancienne with a few slight variations. I have to clarify that this is not the formulation that Peter Reinhart and Daniel Leader had adapted from the original Gosselin technique but the true ice cold overnight autolyse method that David had published. After the overnight autolyse and the incorporation of the reserved water, yeast and salt the next morning, instead of bulk fermenting, shaping and baking the same day, I partially bulk ferment the dough at room temperature for 3 hours then retard it in the refrigerator for 18 hours before shaping and baking. I use a mix of 94% King Arthur Organic Select Artisan Flour (11.3% protein) and 6% Bob's Red Mill Organic Dark Rye Flour with 70% hydration. I also reduce the yeast amount by 2/3 because of the extended fermentation. Here are the results:

The crust has nice caramelization from the extra sugar produced by the long cold autolyse.

The crumb is open and soft with a slight chewiness. The taste is sweet and nutty with a complex aftertaste.

The crumb is medium thin with nice crunchiness and the crumb shows good translucent gelatinilization.

P.S. Following a number of requests, here is the entire formulation.

Formulation:

 Flour Mixture:

  • - 470 gms Unbleached AP Flour
  • - 30 gms Dark Rye Flour
  • - 300 gms Ice Cold Water

 Dough

  • - 10 gms Sea Salt
  • - 1/2 tsp Instant Yeast
  • - 50 gms Cold Water

 1- Mix flour blend and ice water w/ flat beater for 1 min. and refrigerate overnight.

 2- Add yeast and water and mix w/ flat beater for 3 mins or until all water has been incorporated. Add salt and beat for 3 mins or until dough slaps side of bowl.

 3- Let rest 15 mins and do S&F 4 times at 30 mins intervals (1 1/2 hrs total) and 2 more times at 45 mins  intervals (1 1/2 hrs total).

 4- Refrigerate for 24 hours.

 5- Divide dough in 3 and gently pre-shape in torpedo shape. Let rest 1 hr.

 6-Gently shape baguettes and proof on linen couche for 45 mins.

 7- One hour before baking, preheat oven to 490 degrees f w/ baking stone and cast iron skillet filled w/ lava rocks.

 8- Mist sides of oven then slash baguettes 4 times and transfer baguettes to baking stone in oven. Immediately pour 2/3 cup boiling water on lava rocks.

 9- Reduce oven temperature to 460 degrees f and bake 10 mins.Remove cast iron skillet, reduce temperature to 430 degrees F and bake for another 10 mins on convection mode.

 10- Remove baguettes from oven and let cool on wire rack.

Happy Baking!

Don

eatalready's picture
eatalready

Borodinsky Supreme -- Old School -- 100% Rye

Borodinsky bread is my childhood staple food.  We had it practically every day and never grew tired of it. The aroma, the well balanced sweet and sour, the substantial “meaty” crumb and thin glossy crust — should I go on listing all the wonderful things that put this loaf in the bread hall-of-fame?

Nowadays, it seems that every dark rye bread sprinkled with caraway or coriander seed claims the name Borodinsky.  I tried those sorry numbers from stores that carry Russian foods… Half of them are too dry and too fluffy, others are missing that signature tang that only wild sourdough can lend, others still, generously “enhanced” with chemicals resemble very little of the bread we used to eat instead of chocolate.

Over the years, I’ve seen scores of recipes of Borodinsky and, having tried more than enough of them, came to a grim conclusion that the true Borodinsky has become a myth, an urban legend, an elusive unicorn — many claim to have seen one, but none actually delivered the goods.  However, I knew that somewhere out there in the world of used books, there should be an old school formula from soviet bread factories, a so called GOST (Government Mandated Standards) recipe, or even an older one, which, if done right with good ingredients and a bit of careful planning, could yet bear the right results.

Making 100% Rye Borodinsky Supreme

I was right.  There are still some serious bread enthusiasts, both in Russia and otherwise, who dug up the old textbooks and technologies and rendered very good step-by-step instructions accompanied by beautiful photos explaining the process in modern terms and in great detail. Some even dared to adapt for available flour types in each country via many a trial (and, no doubt, some error).  Exciting!

Now to the business of the actual Borodinsky.  Majority of us who grew up with Borodinsky, consumed the part rye/part wheat bread.  It was delicious and we loved every bit of it.  There is, however, a version of Borodinsky of a higher grade, called “supreme”, which is 100% rye.  It blends whole rye and white rye flours in 85/15 proportion.  No wheat to be found. The formula of that bread is cited in the book by Plotnikov called 350 Varieties of Bread (4th Edition, 1940). Some of the formulas in the book existed before government standards were established (1939).  See, many GOST formulas were streamlined for mass production, sometimes simplified, cheapened, etc., while many of the pre-GOST formulas upheld the old school best traditional methods and standards of bread making, thus yielding superior (albeit more labor and time consuming) bread.

Making Red Rye Malt Flour

Sprouting organic rye berries to make red rye malt

Making Red Rye Malt Flour

Final product — red rye malted flour, milled moderately fine

When I stumbled upon the pre-GOST formula, and soon thereafter a detailed blog post with illustrations, I was beside myself. The only thing that stood between me and 100% rye Borodinsky loaf was red rye malt, more precisely, the lack of the above.  Now, that one I still can’t get over.  Possibly due to differences in product naming, and partly due to the fact that I can’t reliably get the true organic red rye malt anywhere in quantities less than 100 kilo (190 lbs), I finally decided to make red rye malt flour at home.  I entrusted myself to the detailed set of instructions I found on this site (THANK YOU!!!), and made my first batch the other day.

Making 100% Rye Borodinsky Supreme

I have to say that the aroma that permeated my house during the roasting process has brought back some serious childhood memories, and for that alone I will be forever grateful.  It also brought the first promise of true Borodinsky in the future, because it smelled exactly like our USSR bread shops filled with still warm unwrapped bread loaves.

Anyway, I am getting distracted here, as my bread is almost done baking and the entire house is now smelling unbearably beautiful.

The process is quite lengthy, but the actual hands-on time is minimal. Good ‘ole “good things come to those who wait” has never been more true (well maybe beat by the famous Pumpernickel). The most important thing here is to plan your pre-baking stages, so that they don’t disrupt your busy schedule.

My impression of the bread: for me it turned out a bit sweet and under-salted, even though I weighed everything quite precisely. The aroma and visual appeal were definitely there. The crumb and crust are both as I remember them. Thin, slightly crunchy crust and substantial, lightly moist, uniformly porous crumb. Color is about milk-chocolate shade. I feel I could have given it a bit more rise and it could be baked at a higher temperature — the top didn’t come out quite as dark as it should be, but the bread was at 180F throughout and baked uniformly through.  I will definitely try this recipe again with the above adjustments.  Overall, I would wholeheartedly recommend this formula, especially if you like your bread with a touch of sweetness.  It passed the ultimate test of schmaltz with cracklings and coarse salt, the sweetness of the loaf was just perfect for this.

References/Sources:

- Detailed blog post with superb step-by-step photo of rye+wheat Borodinsky 1939 version (in Russian) http://registrr.livejournal.com/16193.html

- Blog post with excellent photos  of 100% rye Borodinsky Supreme (in Russian) http://mariana-aga.livejournal.com/152489.html

Borodinsky Supreme

Makes a small loaf in a 1-1/2 quart (1.4 liter) pan.
From start to finish (with some steps going simultaneously) – 14-16 hrs

Step 1: Rye starter

Refresh your 100% hydration rye starter (6-8 hrs), you will need 125 g of it

Step 2: Scalding (5-6 hrs)

  • 200 g boiled water at 150F (65C)
  •   50 g whole rye flour
  •   25 g red rye malt flour

Step 3: Pre-ferment  (3-4 hrs or until doubles or more)

  • all of the scalded batch
  • 125 g refreshed starter
  • 125 g whole rye flour
  • 125 g water, room temperature

Step 4: Final dough — soft and very sticky (30-90 min bulk fermentation or until doubles or more)

  • all of the preferment
  • 200 g whole rye flour
  •   75 g white rye flour
  • 5 g salt
  • 30 g sugar
  • 25 g molasses (I used Blackstrap)
  • 2.5 g ground coriander (best if freshly ground for more intense flavor)
  • 0.5 g dry yeast activated in 75 g water and 3 g sugar (20 minutes)

Step 5: Shaping and final proofing (60 min or until tops the pan)

Grease 1.5 quart loaf pan. Pack the dough nicely into corners at first and then the rest. Smooth over with wet hands. Cover with plastic and let rise until reaches the top of the loaf pan.

Step 6: Flour washing (1 min)

Mix 1 tbsp AP flour with 50 ml water, shake well. Brush the bread right before setting into the oven. Sprinkle the top sparingly with whole coriander or caraway seed, if desire

Step 7: Baking (60 min)

Preheat to 400F (200C). Bake 60 minutes.

Step 8: Kissel (custard) washing (1 min)

Mix 1 tsp corn or potato starch with 150 ml water. Bring to a boil.  Brush the bread as soon as it finishes baking. Remove the loaf from pan and cool on rack.

Flour wash before baking and custard wash after baking are needed for creating that famous beautiful glossy, almost lacquered looking crust on top of the loaf, which also prevents the bread from going stale too fast.

Mebake's picture
Mebake

Rye Sourdough with Spelt and soaker

Last week, I had some left over whole spelt flour, some corn meal, and some semolina in addition to a ripe Rye starter. Therefore, I decided to put them all to use in a new recipe as follows:

UPDATE** INSTRUCTIONS:

Prepare the Rye sour by adding a tablespoon and a half of your active rye starter to the 250g water, and mix well to disperse. Add the Whole rye flour, mix well, and let stand for 8-12 hours at room temperature until the surface just starts to crack and collapse. To prepare the soaker, weigh all soaker ingredients into a bowl, and then weigh 160 grm of water, boil it, and add it to the soaker. Mix well, cover, and let stand until overnight, or when your rye sour is ready.

Next day, mix all ingredients at once, by hand or using a mixer for 5-10 minutes. The dough will remain relatively sticky, so try to resist adding any flour at this stage.Shape as a round and let ferment in an oiled bowl for 2 hours at preferably 78 F or 24-25C, folding it half way through at the 1 hour mark. By the end of bulk fermentation, the dough will have risen by 50-60%. scrape your dough onto a heavily floured surface, pat the dough even (Don't knead), divide into the desired dough pieces, and round each piece leaving them to rest for 15- 20 min, covered. Dust your basket with a mixture of all purpose flour and rice flour, and shape your dough and invert it smooth side down into the basket. The final fermentation will be only 45 minutes, but watch the dough NOT the clock. Preheat your oven at this stage with a stone in place to a 500F or 260C. 5 minutes before loading the bread, place your steaming dish filled with wet towels on the bottom of your oven.  When ready, invert the dough on baking paper lined peel/ board and close the oven immediately. Bake for 15 minutes with steam, and then remove the steaming dish and reduce the temperature to 400F for another 20-25 minutes. 

When the time is over, remove your bread from the oven. Wear oven mitts, and tap on the bottom of one loaf, It should  sound hollow. Furthermore, you may insert a thermal probe into the center of the loaf from the bottom, and the temperature should register 195-200F or 90-95C. If it doesn't, put it back in the oven for another 10 minutes. Cool the bread completely on a wire rack, prior to cutting. 


Due to the soaker, the aroma of this bread is really attractive. When cool, The crust was somewhat chewy, and the crumb slightly moist but not chewy. The flavor of this bread is earthy sweet and very pleasant. The crumb is close textured and compact due to all the whole grains, the bread might have benefited from extra lightness by increasing bread/all purpose flour.

I have eaten this bread thinly sliced with a spread of cheese, and it was fabulous. This bread keeps really well.


- Khalid


Susan's picture
Susan

Eric's Fav Rye

Eric's Fav RyeEric's Fav Rye

My first try

at Eric's favorite deli rye.

Eric's Rye CrumbEric's Rye Crumb

Smo's picture
Smo

The Easiest German-style Spelt Recipe, Ever

Well, that's the idea anyway.  I've been working on this one for years and didn't want to post it until I felt that I'd mastered it.  That came sooner than expected this year, when I switched to using pullman loaf pans and things got immediately easier.

The goal of this recipe is to be something that I can bake every week for the rest of my life, no matter how crazy things get.  So far, so good.  The recipe features:

  • No kneading
  • No shaping
  • No sourdough starter maintenance
  • Flexible rise time
  • Short ingredient list
  • Authentic German crust, crumb and taste

I studied abroad years ago in southwestern Germany, where Spelt bread (aka Dinkelbrot) is very popular. I was given a recipe for a no-knead, 100% whole grain sourdough spelt bread while I was there.  Over the last few years I've been trying to perfect the recipe by making it simpler, more full-proof, and easier to fit into a busy lifestyle.  The last batches I've made are the closest I've come to reproducing the Dinkelvollkornbrot from my favorite bakery in Stuttgart [1].

Begin by adding (per loaf) 600g of whole grain spelt flour, 15g salt and 3g guar gum [2] (optional, see notes) to a mixing bowl. EDIT: I now use 20g of ground flax seed per loaf in lieu of the guar gum). Take your sourdough starter out of the fridge and mix it in too. I don't measure the starter but it's usually about half a cup [3]. Add 600g of hot water (I run my tap until it's hot) to the bowl and mix until combined. If needed, add extra water to hydrate all the flour without resorting to kneading - I usually end up adding 50-100g extra. But I would start around 100% hydration and go from there.

Once the dough is mixed, take a cup or so of it and put it back in your sourdough starter jar. Put it straight back into the fridge. It'll ferment and be ready for your next bake. As long as you bake at least once a month, this is all the sourdough maintenance you'll need to do with this recipe, no need to feed your starter.

Now, cover with a towel and go to work. Or go to bed. Or, whatever. Just give the dough 8-15 hours to rise. The dough will be waiting for you any time within that time period. How long you wait will effect on the level of sourdough flavor in the final product, but the effect is minor and I worry more about my schedule than the flavor. Whenever it's convenient, move on to the next step.

After the long rise, the dough should have risen quite a bit (maybe close to double in volume).  Optionally add 35g of sunflower seeds and 35g of pumpkin seeds per loaf to the bowl [4]. Stir well and remove large air bubbles. This should only take 1-2 minutes, don't get too enthusiastic and start kneading.

Now grease your loaf pans (I use an oil mister, because it's easy and fast) and divide the dough between the pans. It should be far too wet to shape, so don't even try. Let it rise about an hour before putting it in the oven (with the lid on, if you're using a pullman pan).

This step is where the pullman loaf pans really come in handy, because they have a lid.  The tight-fitting lid results in more predictable oven spring, which gives you a much bigger margin for error when proofing the dough. I have yet to underproof or overproof a loaf when using these pans.  Even when I was sure I'd screwed up, the loaves turned out fine. With regular loaf pans I found that the optimal window of time to put them in the oven was very, very short. See notes for more on this, plus tips on using a regular pan with this recipe [5].

Once the bread has proofed, put it in a 420 degree oven. I then bake it for an hour, in my oven at home[6].  Take the bread out of the oven, place onto cooling racks, and wait for it to cool.  For best results, wait overnight before starting on the loaf.  Then slice thin and enjoy! The bread will last a long time - at least 10 days. It's great for open face sandwiches with cheese, cold cuts, or other spreads.  Or for PB&J (I may love German bread but I'm still American...). Or, you know . . . butter. Open face butter sandwiches. Is there anything better?

I've also made a version with white spelt flour, for making grilled cheese and BLTs. That one's a work in progress.  I'm going to try adding potato water to soften up the crust next time.  And I have yet to master the rye version as well.  But this whole wheat spelt version is good and consistent for me now.

Here are links to the pullman loaf pans that I'm using, on Amazon:

Affiliate link (for those who aren't familiar, gives the link poster, AKA me, a little kickback at no extra cost to the purchaser)

Non-affiliate link

They also make a 13" long version, which would be more economical if you're trying to maximize the amount of bread made per dollar spent on loaf pans.  But I like the shape of the 9" loaves better.

Notes:

[1] Hafendoerfer, for those who are curious. If you *ever* get the chance to go there, do it! It might be the best bakery in the entire country of Germany. Definitely the best in Stuttgart.

[2] The guar gum improves the texture when used in small quantities. Using much more than this will result in an unpleasant gummy, bouncy texture. The loaf will be fine without it, but won't hold together quite as well.  EDIT: I now use 20g of ground flax seed per loaf instead.  It works just as well as the guar gum, plus it's good for you!

[3] By having a long initial fermentation, there's no need to have an active starter. It'll have several hours to wake up and get going. I've used starter straight from the fridge that hadn't been fed in a month, and the bread rose just fine. Using hot water also helps kick-start the fermentation.

[4] I *highly* recommend adding the seeds, they do a lot for the texture and flavor. They also tone down the fluffiness of the bread and make the crumb more authentically German - I found that my bread was rising a bit too much without them. If you omit them, you may find that 600g flour makes a bit too much dough for a 4x4x9 pullman pan.

[5] With a regular pan, I found it really hard to figure out the ideal time to put the dough in the oven to get a good rise. Overproofing results in a lot of oven spring, but then the loaf collapses in the oven. Underproofing results in the crust rising above the crumb, and a cavity between the two. Or weird shapes bursting out of the top of the loaf.  I found the sweet spot between the two to be short and hard to catch.

There may be other solutions to this problem - adding steam to the oven might help. Or you could put a sheet pan on top of regular loaf pans and put a skillet on top for weight. But the pullman pans work for me and I like the size of the loaves they make.  I spent years trying to figure out the proofing stage of this recipe and I finally feel like I've figured it out, thanks to the new pans.

[6] If I'm using a new oven, I'll bake for 45 minutes, then remove the covers off of the pullman pans and stick a probe thermometer into the center of one loaf. I then continue baking until the center reaches 205-ish degrees Fahrenheit (I live at 7000 feet elevation, so I actually go to 195, but at sea level you'd want 205). Once I've figured out the oven I don't use the thermometer anymore and I just set a timer.


Pages