The Fresh Loaf

A Community of Amateur Bakers and Artisan Bread Enthusiasts.

Most bookmarked

Floydm's picture
Floydm

Hokkaido Milk Bread with Tangzhong

Every now and then you learn a new technique in the kitchen that really knocks your socks off.  Tangzhong is one of them.

Tangzhong

Tangzhong is the technique of heating a portion of the flour and liquid in your recipe to approximately 65C to make a paste (roux).  At this temperature the flour undergoes a change (gelatinizes?).  Adding this roux to your final dough makes a huge difference in the softness and fluffiness of your final dough.

It is really easy to do a tangzhong.  Take 1 cup of liquid (milk or water) to 1/3 cup flour, or a 5 to 1 liquid to solid ratio (so 250g liquid to 50g flour) and mix it together in a pan.  Heat the pan while stirring constantly.  Initially it will remain a liquid, but as you approach 65C it will undergo a change and thicken to an almost pudding like consistency.  

Once it is evenly thickened, remove from heat and allow to cool down some before making your final dough.  

Reportedly you can cover it and keep it in the fridge for a few days before using it, but I baked with it immediately.

Hokkaido Milk Bread

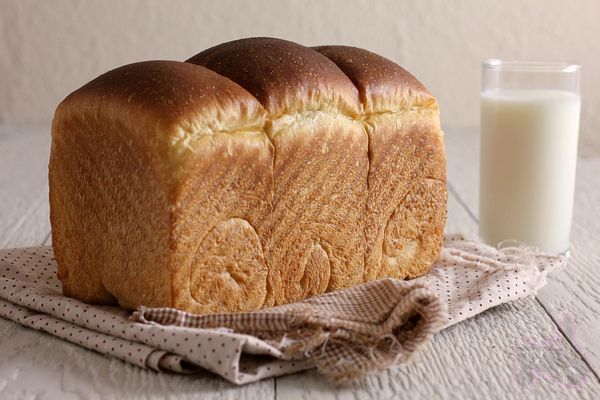
We have some great Asian bakeries in Vancouver and they all make some version of a Milk Bread.  Soft, slightly sweet, often baked in pullman pans so that the slices are perfectly square, sometimes containing raisins or a swirl of red beans or cream cheese, milk bread is the ultimate comfort food. It has a tenderness I've never reproduced at home until now.  I always figured it was a ton of oil or some other artificial conditioner that gave it that consistency, but now I think Tangzhong and heavy kneading were the secret. 

My recipe is a hybrid of a bunch of different recipes I found online and credit below.  What I offer here is a good place to start but certainly not an authoritative version or one I'd suggest is the best.  Still, it was awfully good.


Tangzhong


1/3 C all purpose flour

1 C liquids (I used 2/3 C water and 1/3 C milk)

Final Dough

800g (around 5 C) all purpose flour

1/2 C sugar

50g (1/2 C) milk powder

1/2 C half and half

3/4 C milk

2 eggs

4 T butter

4 t instant yeast

1 t salt

all of the tangzhong

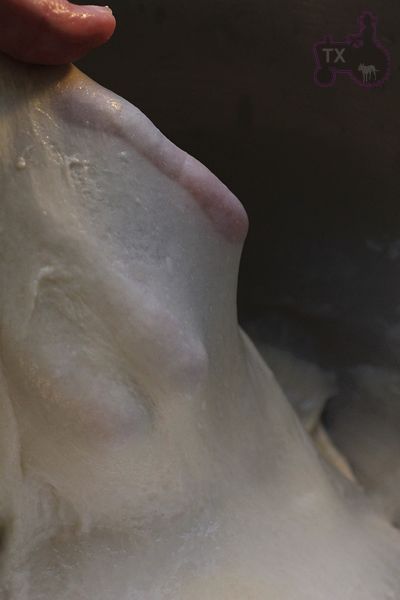
Combine all the ingredients in a bowl or standmixer and mix the heck out of it, 10 or 15 minutes, until the dough is silky and smooth.  I didn't initially add enough liquid so my dough was quite dry, but by adding more to the bowl and using wet hands I was able to work more milk and water into the dough.  

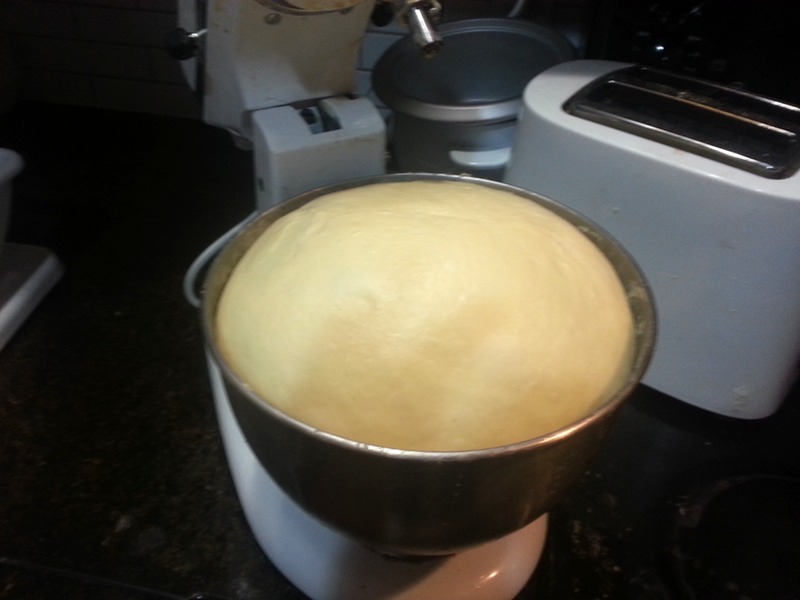
Once you've kneaded the dough well, cover the bowl and let the dough rise until doubled in size, roughly an hour.

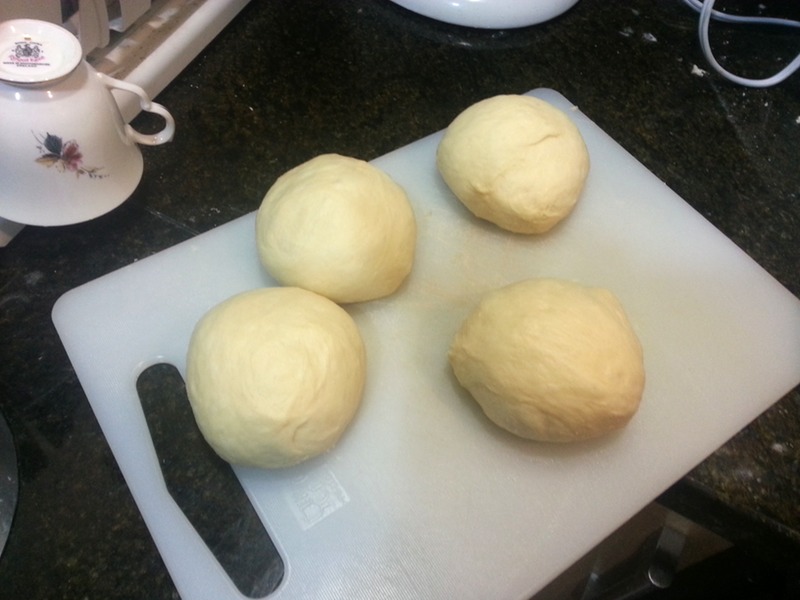
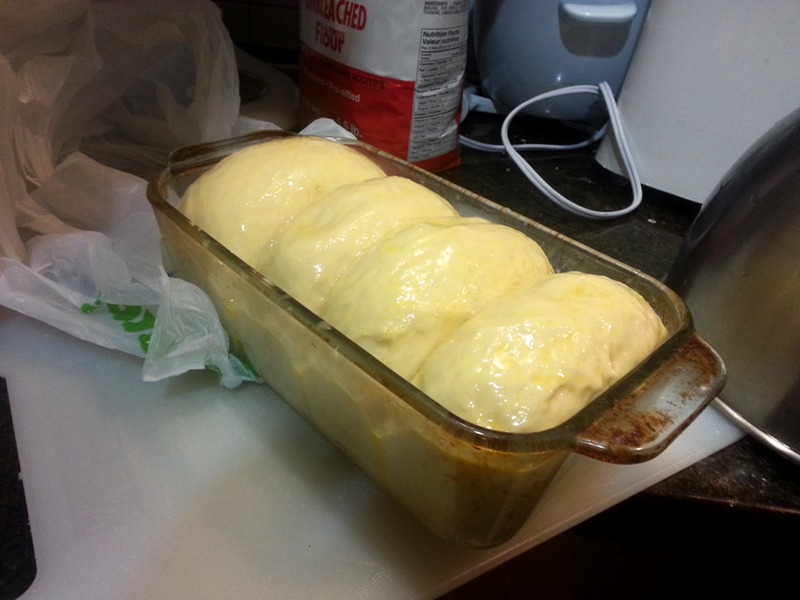
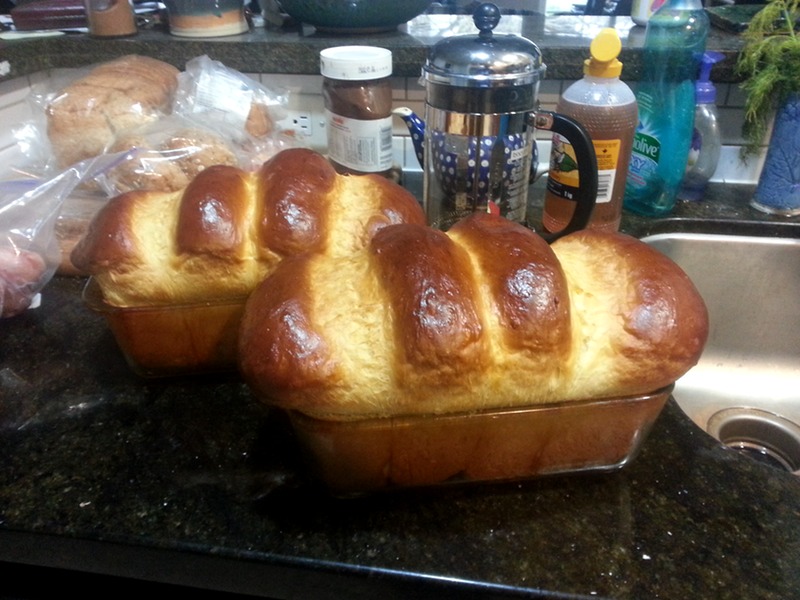
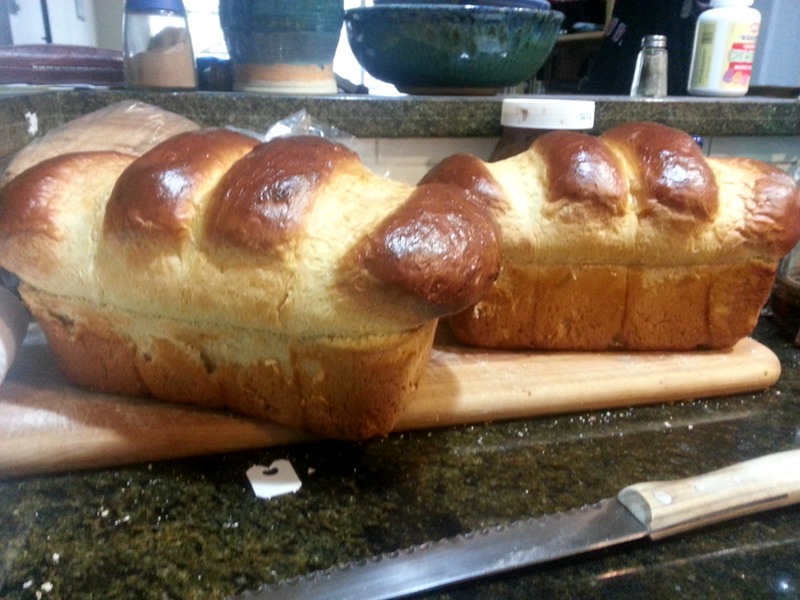
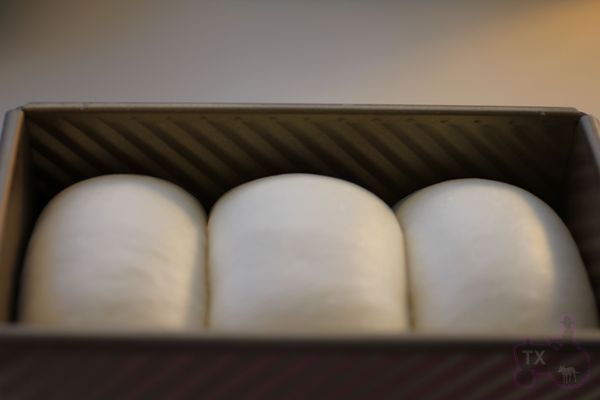
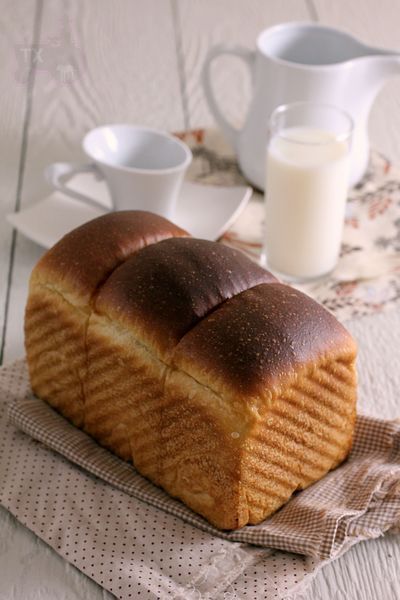
Divide the dough into smaller portions.  I divided it into 8 ~210g pieces, which I baked 4 to a pan in 2 pans.  As you can see, that was a bit much for the pans I have!  Next time I think I'll divide the dough into 12 pieces and bake it in the 3 pans. 

Cover the pans loosely and allow to rise for half an hour, then glaze with milk or an egg wash.

Heat the oven to 350F while letting the loaves rise another 15-30 minutes.  

Baking the loaves at 350F for approximately 40 minutes.  If they are browning too much, you can cover them loosely with foil.

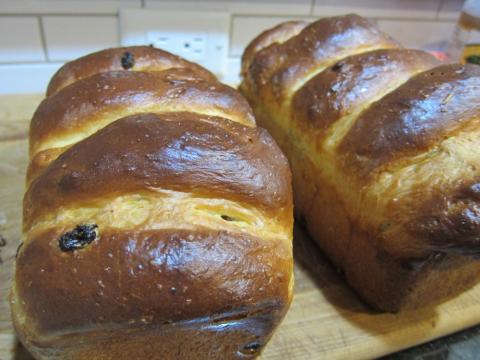
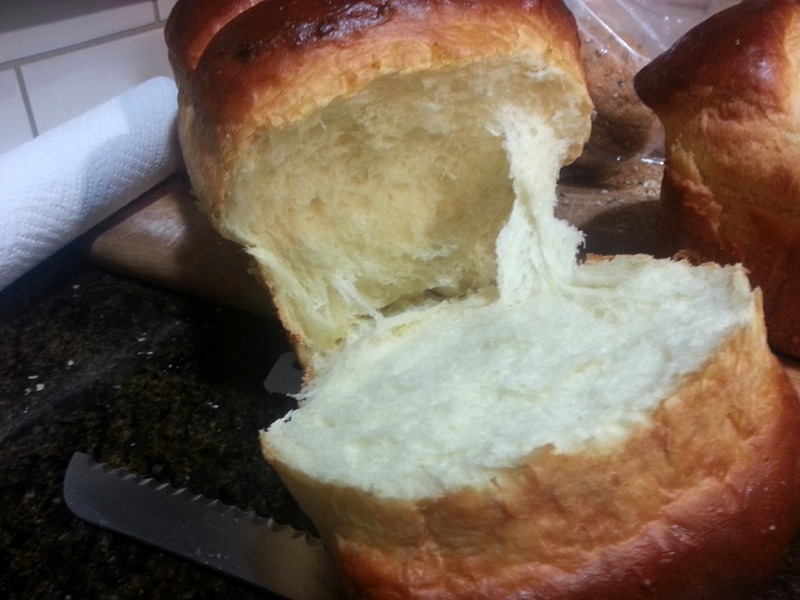
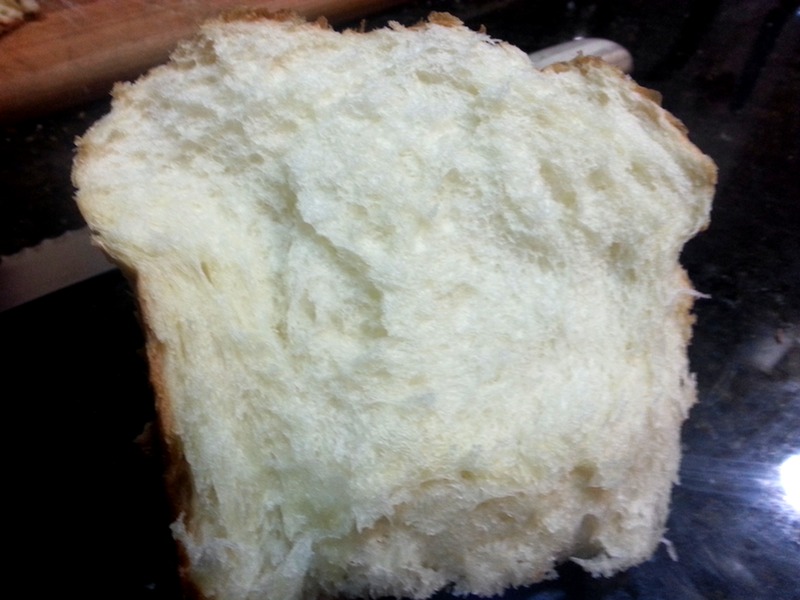
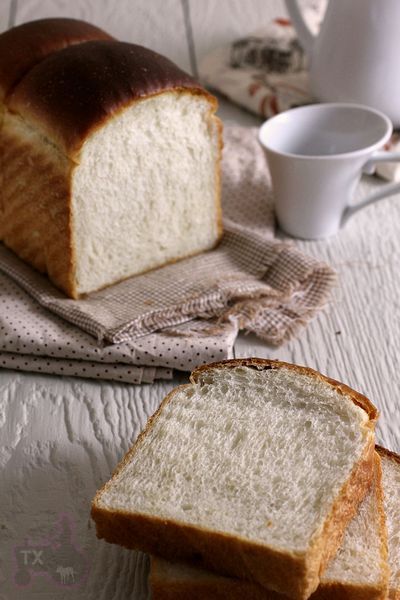
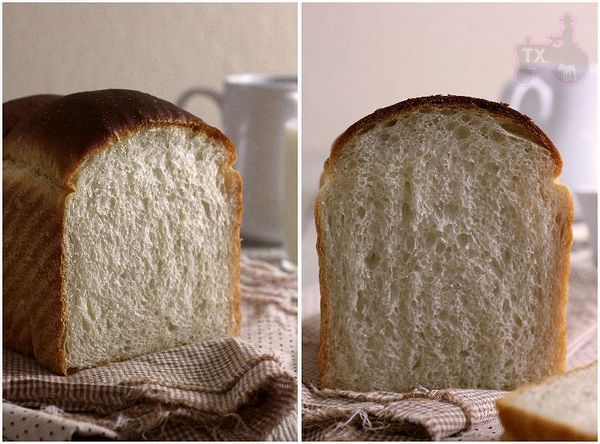
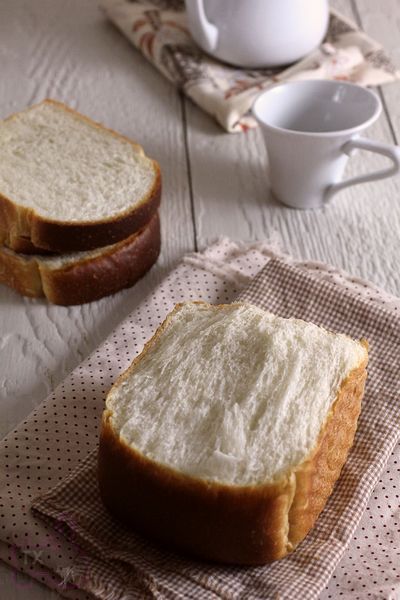
Look at that crumb!  Absolutely the softest, silkiest loaves I've ever made.

Further reading/discussion about Hokkaido Milk Bread and Tang Zhong:

Debra Wink's picture
Debra Wink

Lactic Acid Fermentation in Sourdough

A few years ago, I was asked to explain lactic acid fermentation in sourdough, and the difference between homo- and heterofermentation. Not an easy task, partly because I wasn't satisfied that I knew enough, or that I could reconcile what I was reading in bread-baking books with what I had learned in school. To sort it out, I had to dig deeper into the scientific literature. Answers are there in bits and pieces, although not in a context that is easy to make sense of. As I plugged away at deciphering current microbiology textbooks and scientific research, I started to see things in a new light. And so now, I want to share what I've learned with those who wish to know more.

First, I'd like to introduce the concept of a metabolic pathway. On paper, a metabolic pathway can be illustrated in a flow diagram that represents a sequence of enzyme-controlled chemical transformations. While the pathways in this discussion start with sugar and finish as various end-products, there are several intermediate compounds formed along the way as one thing is converted to the next. The names may be intimidating at first glance, but don't let them scare you. Knowing their chemical reactions and what all the compounds are is not as important here as understanding their overall purpose, which is to produce energy for the organism. Like all living things, microbes need energy to perform the tasks that enable them to live, grow and multiply.

Some pathways generate more energy than others. Through respiration, glucose and oxygen are turned into carbon dioxide and water via the Krebs cycle, also known as the tricarboxylic acid or TCA cycle. You may have seen it before if you've studied biology, because it's the same pathway we humans use. It is aerobic, meaning that oxygen (O2) is involved, and it generates far more energy than any fermentation pathway. Whenever oxygen is available, respiration is favored by facultative anaerobes like yeasts, because they will always take the path that generates the most energy under the prevailing conditions. For the most part though, bread dough is anaerobic (without oxygen), and fermentation is an alternative pathway that doesn't require oxygen. When yeasts ferment sugars, they produce alcohol (ethanol) in addition to carbon dioxide. Fermentation produces much less energy than respiration, but it allows microorganisms to carry on when no oxygen is available, or they lack the ability to respire as is the case with lactobacilli.

Bacterial fermentation is more varied than fermentation by yeast. Bacteria produce organic acids that contribute, for good and bad, to the quality of bread. Controlling acid balance and degree of sourness is something that artisan bakers strive to do, so it may be useful to understand where the acids come from and how their production can be influenced by things that are within the baker's control. In yeasted breads, acids come in small doses from naturally occurring bacteria present in flour and commercial yeast. (Fresh yeast generally has more bacterial inhabitants than dried, and whole grain flours more than refined.) In sourdough breads, acid-producing bacteria are supplied in much greater numbers from starter. There are many different species and strains of bacteria found in various types of starters, and because they produce lactic acid while fermenting sugar, they fall under the heading of Lactic Acid Bacteria (LAB).

Lactic acid bacteria common to sourdoughs include members of Leuconostoc, Pediococcus, Weissella and other genera. But by far, the most prevalent species belong to the very large and diverse genus, Lactobacillus. Based upon how they ferment sugars, lactic acid bacteria can be sorted into three categories. Please bear with me now, because while these terms may look impossibly long and technical, they are actually self-descriptive. Take homofermentative LAB for example. Homo-, meaning "all the same," refers to the end product of fermentation (by lactic acid bacteria), which is only, or "all" lactic acid. Heterofermentative then, means "different" or mixed end products. As lactic acid bacteria, heterofermentative LAB produce lactic acid, but they also produce carbon dioxide gas, alcohol or acetic acid as well. 

SUGAR STRUCTURE

As carbo-hydrates, sugars are made up of carbon (C) and water, which is composed of hydrogen (H) and oxygen (O). The hydrogen and oxygen atoms are arranged in various configurations around a chain of carbon atoms which form the structural backbone of the molecule. The carbon chain may be various lengths, but sugars common in bread fermentations are of the 5- and 6-carbon types, referred to generically as pentoses and hexoses, respectively. Glucose and fructose are examples of hexoses. Pentoses are sugars such as arabinose and xylose.

                                                                         
                              Glucose                    Fructose                  Arabinose                     Xylose

Pentoses and hexoses can exist in the chain form, or in a ring structure which forms when dissolved in water. Single sugars, or monosaccharides, are often linked together into larger carbohydrates of two or more units. Disaccharides, containing two sugars, are important in bread fermentations. Maltose, which is made up of two glucose molecules, is the free-form sugar most abundant in dough. Sucrose, another disaccharide consists of one glucose and one fructose.


                                  Glucose                                             Maltose    


                                 Fructose                                            Sucrose

-Sugars illustrated by Antonio Zamora. For a more complete explanation, with diagrams of starches and pentosans, please see his lesson, "Carbohydrates - Chemical Structure" at: http://www.scientificpsychic.com/fitness/carbohydrates.html

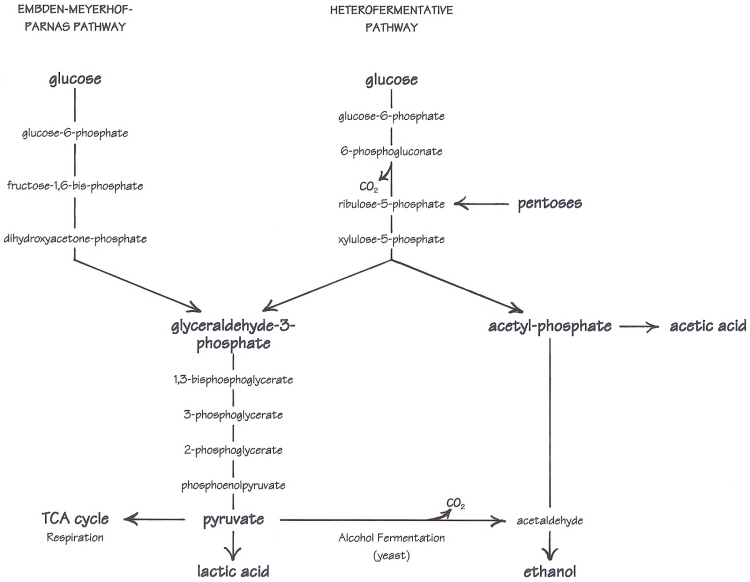
Sugars that can be fermented, and their end-products are variable from one species of LAB to the next. But the key lies in the structure of the sugar---particularly, the number of carbon atoms in the backbone of the molecule. Homofermentative LAB can only ferment 6-carbon sugars. In the homofermentative pathway, a hexose is processed and split into two identical 3-carbon pieces, which are passed down through the reaction sequence and transformed into lactic acid molecules. In contrast, heterolactic fermentation is based on 5-carbon sugars. Pentoses may be used directly, although more often, a hexose is cut down by removing one of its carbons. The extra carbon is cast off in the form of carbon dioxide gas, and the remaining 5-carbon molecule is split unequally into 3- and 2-carbon units. The 3-carbon piece is turned into lactic acid, while the 2-carbon piece will become either ethanol or acetic acid. Up to this point, heterolactic fermentation doesn't produce as much energy as homolactic, but it does give an advantage over homofermentative LAB, which cannot utilize pentose sugars.

Additional energy can be produced by turning the 2-carbon piece into acetic acid, but it requires the assistance of another substance. The term for this is co-metabolism, meaning that two substrates are used simultaneously---a hexose for its carbon backbone, and a co-substrate to facilitate the formation of acetic acid and generation of additional energy. The co-substrate can be one of a number of things including oxygen, citrate, malate, short chain aldehydes, oxidized glutathione, fructose and 5-carbon sugars. In the absence of co-substrates, the 2-carbon piece is turned to ethanol instead. Alternatively, when pentose sugars are fermented (used as the carbon source), acetic acid may be produced without the help of co-substrates.

Some lactobacilli can use oxygen as a co-substrate. Some cannot, and are inhibited by aerobic conditions. In any case, there is a small amount of oxygen in dough only at the beginning of fermentation, and generally not enough to affect acetic acid production to any extent. Likewise, citrate and malate aren't naturally present in significant amounts, and pentose utilization varies by species and strain as well as availability. While all these things may be used to the extent that they are present, it turns out that fructose is generally the one most available in bread dough. 


All of the pathways in this discussion are glycolytic pathways. Glycolysis is the conversion of glucose to pyruvate, which is the springboard to both respiration and alcohol fermentation in yeast, to lactic acid fermentation in LAB, and to many biosynthetic pathways (manufacture of compounds used in other life processes). Oxygen is not required, so glycolysis is especially important to microorganisms that ferment sugars, like the yeast and bacteria which grow in the anaerobic environment of sourdough.

Homofermentative lactobacilli share the same glycolytic pathway with yeasts---the Embden-Meyerhof-Parnas, or EMP pathway. But in contrast to alcohol fermentation, pyruvate is reduced to lactic acid. In either of the two pathways here, the sugars are split into smaller molecules---two identical 3-carbon units (glyceraldehyde-3-phosphate) in the EMP pathway, or a 3- and a 2-carbon unit in the heterofermentative pathway. The 3-carbon pieces all follow the same path to become pyruvate and then lactic acid, while the 2-carbon acetyl-phosphate on the other side of the heterofermentative pathway can become either ethanol or acetic acid.

Glucose is not the only sugar that can be utilized. With appropriate enzyme systems, other sugars can be converted into glucose or one of the intermediates in the pathway such as glucose-6-phosphate (or in the case of pentose sugars, ribulose-5-phosphate). The ability to use other sugars varies by species and strain. Most sourdough lactic acid bacteria ferment glucose preferentially, but Lactobacillus sanfranciscensis separates maltose into a glucose-1-phosphate and a glucose. The glucose-1-phosphate portion is converted to glucose-6-phosphate to enter the heterofermentative pathway, and glucose is excreted from the cell.

In addition to obligately hetero- and homofermentive, there is a third type of lactobacilli characterized as facultatively heterofermentive. These are lactobacilli that are not restricted to one pathway or the other, but can use both. Facultative heterofermenters switch back and forth between the homo- and heterofermentative pathways depending upon which sugars are available. In general, they ferment hexoses via the homofermentive route, and pentoses heterofermentively. Most will use the hexose sugars first, although some strains ferment pentoses preferentially. Many co-metabolize fructose with maltose through the heterofermentative pathway, but use the homofermentative pathway when only maltose is available.

To put all this technical information to practical use, we need to consider factors that influence LAB activity and pathway selection. The end products are determined by the species and available sugars, which for lean doughs, depend upon the flour and the activity of enzymes. Whole grain and high extraction flours can affect acidification in two ways. First, the higher mineral (ash) content serves as a natural buffer system, which allows bacteria to produce more acid before the pH drops low enough to slow their growth. And second, grains supply pentose sugars in the form of pentosans. Although rye flours are best-known for these, pentosans are also present in wheat and other grains. (But, because they occur in the outer layers of the kernel, they are largely removed along with enzymes and many other substances in the milling of refined flours.) Cereal enzymes act on pentosans to some degree, freeing pentose sugars like xylose and arabinose that heterofermenters may be able to use according to species and strain. Pentoses will increase acetic acid production if they can be fermented or co-metabolized, either one.

Acidification is also influenced by hydration and temperature. Contrary to popular belief, all three groups of sourdough lactobacilli prefer wetter doughs a bit on the warm side, many growing fastest at about 90ºF or a little higher. For the homofermentive species producing only lactic acid, increasing activity by raising the hydration and/or temperature will increase acid production. Decreasing activity by reducing hydration or by retarding will slow production. There is a direct relationship between activity and lactic acid. During heterofermentation, for each molecule of glucose consumed, one lactic acid is produced, along with one carbon dioxide (if a hexose is fermented), and either one ethanol or one acetic acid. But under wetter, warmer conditions, where sugars are metabolized more rapidly, the tendency is toward lactic acid and alcohol production in obligate heterofermenters, and all lactic acid (homofermentation) in the facultative heterofermenters. Lactic acid production is directly related to activity during heterofermentation just as in homofermentation, even if only half the rate.

At lower hydrations and temperatures (lower activity), more acetic acid is produced, but not because of temperature per se. Acetic acid production is influenced indirectly by temperature, in that it affects the kinds of sugars available. The fructose that drives acetic acid production, is liberated from fructose-containing substances in flour, largely through the enzyme activity of yeast. And, because lower temperatures are more suited to yeast growth than higher, more fructose is made available to the bacteria at lower temperatures. At the same time, the bacteria are growing and using maltose more slowly, so the demand for co-substrates goes down as the fructose supply goes up. The ratio of acetic acid to ethanol and lactic acid goes up, because a higher percentage of the maltose is being co-metabolized with fructose. Reducing hydration has a similar effect of slowing the bacteria more than yeast, which I believe is the real basis for increased acetic acid production in lean breads made with refined flours.

Contrary to myth, the species that grow in sourdough starters are not tied to geographic location, but rather to the traditional practices in the different regions. Several organisms go into the mix, but the environment created inside the starter from the combination of flour, temperature and maintenance routines is what determines which ones will thrive. In type I, or traditional sourdoughs (i.e., those maintained by continuous refreshment at room temperature), the obligately heterofermentive Lactobacillus sanfranciscensis is the species most frequently and consistently found---not just in San Francisco where it was first discovered, but all around the world. And so it deserves special attention.

Lactobacillus sanfranciscensis is fairly unique among the obligately heterofermentive lactobacilli, in that it ferments no pentose sugars. And unusual among lactic acid bacteria in general, because it prefers maltose over glucose. But it will co-metabolize fructose with maltose to produce acetic acid. L. sanfranciscensis converts maltose into one glucose-6-phosphate which enters the heterofermentative pathway, and a glucose which is excreted back into its surroundings. This is a good arrangement for common sourdough yeasts, since maltose is the most abundant sugar in wheat doughs, and some lack the ability to break it down for themselves. Yeasts and other bacteria that can ferment maltose, generally prefer glucose. And so by providing glucose to competing organisms, L. sanfranciscensis actually helps to conserve the maltose for itself---just one of the ways in which it gets along well with other sourdough microorganisms, and perhaps one of the reasons it is found so often.

Alternate pathways are a recurring theme in the microbial world, because microorganisms have less ability to control their environment or to leave when conditions become difficult. They sometimes have to switch gears to survive. In that effort, lactic acid bacteria will utilize whichever fermentation pathway that generates the most energy within their capabilities and resources. In order of preference, the hierarchy seems to be heterofermentation with co-substrates (forming lactic acid and acetic acid), followed by homofermentation (all lactic acid) and heterofermentation without co-substrates (lactic acid and ethanol).

While traditional sourdough starters usually support one or more strains of Lactobacillus sanfranciscensis, it is often found in combination with the facultatively heterofermentive Lactobacillus plantarum, many strains of which can either ferment or co-metabolize at least one pentose sugar. Various other obligate and facultatively heterolactic acid bacteria are also common (obligately homofermentive LAB are only transient in the startup process and do not persist in established type I starters). Sourdough starters are sensitive ecosystems with complex associations of lactic acid bacteria, and combinations can be highly variable from one starter to the next. Lactic acid fermentation is as complex and varied as the organisms involved, and so sourdough processes may need to be optimized on a starter by starter basis.
- Debra Wink  


Bibliography

Arendt, Elke K., Liam A.M. Ryan, and Fabio Dal Bello. 2007. Impact of sourdough on the texture of bread. Food Microbiology 24: 165-174.

De Vuyst, Luc and Marc Vancanneyt. 2007. Biodiversity and identification of sourdough lactic acid bacteria. Food Microbiology 24:120-127.

Doyle, Michael P., Larry R. Beuchat, and Thomas J. Montville. 2001. Microbial physiology and metabolism, p. 19-22; Lactose metabolism, p. 653-655. Food Microbiology Fundamentals and Frontiers, 2nd ed. American Society for Microbiology Press, Washington, DC.

Gänzle, Michael G., Michaela Ehmann, and Walter P. Hammes. 1998. Modeling of growth of Lactobacillus sanfranciscensis and Candida milleri in response to process parameters of sourdough fermentation. Applied and Environmental Microbiology 64:2616-2623.

Gänzle, Michael G., Nicoline Vermeulen, Rudi F. Vogel. 2007. Carbohydrate, peptide and lipid metabolism of lactic acid bacteria in sourdough. Food Microbiology 24:128-138.

Gobbetti, M., P. Lavermicocca, F. Minervini, M. De Angelis, and A. Corsetti. 2000. Arabinose fermentation by Lactobacillus plantarum in sourdough with added pentosans and "alpha-L-arabinofuranosidase: a tool to increase the production of acetic acid. Journal of Applied Microbiology 88:317-324.

Holt, John G., Noel R. Krieg, Peter H. A. Sneath, James T. Staley, and Stanley T. Williams. 2000. Regular, nonsporing gram-positive rods, p. 566. Bergey's Manual of Determinative Bacteriology, 9th ed. Lippincott Williams & Wilkins, Philadelphia, PA.

Katina, Kati. 2005. Sourdough: a tool for the improved flavour, texture and shelf-life of wheat bread. VTT Technical Research Centre of Finland.

Ng, Henry. 1972. Factors affecting organic acid production by sourdough (San Francisco) bacteria. Applied Microbiology 23:1153-1159.

Paramithiotis, Spiros, Aggeliki Sofou, Effie Tsakalidou, and George Kalantzopoulos. 2007. Flour carbohydrate catabolism and metabolite production by sourdough lactic acid bacteria. World J Microbiol Biotechnol 23:1417-1423.

Wing, Daniel, and Alan Scott. 1999. Baker's Resource: Sourdough Microbiology, p. 230. The Bread Builders. Chelsea Green Publishing Company, White River Junction, VT.

This article was first published in Bread Lines, a publication of The Bread Bakers Guild of America. Vol. 15, Issue 4, Dec. 2007.


Revised:  November 4, 2009

txfarmer's picture
txfarmer

Index for My Blog Entries - will keep updating and linking to it

My favorite 36 hours Sourdough baguette and its many variations:


Other baguettes:


Sourdough breads can be very soft and fluffy:

100% whole wheat breads can be very soft and fluffy too, SD or not:


My obsession for laminated dough:


Other stuff made with starters:


Other non-sourdough stuff:

Debra Wink's picture
Debra Wink

The Pineapple Juice Solution, Part 2

Pineapple juice is a simple solution to a problem that many people encounter while trying to start a sourdough seed culture from scratch. Oftentimes, a new culture will appear to start off very strong, only to die a day or two later. The early expansion is caused by a prolific gas-producing bacterium which many mistake for yeast. Pineapple juice can be added to flour instead of water at the beginning, to insure against unwanted bacteria and the problems they leave in their wake. It doesn't change the end result, but it does seem to keep things on the track to finish on time. Part 1 tells the story of where the pineapple remedy comes from and how it was conceived. The rest of the story probes deeper into how it all works. But first, here is a recap of the key patterns revealed by notes and data collected during experimental trials:

  • When starters expanded significantly on the second day, a period of stillness followed, and the appearance of yeast was delayed.
  • Gas-producing bacteria stopped growing when the pH dropped to 4.5, but yeast growth didn't begin until the pH fell to around 3.5, accounting for the period of stillness.
  • Lowering the pH in the initial mixture, by adding ascorbic acid or by replacing the water with pineapple juice, kept gas-producing bacteria from growing and brought about a more timely and predictable result.

But it wasn't enough just to find a fix. The problem-solving efforts of my team were creating a buzz which we hadn't anticipated and this thing, like the seed cultures we were creating, was taking on a life of its own. Some were jumping to premature conclusions, and speculation seemed to be spreading as fact. It made me very uncomfortable, because I'd rather be dispelling myths than adding to them. I wanted to find some real answers, and find them fast, so I started making phone calls. I found two local labs that could help me out. One had the capability to identify leuconostocs, and the other to detect lactobacilli and other bacteria of interest. I submitted samples of a day two starter during the big expansion. Both labs found that there were three organisms growing. But there were no lactobacilli or yeasts found, which supports what I observed time after time on microscopic examination. My gas-producer was identified as Leuconostoc citreum. At the time, I couldn't find much information specific to this organism, although it seems to share many characteristics with other Leuconostoc species found in foods. Most will not grow below pH 4.8, and this one doesn't appear to be an exception.

Until recently, I could only theorize that the Leuconostoc may actively hinder the process, because the pattern supports it, and because it's not uncommon for microorganisms to produce substances which inhibit competitors. But in updating this article, a new search of the scientific literature finally uncovered the piece of the puzzle I was looking for. Who would have thought the answers would be found in kimchi and sake? It turns out that kimchi fermentation has a lot in common with sourdough development, and mirrors the early days of the seed culture process. Leuconostoc citreum plays a dominant role in the early and mid-phases of fermentation where it causes a slow and prolonged drop in pH, and retards the growth of other lactic acid bacteria.[1] In a study on sake fermentation, Leuconostoc citreum was found to produce bacteriocins (bacterially-produced antibiotic proteins) which inhibit the growth of similar lactic acid bacteria (i.e., lactobacilli).[2] It appears that these bacteriocins linger for a time even after the organism stops growing, although their effect is diluted through successive feeding. A dosage effect would explain nicely the apparent relationship between the vigor with which this bacterium flairs up initially, and the number of days the starter remains still afterward. The higher the rise, the longer it seems to take to recover.

In addition to Leuconostoc citreum, there was also a large amount of Aerococcus viridans. The first lab I visited found Leuconostoc to be in the greatest quantity, but Aerococcus was multiplying so fast that it soon passed the Leuconostoc in number. That is important, and could very well have contributed to the delayed progress. Even though Aerococcus doesn't produce gas, and so was not responsible for any of the expansion, it is not much of an acid producer either. So while it was using up a large share of the available sugars, it was not helping the pH to fall. Aerococcus is an occasional spoilage organism in unpasteurized milk, which is the extent of information that I have found on its involvement in foods. Its lower limit is not given in my reference books, but since pineapple juice seems to keep it at bay, I suspect that it must be in the same ballpark with leuconostocs. I'm still not sure how big a part each of these organisms plays in slowing the progress of a seed culture, but lowering the pH at the outset seems to be a blanket fix.

I mentioned in Part 1 that some of the bacteria were flipping, twirling and zipping around under the microscope. Those were Enterobacter cloacae. Enterobacter produces gas, but since it was present in only a scant amount compared to the others, I think it safe to say that the Leuconostoc was responsible for the majority of it. However, Enterobacter contributes to an unpleasant odor, as do Aerococcus and Leuconostoc. Because some people report a very stinky smell and others not as much, I'd have to say that even among starters that grow Leuconostoc, not all necessarily have the same combination of bacteria. There are others that can grow as well. Results vary from flour to flour and year to year, because the number and species of microorganisms are influenced by conditions relating to weather and grain crop production.[3] I wish I could have all the organisms identified at every stage, but there aren't any laboratories in my area that are equipped to identify wild yeasts or sourdough bacteria. And even if they could, the cost would be prohibitive. I was fortunate to be in a position to have two of the organisms identified as a professional courtesy.

With the additional information, and having watched the drama unfold under the microscope, I started seeing the seed culture process not as good guys out-competing bad or gradually increasing in number, but as a natural succession of microorganisms that pave the way for "the good guys" in the way that they transform their environment. There are bacteria in flour that prefer the more neutral pH of freshly mixed flour and water (like Leuconostoc and company). They are the first to start growing, some producing acids as by-products. This lowers the pH, and other bacteria begin to grow; they produce their acids, lowering the pH even more. It soon becomes too acidic for the first batch and they stop growing. One group slows down and drops out as the next is picking up and taking off. Each has its time, and each lays the groundwork for the next. It's much more like a relay than a microbial free-for-all. The baton is passed to the next group in line as conditions become suitable for them. The acidity increases a bit more with each pass, and the more acid-loving bacteria can eventually take over. The appearance of yeast seems to be tied in some way to low pH---maybe directly, maybe indirectly, but the correlation shows that it isn't random in the way that "catching" yeast from the air would be, or their gradually increasing in number.

In the late fall/early winter of 2004, I was coaching a group of women on Cookstalk, Taunton's Fine Cooking forum, and I noticed something else. My starters sort of liquefy the day before yeast starts to grow. Gluten disappears, which shows the work of proteolytic enzymes. At first I thought it signaled the appearance of lactobacilli and their proteases. But now I think it was simply an indicator that the pH had dropped low enough to activate aspartic proteinases, pH-sensitive enzymes abundant in wheat.[4] Because I prefer to seed a new culture with whole grain flour for at least three days, there are more cereal enzymes present than in a starter fed with white flour (most of them are removed with bran in the milling process). But either way, it is a good sign of Lactobacillus activity, whether by production of bacterial proteases or by the organism's effect on pH and activation of cereal proteases.

The starters were developing a little more slowly this time around, which inspired me to describe the different stages that a new culture transitions through, rather than try and pin it to a time frame. Room temperature is different from one kitchen to the next, as well as season to season. Sometimes rye flour finishes faster, sometimes whole wheat is faster. Sometimes a culture doesn't start producing its own acid for the first two days instead of one. Because this process involves variable live cultures under variable conditions, it doesn't always work in a prescribed number of days, but it follows a predictable pattern. While this has been a discovery process for me, it is not a new discovery:

"There has been nice work done in Rudi Vogel's lab on the microflora of a freshly started sourdough: first, there are enterobacteria (Escherichia coli, Salmonella, Enterobacter), highly undesirable organisms that stink terribly. Then there are homofermentative lactobacilli (good lactic acid producers, but they don't produce gas or acetic acid), then acid-tolerant, heterofermentative lactobacilli that make lactic and acetic acid, as well as CO2. I think this took about forty-eight hours at 30ºC in Vogel's study. The stink at the beginning does not matter as the organisms will be diluted out or die eventually. No L. sanfranciscensis appears by forty-eight hours, though: these will occur only after repeated refreshments. Peter Stolz told me that it takes about two weeks of repeated inoculations to get a good 'sanfranciscensis' sourdough."[5]

That paragraph didn't have any special significance for me until I had gotten to this point. But when I read it again, I had one of those aha moments. Not only did this describe a succession, but it filled in some of the blanks, and I could see clearly how all these microorganisms related to the four phases I had defined. Here is the updated version marrying the two. You don't need a microscope for this, because there are outward signs which serve as useful indicators of progress.

The First Phase:
For the first day or so, nothing really happens that is detectable to the human senses. It doesn't taste any tangier or develop bubbles. It remains looking much the same as when it was mixed, except a little lighter in color if an acid was used, and a little darker if not. While nothing appears to be happening, the first wave of bacteria (determined by pH and the microflora in the flour) are waking up, sensing their new environment and preparing to grow. This phase usually lasts about one day, sometimes two.

The Second Phase:
The starter will begin producing its own acid and develop a tangy taste (although it might be difficult to distinguish from pineapple juice). Lactic acid bacteria are actively growing at this point. When using only water, this phase represents two waves of microbes---first Leuconostoc and associates, followed by homofermentative lactobacilli and possibly other lactic acid bacteria. By controlling the pH, you can by-pass the leuconostocs and other "highly undesirable organisms that stink terribly," and skip to the second wave. It will get bubbly and expand only if the pH is not low enough to prevent growth of gassy bacteria, otherwise there won't be much to see. There probably won't be much gluten degradation, and it may smell a little different, but it shouldn't smell particularly foul unless started with plain water. This phase can last one to three days or more. If it is going to get hung up anywhere, this is the place it usually happens, especially if it is put on a white flour diet too soon. If after three days in this phase, it still doesn't become more sour and show signs of progress, the best thing to do is switch back to whole grain flour. Whole grain has a much higher microbial count to re-seed the culture and get it moving again. If that doesn't do it, skip a feeding or two to allow the acidity to build.

The Third Phase:
The starter will become very tart like lemon juice---an indication of more acid production by more acid-tolerant bacteria. The gluten may disappear and tiny bubbles become more noticeable. These are signs that heterofermentative lactobacilli have picked up the baton. Once a starter becomes really sour, it usually transitions into phase four within a day or two. Note that lactic acid doesn't have much aroma, and so smell is not a reliable way to judge the level of sourness. If it gets stuck here for 48 hours or more, make sure there's still enough whole grain in the mix and give it more time between refreshments.

The Fourth Phase:
Yeast start to grow and populate the starter relatively quickly at this point. It will expand with gas bubbles all over and begin to take on the yeasty smell of bread or beer.

This pattern suggests that wild yeasts are activated by low pH. Or perhaps the activator is something else produced by lactobacilli, but it happens predictably at this point for me, as long as the whole grain flour has not been diluted out. There may be some variation among wild yeasts as to the exact pH or activating substance. I have been unable to find the answer in scientific literature, and my contact at Lallemand did not know. I have only found studies done with cultivated strains of Saccharomyces cerevisiae, which don't seem to require much more than a fermentable sugar (and may explain why seed cultures take off much quicker in a bakery environment where baker's yeast is everywhere). The most useful information I have found on the subject is this, about microbial spores in general:

"Although spores are metabolically dormant and can remain in this state for many years, if given the proper stimulus they can return to active metabolism within minutes through the process of spore germination. A spore population will often initiate germination more rapidly and completely if activated prior to addition of a germinant. However, the requirement for activation varies widely among spores of different species. A number of agents cause spore activation, including low pH and many chemicals... The initiation of spore germination in different species can be triggered by a wide variety of compounds, including nucleosides, amino acids, sugars, salts, DPA, and long-chain alkylamines, although within a species the requirements are more specific. The precise mechanism whereby these compounds trigger spore germination is not clear."[6]

What this means is that for dormant cells to return to active growth (germinate), they need to break dormancy (activate) which is initiated by different things for different species. In the case of these wild sourdough yeasts, if all they needed were food or oxygen, which are there from the get-go, then they would start growing immediately. The fact that they don't, is probably why many people think they need to be caught from the air, or that large quantities of flour must be used to round up enough of them. There are enough dormant cells present even in relatively small quantities of whole grain flour, but it's like a game of Simon Says. You can try to coax them into growing, with food and all the things you may fancy to be good for actively growing yeast. But they're not active. They are dormant, and will remain so until they receive the right message from their surroundings. Compare this to the plant seed that sits in soil all winter long, waiting until spring to sprout, when conditions are most favorable. Is it a survival mechanism? I don't know, but waiting for the pH to drop does increase the likelihood that the yeast will wake up in the company of lactobacilli, with which they seem to share a complex and mutually beneficial relationship. It is also important to point out here that active sourdough yeasts thrive in a much wider pH range than what appears to be required for activation of dormant cells. The point to keep in mind is that active and dormant cells are physiologically and metabolically different, and so their needs are different.

This pattern of growth is not unique to the formula in the Bread Baker's Apprentice. I have seen the same progression, in whole or in part, with all the starter formulas I've tried. And it doesn't really matter how much flour you start with. In fact this can be done with very small quantities of flour. All else being equal, it proceeds just as fast with a teaspoon as it does with a pound. Procedures that call for two or three feedings per day, or large refreshments before yeast are active, can actually get in the way of the process. Overfeeding unnecessarily dilutes the acid, which slows the drop in pH, and keeps it from moving through the succession of microorganisms in the timeliest manner. But while it can take up to two weeks or more this way, with Mother Nature as the driving force, things do fall in line eventually. It's just a question of when. Three to five days is about all it really takes to reach the yeast activation stage at average room temperature, somewhat longer if Leuconostoc and associates grow. The strategy is quite different from reviving a neglected starter, which is likely to have an overabundance of acid, and a large population of yeast and sourdough bacteria, however sluggish they may be.

So, what can we do instead to facilitate the process? Start by providing conditions for the first two to three days which are favorable to lactic acid bacteria. A warm spot if you can easily manage one (but not too much higher than 80ºF), and a reasonably high hydration (at least 100%). Use pineapple juice if you like, to bypass the first round of bacteria. (Or use water if you prefer, and don't mind the odors and delay.) Feed with whole grain flour until yeast are actively growing, not for the wider spectrum of sugars it may offer, but for its higher numbers of yeast and lactic acid bacteria to seed each phase in its turn. Don't feed too much or too frequently, so as to allow the acids to accumulate and the pH to fall more rapidly. The ideal feeding quantity and frequency would depend on the temperature, hydration, and how fast the pH is falling. However, I usually recommend once a day at room temperature, simply because it is the easiest to manage, it works, and the daily manipulation helps to keep mold from getting started. Mold is the biggest stumbling block for procedures in which a young mixture is allowed to sit idle for two or three days at a time. Turning surface mold spores into the center by re-kneading or stirring and scraping down the sides daily, is the best way to get around it. Mold is not inhibited by low pH or pineapple juice, and anti-mold properties don't fully develop until sourdough is well established.

While you don't actually need a formula to do this, no article on making sourdough starter would be complete without one. This procedure was designed with simplicity in mind, to be efficient, effective, and to minimize waste. It was developed with the participation of four willing and very patient women whom I worked with online---DJ Anderson, Karen Rolfe, Deanna Schneider and the still-anonymous 'lorian,' whose plea for help is what renewed the quest to find a better way. I learned a great deal from the feedback they and others gave me as we worked out the kinks, and this formula is a tribute to them.

There is nothing magic about the two tablespoons of measure used throughout the first three days. Equal weights didn't provide a high enough ratio of acid to flour to suit me, and equal volumes did. Two tablespoons is enough to mix easily without being overly wasteful (and just happens to be the volume of an eighth-cup coffee scoop, which is what I kept on the counter next to the flour and seed culture for quick, easy feeding). If you insist on weighing, make it about 15 gm flour and 30 gm juice. These first few days don't really benefit from being particularly fussy with odd or precise measuring, so make it easy on yourself. Keep it simple, and let Mother Nature do the rest.

Day 1: mix...
2 tablespoons whole grain flour* (wheat or rye)
2 tablespoons pineapple juice, orange juice, or apple cider

Day 2: add...
2 tablespoons whole grain flour*
2 tablespoons juice or cider

Day 3: add...
2 tablespoons whole grain flour*
2 tablespoons juice or cider

Day 4: (and once daily until it starts to expand and smell yeasty), mix . . .
2 oz. of the starter (1/4 cup after stirring down -- discard the rest)
1 oz. whole grain flour* (scant 1/4 cup)
1 oz. water (2 tablespoons)

* Organic is not a requirement, nor does it need to be freshly ground.

On average, yeast begin to grow on day 3 or 4 in the warmer months, and on day 4 or 5 during colder times of the year, but results vary by circumstance. Feed once a day, taking care not to leave mold-promoting residue clinging to the sides or lid of your bowl or container, and refer back to the different phases to track progress---particularly if it gets stuck in second phase or shows no progress for 3 or more days. Once you have yeast growing (but not before), you can and should step up the feeding to two or three times a day, and/or give it bigger refreshments. Before yeast, don't feed too much; after yeast, don't feed too little. You can feed the starter/seed culture whatever you would like at this point. White flour, either bread or a strong unbleached all-purpose like King Arthur or a Canadian brand will turn it into a general-purpose white sourdough starter. Feed it rye flour if you want a rye sour, or whole wheat, if you want to make 100% whole wheat breads. If you're new to sourdough, a white starter is the best place to start.

This is the point at which I generally defer to the sourdough experts. There are several good books on sourdough which address the topic of starter maintenance and how to use it in bread. There are many different approaches. Just keep in mind that the first days of the seed culture process have nothing to do with developing flavor or even fostering the most desirable species. The object is simply to move through the succession and get the starter up and running. The fine-tuning begins there. Once yeast are growing well, choose the hydration, temperature and feeding routine that suits you, and the populations will shift in response to the flour and conditions that you set up for maintenance.

One more thing I have found is that with regular feeding at room temperature, new starters seem to improve and get more fragrant right around the two week mark. Maybe this coincides with the appearance of Lactobacillus sanfranciscensis mentioned previously, or another highly adapted sourdough species. A Fifth Phase, and beyond? Obviously, there is still more to learn.   -Debra Wink

References

1. Choi, In-Kwon, Seok-Ho  Jung, Bong-Joon Kim, Sae-Young Park, Jeongho Kim, and Hong-Ui Han. 2003. Novel Leuconostoc citreum starter culture system for the fermentation of kimchi, a fermented cabbage product. Antonie van Leeuwenhoek  84:247-253.

2. Kurose, N., T. Asano, S. Kawakita, and S. Tarumi. 2004. Isolation and characterization of psychotrophic Leuconostoc citreum isolated from rice koji. Seibutsu-kogaku Kaishi 82:183-190.

3. Doyle, Michael P., Larry R. Beuchat, and Thomas J. Montville. 2001. Fruits, Vegetables, and Grains, p. 135. Food Microbiology Fundamentals and Frontiers, 2nd ed. American Society for Microbiology Press, Washington, DC.

4. Katina, Kati. 2005. Sourdough: a tool for the improved flavour, texture and shelf-life of wheat bread, p. 23.VTT Technical Research Centre of Finland.

5. Wing, Daniel, and Alan Scott. 1999. Baker's Resource: Sourdough Microbiology, p. 231. The bread Builders. Chelsea Green Publishing Company, White River Junction, VT.

6. Doyle, Michael P., Larry R. Beuchat, and Thomas J. Montville. 2001. Spores and Their Significance, p. 50. Food Microbiology Fundamentals and Frontiers, 2nd ed. American Society for Microbiology Press, Washington, DC.

7. Arendt, Elke K., Liam A.M. Ryan, and Fabio Dal Bello. 2007. Impact of sourdough on the texture of bread. Food Microbiology 24:165-174.

------------------------

This article was first published in Bread Lines, a publication of The Bread Bakers Guild of America.
Vol. 16, Issue 2, June 2008.

Related Links:
  The Pineapple Juice Solution, Part 1 | The Fresh Loaf
  Lactic Acid Fermentation in Sourdough | The Fresh Loaf 
  Basic Procedure for Making Sourdough Starter | Cooks Talk

txfarmer's picture
txfarmer

Extremely soft sourdough sandwich bread - the most shreddble, soft, velvety ever!


I have posted about how to make very soft, very fluffy, yet still bouncy sandwich breads with lots of flavor(see here). The key isn't any gimmick or special ingredient, it's intensive kneading, a full long bulk rise, and proper shaping. I have posted the windowpane picture in the earlier post, but still got some questions about it. Here I will try to describle how the dough would progress during intensive kneading:

1. Dough starts to come together, but if you pull a piece, the dough would easily tear, won't form windowpane.

2. Keep kneading, the windowpane gradually starts to form, but it's thick, and won't extend very far. If you poke and get a hole, the edge is rough.

3. keep kneading, the windowpane becomes very extensible. The windowpane is thin but very very tough to break. If you poke a hole (I actually have to use my nail), the edge is smooth.

4. Keep kneading, the windowpane becomes even thinner, more transparent, but it becomes more delicate, easier to poke holes. The edge of the hole is still smooth.

5. Keep kneading, the dough starts to break down into a puddle of mud.


Stage 3 is the "golden point" for creating sandwiches with the best texture, and highest volume. 4 is a little over, your bread will still be high and nice, bu the texture would be a bit rough.  Of course it will take a few trail and error to get to that point reliably. In addition, if you are making a sourdough version like I do here, the bulk rise would take a lot longer than the dry yeast version. During this time, the dough is still getting stronger, which means, we need to knead the dough a tiny bit less than stage 3. This time I stopped kneading probably 30secs before it reaches stage 3, and the bread I got is the softest, most shreddable, bounciest I have ever gotten.


Sourdough Incredibly soft white bread

Note: 19% of the flour is in levain

Note: total flour is 250g, fit my Chinese small-ish pullman pan. For 8X4 US loaf tin, I suggest to use about 270g of total flour. For KAF 13X4X4 pullman pan, I would suggest using about 430g of total flour.

- levain

starter (100%), 13g

milk, 22g

bread flour, 41g

1. Mix and let fermentation at room temp (73F) for 12 hours.

- final dough

bread flour, 203g (I used half KAF bread flour and half KAF AP flour for a balance of chewiness and volume)

sugar, 25g

butter, 25g, softened

egg whites, 60g

salt, 3g

milk, 102g


1. mix until stage 3 of windowpane (-30sec:P)

2. rise at room temp for 2 hours, punch down, put in fridge overnight.

3. takeout, divide, round, rest for 1 hour. shape as instructed here.

4. rise at room temp for about 6 hours. For my pullman pan, it should be about 80% full; for US 8x4inch pan, it should be about one inch above the edge. The dough would have tripled by then, if it can't, your kneading is not enough or over.

5. bake at 350F for 45min. brush with butter when warm.


Crumb shots from different parts of the bread, all very velvety soft, with no pores.


So soft that it's hard to cut, much easier to tear off pieces


Amazingly soft and flavorful


Sending this to Yeastspotting.

nicodvb's picture
nicodvb

Very liquid sourdough

Hi,
I read that most of you use a sourdough with 100% hydratation, just like me.
Recently I came across a more liquid sourdough (130% hydratation) that doesn't actually rise (a lot). It has the consistence of yogurth but it thickens during refreshments. It's supposed to develop exclusively lactic acid (none of acetic acid), and to grow the yeasts better

Did anyone ever use it? Can you share your experiences? Can you explain the differences?

Thanks,
Nico

SylviaH's picture
SylviaH

Oven Steaming - My New Favorite Way

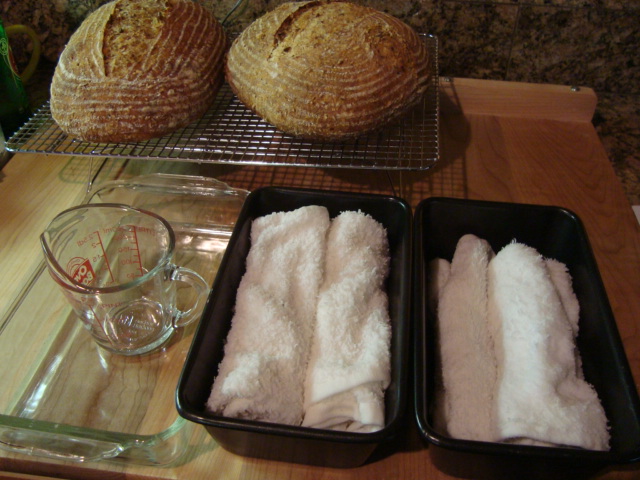
I have been wanting to try this method for sometime and have just been putting it off until today.  Of coarse I had to pick today, my kitchen still in some construction mode after remodeling my shower, it had leaked through on the kitchen ceiling, an appointment with a glass and mirror installer...and today is Mike's birthday, so everything is in a bit of a rush.  I baked a couple of mulitigrain loaves, and upon doing this I decided to try a new method of creating steam in my oven.  I'm convinced the only way I'm going to get steam that's not continually 'vented' out of my oven is by using this method.  This is so much easier for me..a lot less effort to create constant steam.  Pictures are worth a thousand words.

Preheated the loaf pans in my oven one or two 5 1/2" X 9 1/2" dark non-stick loaf pans...I used 2 loaf pans with 2 tightly rolled towels in each pan.

Placed 2 water soaked towels into a 6X10 Pyrex glass dish.  Microwaved them for 1 1/2 to 2 minutes.  Until good and hot.

I removed a pre-heated loaf pan from the oven.  Turned my pre-heating oven onto the Bake mode.

Using Tongs I placed the hot towels into the loaf pan. Placed the pan and hot towels back into the oven

Repeated for the other loaf pan and towels.

Using a 8oz. pyrex cup, I microwaved a 1/2 cup of water until it boiled.  Poured the hot water over the two hot rolled towels in one of the loaf pans.

I then repeated for the other loaf pan.  I covered my glass door with a towel and left the pans in the oven while pouring the hot water over the towels.

More or less water can be added.  I had my towels very wet with a little water on the bottom of the pans.

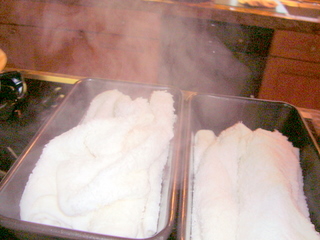
The oven was pre steamed and steamed.  There was constant steam coming from the towels..  Up to 10 minutes after the pans were removed from the oven, there was still steam present, lots of it.  Photos of this steam.  It's not easy to get photos of steam but I did manage if you look closely at the photo.

This is the first time I have tried this method.  It is so much easier for me and creates that constant steam I have been after, without losing it to my venting oven...there's always steam present until the pans are removed.  I think one pan would work nicely too. 

My bread is still cooling.  Mike and I are off to enjoy the evening out.


            Tongs should have been included in this photo.  A couple of  large multigrain loaves was todays's baking.


                  Microwave heating the wet towels in a the pyrex dish


                                                           Steaming the oven


                                                        Steam coming from towels, apx. 10 minutes after being removed from the oven


          ADDED: A little better photo.  Steam coming from the towels several minutes after being removed from the oven.

                                  As I said in the post to Larry, there is some scientific reason

why the steam vapors are not as visable in a hot oven..something I think to do with the air being hotter and so the vapors do not show like they do in cooler air...something like that!  But the steam is in the oven, even though you can't notice it as much as you do outside the oven.  I think I will try a little less steam in my next bake.

         Sylvia                                                     


gaaarp's picture
gaaarp

Starting a Starter - Sourdough 101, a Tutorial

(The following started as a blog, but I've had enough questions and comments about it that I thought I'd repost it as a forum entry so it would be easier to find.  Of course, if Floyd wants to add it to Lessons, that would be OK, too.)

Like many people, I found TFL in my quest to learn how to make sourdough.  I had a starter going and was sure I had killed it.  The advice I found here gave me the knowledge and confidence to make a starter that I've been using for months now, with ever-better results.

Although there is a wealth of information here, there was no one source that detailed the method I used, which was based on Reinhart's "barm" in BBA.  Now that I have succeeded in making several starters, I've been thinking about making a video tutorial to walk through the process step-by-step, day-by-day.  My own experience and that of others here has taught me one thing:  sourdough starters don't read baking books, so they don't know how they are "supposed" to behave.  I could have been spared the angst, the wasted time, and of course, pounds of precious flour, if only I had known what to expect and what to look for. 

I don't have the technical part of video-making worked out yet, so I have decided to do a tutorial blog.  This will be a real test, as I am trying out a modified starter that I haven't made before.  It's still based on Peter's starter, but I have altered the amounts, and possibly the times, to suit my own fancy.  If all goes well, I will end up with a more reasonable (i.e., much smaller) amount of starter, and I will get there with much less wasted flour.

So here goes:

Day 1: 

Ingredients:  1/3 cup rye flour and 1/4 cup water

For the flour, I use stone-ground rye.  Nothing special, just what I got from the grocery store.  My water is tap water run through a filter.  Before I had a filter on my sink, I used bottled drinking water.

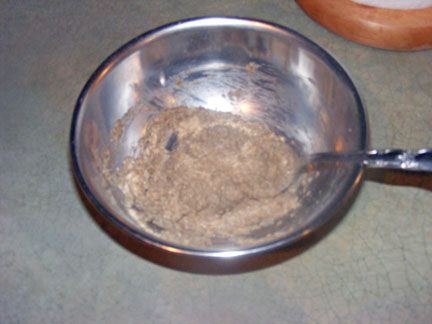
Mix the flour and water in a bowl.  It will be thick and pasty, kind of like the oatmeal that's left in the pot if you don't come down for breakfast on time. 

Day 1 - thick and pasty

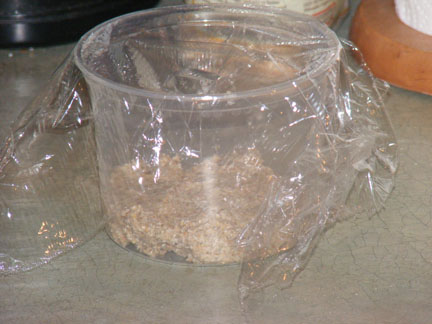
Once all the flour is mixed in, put it in a pint-sized or larger container and cover with plastic wrap.  Leave it out on the counter. 

Day 1 - ready to rest

And that's it for today.


Day 2:

Ingredients:  1/4 cup unbleached AP, bread, or high gluten flour; 1/8 cup water

There should be little, if any, change in the culture from yesterday.  Again, I'm not really particular about the flour.  I would just recommend staying away from bleached flour.  I am using AP flour for this batch.

Mix the flour, water, and all of the starter from yesterday in a bowl.  It will still be thick but a little wetter than yesterday. 

Day 2 - still thick, but not quite as gooey

Put it back in the container (no need to wash it), press it down as level as you can get it, and mark the top of the culture with a piece of tape on the outside of the container. 

Day 2 - nighty night

Put the plastic wrap back on top, and you're finished.


Day 3:

Ingredients:  1/4 cup unbleached AP, bread, or high gluten flour; 1/8 cup water

Around Day 3 or 4, something happens that puts terror in the heart of the amateur sourdough maker:  they get a whiff of their starter.  When you check your starter on Day 3, you may notice a strange, and not at all pleasant, odor.  And unless you know better (which you will now), you'll swear something is drastically wrong.  In fact, I would venture to guess that that smell has been the ruin of more amateur sourdough growers than anything else.  It's an acrid, sour, almost rotten smell, and it's perfectly normal.  And rest assured, your new baby sourdough starter will soon outgrow it.  So, take heart, and press on.

You may also notice that your starter has begun to come to life.  It probably won't grow a lot, maybe 50%, but you will start to see bubbles, like these:

It is ALIVE!!!!!

Regardless of the amount of growth, stir down your starter, throw out about half (no need to measure, just eyeball it), and mix the rest with today's flour and water.  You will get a slightly more doughy-looking mass:

Is is soup yet?

Once it's well mixed, put it back in the container (still no need to wash), pat it down, and move your tape to again mark the top of the starter.  From this point forward, keep your starter at a moderate room temperature, 70-72 degrees F.  Lower is OK (it will just grow more slowly); but don't keep it at a higher temperature, or you will encourage the growth of the bacterial beasties at the expense of the yeasty beasties.

Let 'er rise

Put the plastic wrap back on the container, and take the rest of the evening off.  You worked hard today.


Day 4:

Ingredients:  1/4 cup unbleached AP, bread, or high gluten flour; 1/8 cup water

And now, a word about measurements.  If you bake regularly, or even if you've just been nosing around baking sites for a while, you are no doubt aware that the ingredients in most artisan bread recipes are listed by weight rather than volume.  I measure by weight for my baking and for maintaining my sourdough starter. 

You might wonder why, then, am I using volume measurements here?  Two reasons: first, I have tried to make this starter as simple to follow as possible -- no special tools, no monkeying around with the scales, just a couple of measuring cups and a bowl.  And, when it comes to starting a starter, the measurements aren't as critical as when you actually go to bake with it.  So for now, we're just using measuring cups. 

Today is another one of those days where novice sourdough starter makers often lose heart.  Your starter is now coming to life, and like most living things, it kind of has a mind of its own.  Up until now, we followed the clock, making our additions every 24 hours.  Now, we will be letting the starter dictate the timeframe. 

Before you do your Day 4 additions, you want to make sure your starter has at least doubled.  If it doubles in less than 24 hours, you should still wait until the 24 hour mark.  If it takes more than 24 hours, be patient.  Let it double.  It may take another 12 or 24 hours, or it may take longer.  Again, be patient.  It will double.  Just give it time.

If your starter hasn't doubled after 48 hours, you can boost it with a shot of rye flour.  Add 3 to 4 tablespoons of rye flour and a bit of water (try to keep the hydration level about where it was) and mix it up.  Then wait for it to double before proceeding with the Day 4 additions. 

Eventually, you'll end up with a nice, bubbly starter:

Day 4 - rising to the occassion

You can see that mine more than doubled.  But I still waited for 24 hours.  Once it doubles, throw out half of the starter, then mix the rest with the flour and water, and back into the bowl it goes:

Day 4 - Edwina, back in bowl

Replace the tape and plastic wrap.  Then wait for it to double.   It could take as little as 4 hours, or it may take more than 24 hours.  This time, you can move on to Day 5 at any point after doubling.  It's OK if you let it more than double; it's also OK to move on right when it hits the double mark.  So, hurry up and wait.


Day 5:

Ingredients:  3/4 cup unbleached AP, bread, or high gluten flour; 1/2 cup water

Once your starter has at least doubled, it's time for the final mix.

Day 5 - alive and kicking

Combine flour, water, and 1/4 cup starter in a bowl and mix well.  Transfer to a clean container with room for the starter to at least double.

Day 5 - final mix

OK, one last time, cover with plastic wrap and let it sit on the counter until it gets nice and bubbly.  Don't worry so much about how much it grows, just so that it's bubbly looking.  This will probably take around 6 hours, but, again, don't stress about the time.  Let the starter tell you when it's ready.

Day 5 - Congratulations, it's a bouncing baby starter!

When your starter gets bubbly, pat yourself on the back:  you are now the proud parent of a bouncing baby starter!  Put a lid or other cover on your container and put it in the refrigerator.  Let it chill overnight, and you can begin using it the next day.

Day 6 and beyond:

By today, your starter is ready to use.  The flavor will continue to develop over the next several weeks to month, so don't be disappointed if your first few loaves aren't sour enough for you.  I would still recommend beginning to bake with it right away, especially if you have never made sourdough bread before.  That way, you can hone your skills while your starter develops its flavor.

Feeding your sourdough:  If you keep your sourdough in the fridge, you only have to feed it about once a week.  And you can minimize your discards by keeping only what you need and feeding it when you want to bake with it.  I recommend a 1:1:1 (starter:water:flour) feeding, which means each feeding includes an equal amount, by weight, of starter, water, and flour. 

Start by weighing your starter, subtracting the weight of your container.  Then add an equal amount of water and flour directly to the container.  So, for example, if you have 100 grams of starter, you would add 100 grams each of water and flour.  I generally add the water and flour at the same time, although some people recommend adding the water first and whisking to dissolve the starter before adding the flour. 

If you feed your starter right out of the fridge, as I do, warm your water to lukewarm (90 - 100 degrees F).  After you mix in the water and flour, leave it out on the counter for a few hours, then put it back in the refrigerator.  It's best if you feed your starter a few days before you intend to bake with it.

To illustrate, here is an example of my feeding routine, starting with the Day 5 starter and assuming that I finished making the starter on Friday night:

  • Saturday morning, I take out what I need to bake bread (2/3 cup using my normal sourdough bread recipe) and return the rest of the starter to the refrigetator.
  • Wednesday of the next week, I get out the starter, weigh it, and add equal amounts of flour and water in a 1:1:1 ratio, as outlined above.  My goal here is to build up as much starter as I need to make bread on the weekend, and enough left over for my next build.  It's OK if I have more than I need to bake with.  If I don't think I'll have enough after a 1:1:1 build, I will increase my ratio of flour and water, maybe to 1:2:2 or 1:1.5:1.5.  In that case, I will let it sit out until it almost doubles before returning it to the fridge, which might take a bit longer, as I'm using less starter relative to flour and water.
  • Friday night or Saturday morning, I again take out what I need to bake with and return the rest to the fridge, to be fed again mid-week.

This is just an example of how I keep my starter.  You can feed yours more often if you bake more than I do.  It's also OK to let it go more than a week between feedings.  If you do that, though, you might want to feed it a few times before you bake with it.

So, that's it.  Hopefully I've unravelled some of the mystery of sourdough starters and given you the confidence to try one yourself.  Good luck, and let me know how it works out for you!

cinnamon raisin oatmeal bread
I love cinnamon raisin breads. I make them often and find them to be the perfect breakfast treat, with just enough sweetness to not require jam, just enough fruit to constitute more than just carbs for breakfast.

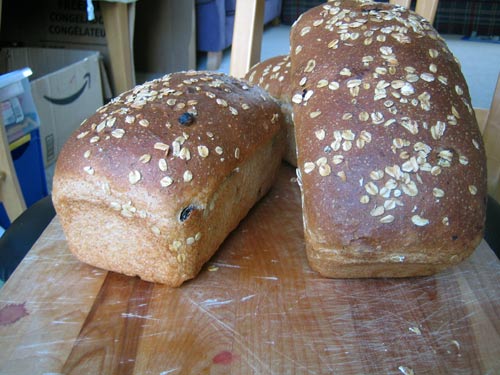
I've baked many different raisin bread recipes. Some I find to be too sweet, others too heavy on the whole wheat (though white flour alone I don't find that satisfying either). This recipe, from Jeffrey Hamelman's Bread, is one of the best raisin breads I have found: I particularly enjoy how the oats on top of the loaf toast up nicely.

(Despite my initial misgivings about his attitude toward amateur bakers, I do have to say that all of the recipes from Hamelman's book that I have baked have been exceptionally good. I find myself thumbing through it almost as often as The Bread Baker's Apprentice these days.)

One interesting thing Hamelman mentions in a side note is that chemical compounds in bark-based spices such as cinnamon and nutmeg inhibit yeast activity, so more yeast than typical is required. This is a good thing to keep in mind when adapting a normal bread into a cinnamon raisin bread, something I do often.

And a warning: this recipe makes three substantial loaves. It pushed the capacity of the standmixer. You may want to consider halving the quantities.

Cinnamon Raisin Oatmeal Bread
Makes 3 loaves
24 oz (5 1/2 cups) bread or all-purpose unbleached flour
8 oz (1 7/8 cups) whole wheat flour
5.3 oz (1 5/8 cups) rolled oats
20 oz (2 1/2 cups) water
3.5 oz (3/8 cups) milk
2.4 oz (3 tablespoons) honey
2.4 oz (5 1/2 tablespoons) vegetable oil
.7 oz (1 tablespoons plus 1/2 teaspoon) salt
.37 oz (1 1/4 tablespoon) instant yeast
.5 oz (2 tablespoons) ground cinnamon
10.6 oz (2 cups) soaked and drained raisins

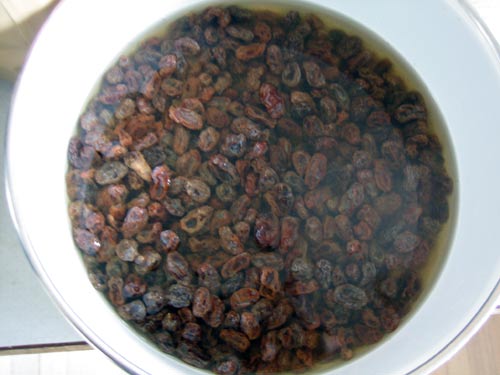
At least half an hour before you begin, soak the raisins in warm water.

soaking raisins
Doing so plumps them, which makes them softer and moister in the loaf and also prevents the ones on the surface of the loaf from burning. Just prior to adding the raisins to the loaf, you'll pour the water out.

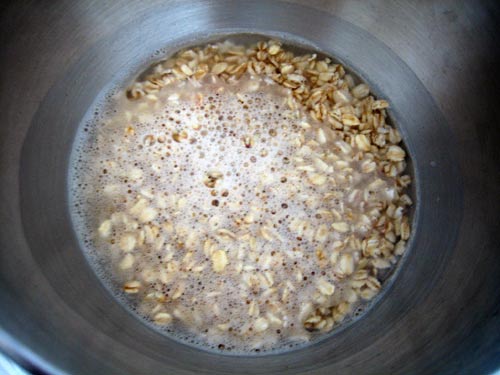
Next, soak the oats in the 2 1/2 cups water for 20 to 30 minutes.
soaking oats
If you are using active dry yeast instead of instant yeast, which I did, withhold 1/2 cup of the water to proof the yeast in.

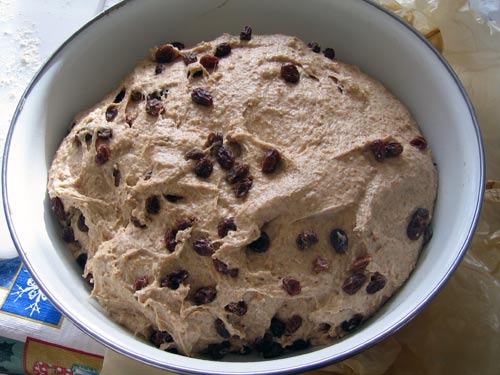
Mix the flours, yeast, milk, honey, oil, salt, and cinnamon into the oats. Mix well, until all of the flour is hydrated. Knead by hand for 5 minutes or in a standmixer for 3, then mix in the drained raisins. Knead or mix until the raisins are distributed throughout the dough.
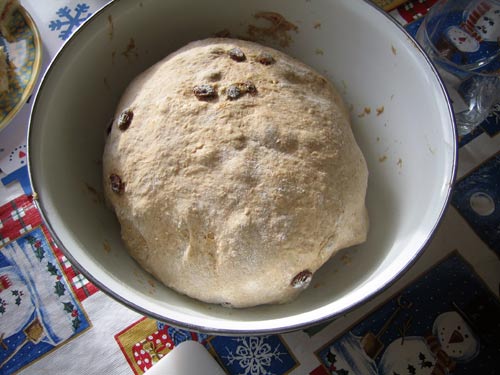
bowl of dough

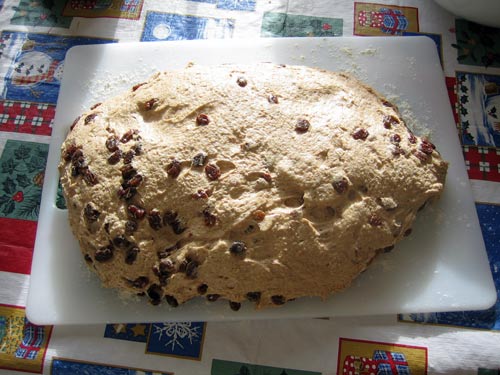
Cover the bowl of dough and allow it to rise for 1 hour. Then remove the dough from the bowl and fold it, degassing it gently as you do. The images below illustrate this technique.

Place the dough on a floured work surface, top side down.
dough on board

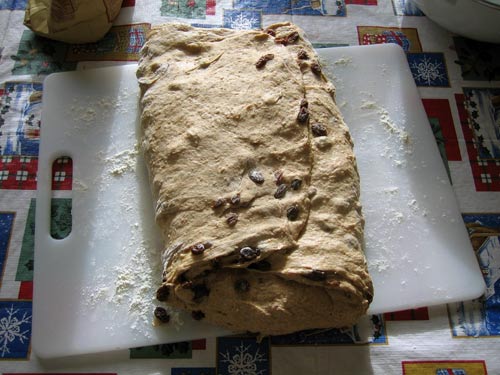
Fold the dough in thirds, like a letter, gently degassing as you do.
fold 1

Fold in thirds again the other way.
fold 2

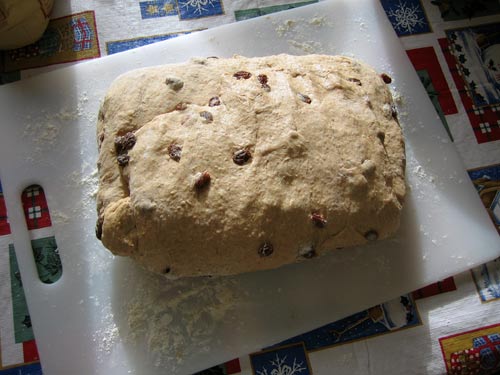
Flip the dough over, dust off as much of the raw flour as you can, and place it back into the bowl.
bowl of folded dough

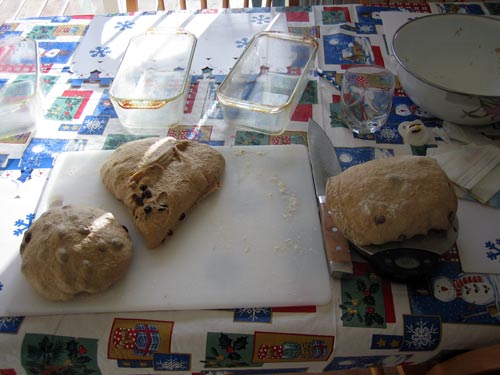
Cover the bowl and allow the dough to rise in bulk again for another hour. Then divide the dough in thirds and shape the loaves.
shaping loaves

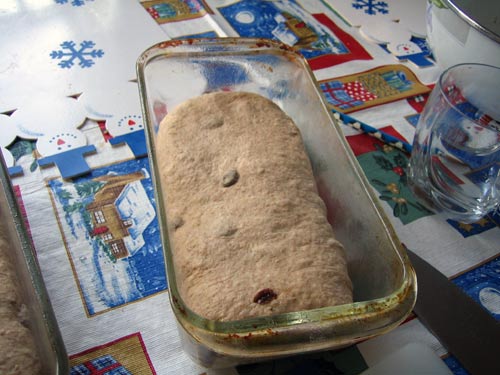
Place each shaped loaf into a greased bread pan.
shaping loaves
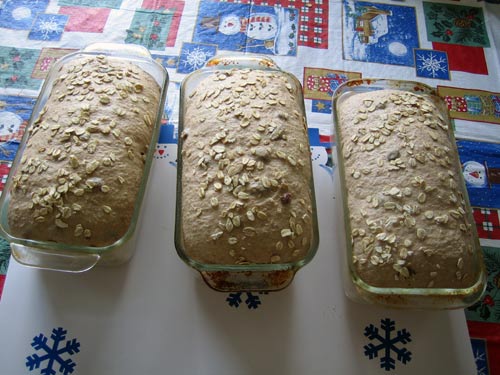
Spray or gently brush each loaf with water and sprinkle with some more oats.

Cover the pans and set aside to rise until the loaves crest above the edge of the pans, roughly 90 minutes.
risen loaves

Preheat the oven to 450. Place the loaves in the center rack of the oven. After 5 minutes, reduce the oven temperature to 375. Rotate the loaves 180 degrees after 20 minutes, and bake for another 15 to 25 minutes, until the tops of the loaves are nicely browned, the bottoms of the loaves make a hollow sound when tapped, and the internal temperature of the loaf registers above 185 degrees when measured with an instant read thermometer.

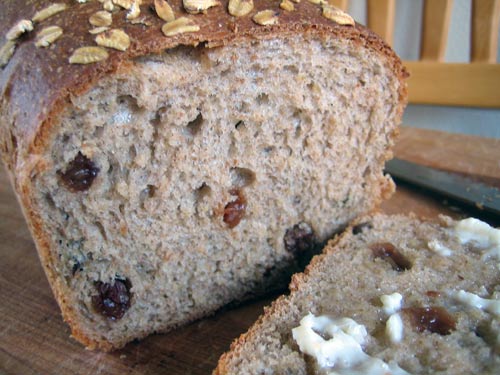
sliced loaves

Yeah, ok, you are supposed to let the loaves cool before slicing. I couldn't though, and I have no regrets!

Related Recipes: Sweet Corn Raisin Bread, Maple Oatmeal Bread, Struan Bread.

Cinnamon Raisin Oatmeal Bread

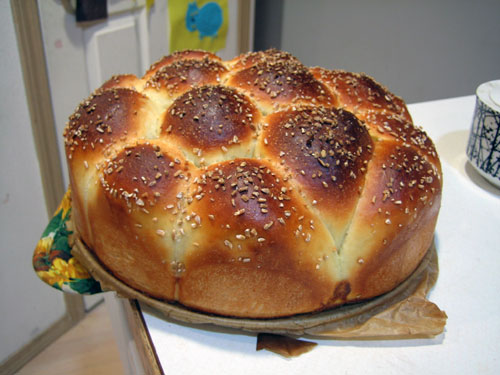
These rolls make a beautiful compliment to anyone's Thanksgiving table. If timed properly, these can be baked right when the turkey is about to come out of the oven to provide a wonderful accent to the meal.

This recipe is inspired by the Buttermilk Cluster recipe in Country Breads of the World. I made a few minor modifications, such as including a little bit of honey, but in general it is the same thing.

Buttermilk Cluster
Makes 12 to 18 rolls, depending on size
6 to 6 1/2 cups (750 grams) bread or all-purpose unbleached flour
1/2 tablespoon salt
1 envelope (2 1/2 teaspoons) active dry or instant yeast, or 1 15 gram cake fresh yeast
1 tablespoon warm water
1 3/4 to 2 cups buttermilk
1 tablespoon honey

Glaze:
1 egg beaten with 1 teaspoon water

Topping:
1-2 tablespoons seeds (poppy, sesame) or grains (cracked wheat, rolled oats)

Combine the flour and salt in a large bowl. Combine the warm water and yeast in a small cup and allow to proof for 10 minutes.

Pour the yeast, buttermilk, and honey into the flour mixture and mix well. If the dough is so dry that some of the flour won't stick, add a bit more buttermilk or water. If the dough is too sticky to knead, more like a batter, add more flour by the tablespoon until the correct consistency is achieved.

Knead by machine or hand for approximately 10 minutes. Return the dough to the bowl, cover the bowl with plastic wrap or a damp cloth, and set aside to rise until the dough has doubled in size, approximately 90 minutes.

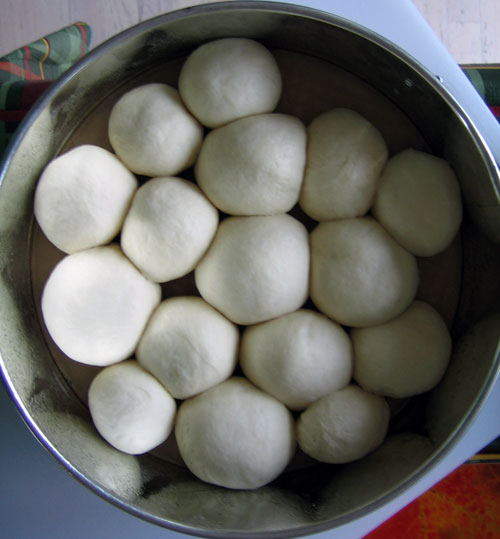
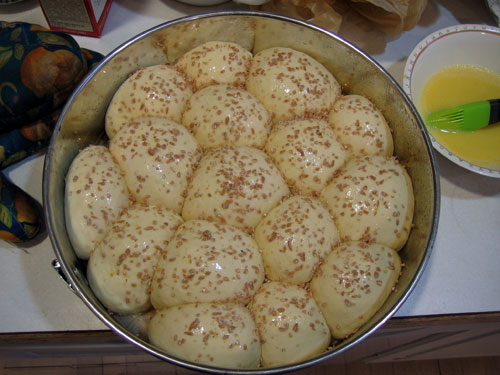
Divide the dough into 12 to 18 pieces. If you are a stickler you can scale them so that they are even, but I just cut them roughly the same size. Shape each piece into a neat ball and place in a round dish or spring-form pan close together.

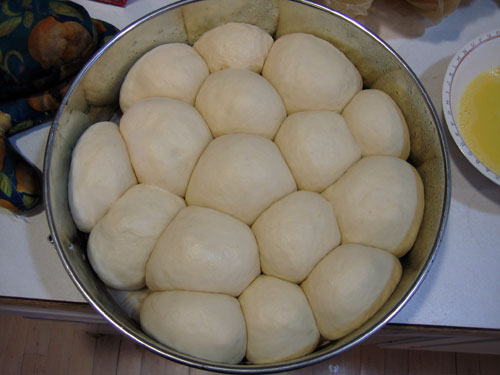
When all of the rolls are in the pan, cover again with plastic or a damp towel and set aside to rise again for 45 minutes to an hour. Meanwhile, preheat the oven to 425.

Uncover the rolls and brush gently with the egg wash. Sprinkle on the grain topping, if you like. I used cracked wheat.

Bake for approximately 30 minutes, until the rolls are firm and spring back when tapped.

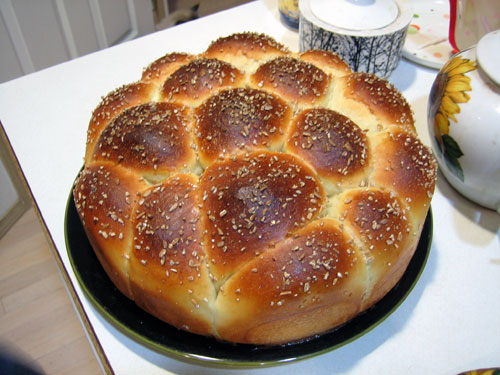
Unmold the rolls from the pan and serve warm.

Buttermilk Cluster

Pages