The Fresh Loaf

A Community of Amateur Bakers and Artisan Bread Enthusiasts.

Recent Blog Entries

Floydm's picture
Floydm

Lately I've been thinking a lot about what this site is for. Part of the reason I've been thinking about this is my recent employment at Mercy Corps, but the disputes the last few days have brought to my attention that we don't all come here with the same expectations about what this site is trying to do. So let me riff a little about what I think think The Fresh Loaf is about. I'll admit up front, I'm not entirely certain either, and as the site has grown my feelings may have changed and probably will continue to do so. Still, some reflection is worthwhile, and hopefully it'll help explain why some things set me off.

The site is a little over two years old. In that time we've had people come and go, but a decent number of regulars have hung around. Many of them (as well as new members) have commented that they don't tend to post to online communities but that this one is different. People here are more helpful, more courteous, less judgmental, more humane than on most other boards.

As the site grows, I'm coming to realize that *that* is what I want to cultivate here. More than the recipes, more than the photos, more than anything else it is the kindness and the humanity that I want to see flourish. Given the choice between this become the most authoritative bread baking site online but run by a bunch of a**holes or a site full of compassionate, caring, but perhaps mediocre bakers, I will hands down choose the latter. That said, I think we have some very talented bakers here and the site content keeps getting better and better. I don't think kindness needs be thrown aside to achieve greatness.

Mercy Corps' motto, which I see and think about every day, is a quote from Gandhi: "Be The Change." In our every day interactions with one another, we can make the world a better place. I honestly think what we've been doing here is consistent with that mission. Every time a baker on one side of the world helps a baker on the other side of the world regardless of borders, race, or religion, we make the world a better place. Every time someone who has been wanting to try to bake something but has been too intimidated to finally tries it because we gave them the confidence to and it brings joy to them and their loved ones, we make the world a better place. Every time we post a tip or a hint we are focusing on our common humanity by sharing our passions with one another rather than focus on our differences and by doing so, in a small way, we are making the world a better place.

As I've mentioned, I worked with Peter Reinhart and the other Brother Juniper's bakers while in high school. I watched how they took something as simple as neighborhood cafe and used it to bring kindness, joy, inspiration, love, and caring into people's lives. They did things far nobler that anything I've done here, such as provide food for the terminally ill and employ a number of people with handicaps that made it difficult for them to find work elsewhere. Their model has inspired me to think about the mission of this site as something more than just exchanging recipes.

I'm continuing to think about how we can use this site to be an agent for positive change in the world, both on micro-level ("offer encouragement to excited new bakers") to the macro-level ("could we do a World Bread Day fundraiser for people who can't even afford to put bread on the table?"). I think we can do more with it.

All that said, I am grateful to the people on this site who come here each day and share their talents and experience. By doing so they enrich my life and the lives of many others.

Floydm's picture
Floydm

We had a lovely dinner over at some friends house this evening. The only downside was there was no bread or starch of any kind with the meal. Being the carbivore that I am, I was very pleased that I had some sourdough loaves waiting to be baked when I got home.

I haven't baked sourdough in three or four weeks. I was pleased to see my starter is still alive:

Not the best sourdough I've ever made, but not bad. It does seem to have been improved by the fact that we were out for 6 hours and it got an extra long final fermentation.

Floydm's picture
Floydm

This was the second time today I've prepared a post and then lost it. Perhaps I should take that as a sign and log off.

This is the latest variation on the whole wheat honey bread I've baked. Less honey and with sunflower seeds. Quite good, quite simple to prepare.

Dutchbaker's picture
Dutchbaker

I have been experimenting with Pugliese lately.  I adapted the Pulgiese recipe from Beranbaum's BB this weekend using my stiff sourdough starter.  I was pleasantly suprised with the results.  It was a nice airy loaf with an open crumb.   The crust was a little tough, but I am still using 100% rice flour to coat the banneton.  I would like to try the bread flour and rice flour mixture next time, to see if I can get a crisper thin crust.

Dutchbaker

pjkobulnicky's picture
pjkobulnicky

I did a forum post a week or so ago asking if anyone knew more than me about making Joe Ortiz's Pain de Seigle de Thiezac . I didn't get any comments so I supposed the answer was no. So .. here is an update.

This bread is supposed to be all rye made solely with a natural starter. Ortiz humanely suggests that the beginner incorporate a bit of white flour and some yeast into the final dough. Even so, the first time I tried this it was a bear to make. Super glue has nothing over on pure rye dough. And ... pure rye starters that are not soupy wet are, how shall we say this ... subtle in their demonstration of activity. I also feel that Ortiz's transcriptions of bakery recipes for the home baker are poorly executed in print. (Joe ... if you read this I do apologize). He has the recipe starting not from an existing starter but from making a stiff levan from scratch. So ... the novice will spend 2-3 days waiting for something to happen and it may never happen. Or, since the action is so subtle, you may never know if you are successful. Anyone knows that it is MUCH easier to get a starter going with a wet solution. Then, once you have a working starter you innoculate another levan with it.

So, I spent the week getting a good starter going and when it came time to do Joe's recipe, I mixed a bit of the starter into the first levan mixture.

Joe doesn't give weights and Joe makes no mention of proofing temps. So ... I used the usual standard weights for cups of rye and white flour. I did the levan and the first refeshment at room temp (curretly about 60 in our house) over long times. The first (innoculated) levan went for almost 24 hours and the refreshment went for 8 hours. When I put the dough together with the wee bit of yeast, I move it to my proof box at 85 degrees where it went for 45 minutes. Then I shaped it ... not too tough and with less additonal flour to manipulate the sticky dough than with cibatta. I put it into a round shape and put it into a heavily, heavily floured round cane banneton using rye flour. It went back to the proof box for another 45 minutes. The oven preheated (450) with my stone for the 45 minutes. The loaf popped right out of the banneton on to my parchment covered peel. It baked for 50 minutes with another 10 in the turned off oven at the end.


If I can figure out how to get pictures to this site I'll post them. I did upload them but got a blank acknowledgment screen so maybe the image upload fairies were sleeping.


If it takes, here is the loaf:


And here is the FlickrURL:


Here is the crumb:


And here is the Flickr url.


Paul


tattooedtonka's picture
tattooedtonka

Well after making about a couple dozen bagels a week for the last 3 or 4 weeks, I figured I would try Cinn./Raisin Bagels as well as regulars.

I soon found out Cinn./Raisin Bagels are not like making regular bagels.  The shaping really kicked my butt.  Plenty of lumps, bumps, seams, oh what a mess.  I have been making my bagels in 4.5oz. size.  But with raisins I went with a 5oz. weight.  After shaping I was really concerned they would end up looking like bumpy biscuits, but I was happy with the ending results.  Most of the lumps smoothed out in the baking process.

After reading Tigressbakes Cornbread post I decided to give it a go.  She is right in her post, it makes alot of cornbread.  But it is a very good recipe.  I took a shot of the outside and then later took some of the inside, but those photos didnt turn out so well.  Here is what I did have.

After trying this out I decided to give Sourdough Guys "Sunflower Seed Bread" an attempt.   Since I am still wrestlin with my starter I decided to try to adapt it to a White/Wheat bread with a white poolish.  I used his weight ratios for the seeds.  He warned that he didnt go 100% with them, so I figured what the heck, I'll try.  So with that I took the entire added up weight of all flours used in the recipe and matched it with exactly the same amount of roasted seeds (per his spec.).  WOW was that alot.  It was a bit messy, and a whole lotta fun.  I used Mike Averys folding method that I read about thanks to JMonkeys recent post, and here are my results.  ALOT of seeds.......Tastes pretty good though if you dont mind so much crunch in your bread.

Well thats all for now...

TT

CBudelier's picture
CBudelier

Thing 1 and Thing 2 have given birth to two reasonably successful loaves of bread. I used Rose Beranbaum's 2 day basic sourdough recipe from TBB. I made one loaf with each of the starters. The doughs were made from:

  • 150 g. 50% starter
  • 150 g. water
  • 180 g. bread flour (my first experience with bread flour)
  • 6 g. salt

Her recipe calls for mixing all ingredients, kneading for 5 minutes and then autolyzing for 20 min. After this, 5 more minutes of kneading and then a 1 hour rise. Following the first rise, the dough is folded twice and allowed to rise for another 4 hours. Then the loaves are shaped, put in a bowl lined with a floured towel and given a final 4 hour rise. I floured the towels with both AP flour and corn starch. I had a lot of flour left on Thing 2, so I think I used too much.

Dough slashed and ready for baking. Thing 2 is on the left, Thing 1 on the right

Thing 2 and Thing 1 after baking

Each of the loaves weighed just under 1 pound.


Thing 1 Crumb                                                                                Thing 2 Crumb


The crumb looked pretty good to me, considering that I was using 2 new starters and bread flour for the first time. The tase was still pretty mild, but I expected that since the starters are young and I didn't do a long, cool rise. I tried to taste a difference in the flavor between the 2, but couldn't. The rest of the family devoured both loaves in about 45 minutes!

The biggest difference I noted was that Thing 1, the indoor starter did perform a bit larger and faster than Thing 2. It will be interesting to see if that trend continues over time. Now I just have to figure out how to justify keeping 2 more jars of starter.......

tigressbakes's picture
tigressbakes

OK so it's not sourdough, it's not even yeasted. But and this is a big but, i swear it is the best damn cornbread EVER!

In fact, I have just vowed to myself that I can only make this for a special treat because over the course of just today I have lost all reason and have eaten more of this cornbread than i care to admit!

This cornbread recipe is taken from Peter Reinhart's Brother Juniper's Bread Book. cornbread 1

It is the perfect sweetness; I went just a little lighter on the sugar than the recipe called for due to the fact that the actual corn I used was off of cobs that I had frozen fresh from last summer, and I knew how sweet it was. There is a healthy amount of buttermilk in the recipe, and the clincher I think is the generous amount of uncooked polenta (out of the 3 cups of polenta it called for I substituted 1/2 of it with stoneground cornmeal just because I didn't have enough polenta). The uncooked polenta gave each bite a perfect little crunch inside the buttery moistness.

cornbread 2

As you can see, the top developed a nice crispy crunch, it is I must say Cornbread Perfection.

For those of you who dare to indulge here is my exact version - ever so slightly altered from Peter's recipe:


  • 4 cups all purpose white (I used King Arthur organic)
  • 2 1/2 cups uncooked polenta + 1/2 cup stoneground organic cornmeal (I used Bob's Red Mill)
  • 4 1/2 Tablespoons Baking Powder
  • 1 Tablespoon Sea Salt
  • 1 cup raw sugar granules
  • 2 rounded cups corn kernels (I used frozen corn from farm fresh cobs from last summer)
  • 3 eggs
  • 1 stick butter melted
  • 3 cups Buttermilk


Mix all dry ingredients together including corn kernels (used fingers). Wisk eggs, then wisk in Buttermilk and butter. Pour wet ingredients into dry and then mix together (I used my hand again) only until all of the flour is hydrated but no more. Pour into a greased pan. I used one that is rectangular, probably an 8X14 or around there. Bake at 350 for about 40 minutes or until a toothpick comes out fairly clean from the middle. And it rises! It is big and thick and makes a lot.

So, if you like cornbread, your in for a treat. Make this if you dare, but be prepared!

It is really perfect the way it is, but I am wonderng if a few chopped up hot chile peppers might make it even more sinful!

Enjoy!


bwraith's picture
bwraith

Sourdough Ciabatta - One Step
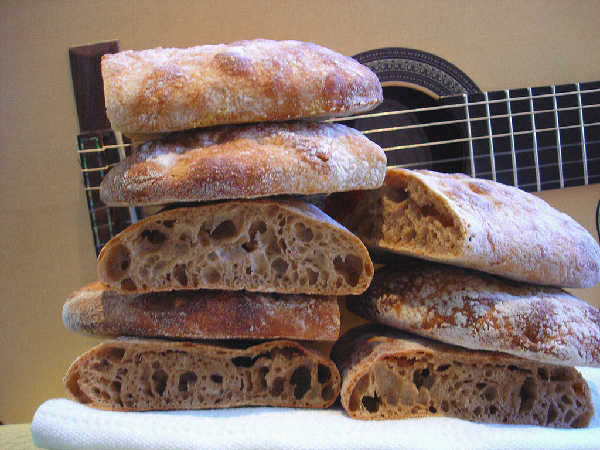
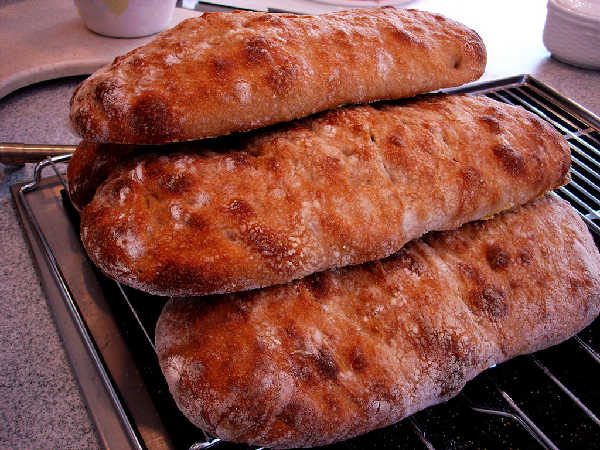
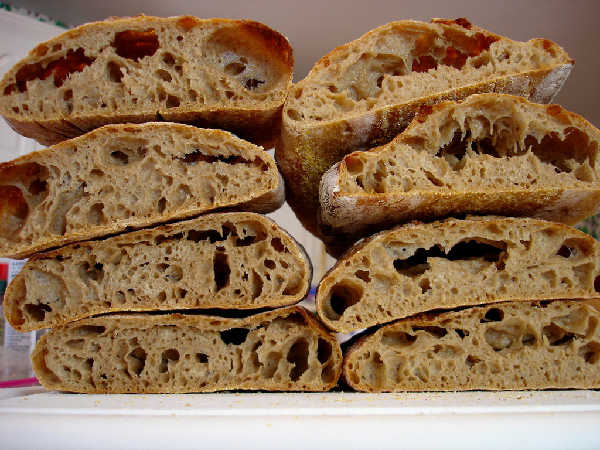
Sourdough Ciabatta - One Step (1)Sourdough Ciabatta - One Step (1)

Sourdough Ciabatta - One Step (2)Sourdough Ciabatta - One Step (2)

Sourdough Ciabatta - One Step (3)Sourdough Ciabatta - One Step (3)

Sourdough Ciabatta - One Step Recipe

I made my first attempt at a "one step" recipe, similar to Sourdough-guy's recent blog entry (thanks, SD-guy). Photos of the process are posted. A spreadsheet showing the quantities in ounces and grams, bakers percentages, and some other percentages, such as hydration is also posted.

I wanted to use some more of my "sifted flours" obtained during a recent phase of obtaining and testing some "sifted whole wheat" flours for the fun of it. You can create a substitute for this flour by substituting a mixture of 87% white flour with 10% whole wheat and 3% wheat germ by weight. If you don't want to use wheat germ, you might try something like a 50/50 mix of white flour and whole wheat flour. I haven't tried doing it with all whole wheat, but I suspect that would also make something good with this recipe. The "sifted whole wheat flour" I used is "Golden Buffalo" from Heartland Mills. It is described as sifted so that the germ and 10% of the bran remains in the flour, which makes it about 87% extraction flour. It's characteristics are much closer to whole grain flour than white flour. For example, it absorbs a lot more water before it becomes slack like a ciabatta dough, and it has fairly high ash content and and protein percentage, and it results in a darker crumb and nuttier tasting crumb. Also, it is a high protein flour to begin with, as it is made from a higher protein wheat. At some point, I'll make this with something like KA organic AP, which should rise better and have a softer crumb and a more typical white ciabatta crust color.

Overall, this recipe worked fine, although I realize now that I probably needed to be a little more agressive about rolling and tightening the loaves when they were shaped, as there was the "big hole down the middle" problem to some extent with these loaves, particularly the ones I shaped more gently and baked first. The ones I let proof a little longer also happen to be the ones I shaped a little more tightly, and they seemed to come out better.

Ingredients:

  • 57 grams 100% hydration white flour starter (almost any reasonably active, recently enough refreshed starter will do)
  • 2 grams diastatic malted barley flour
  • 14 grams salt
  • 665 grams water
  • 57 grams light rye flour (I used KA rye blend)
  • 610 grams high extraction wheat flour (I used Golden Buffalo from Heartland Mills - You can mix some AP or bread flour w/whole wheat and wheat germ as mentioned above)

Mix and Rest

Place starter in a large mixing bowl and add the water. You may want to mix only 540 grams of water to begin with, which is 82% hydration. Then, after you've added all the flour, you can mix in more water until you get the right consistency. The water absorption properties of flours varies over a large range, and the amount of water I used in this recipe is at the very high end of what you're likely to need, due to the type of flour I happen to be using. Stir the water and starter well to get the starter dissolved into the water. Add the diastatic malted barley flour and mix well again. Add the rest of the flour and mix just enough to blend everything with a spoon, dough hook, scraper, as you like. Or, do this all in a mixer but use low speed and mix for only 3-4 minutes just to get the ingredients well integrated. Then add the salt, sprinkling it over the whole dough and folding it in. At this point go around the bowl with your tool scraping the outside of the mass into the center and pushing down, similar to a fold, a few times to incorporate some air and mix the ingredients with the salt well. You don't need to do much more than get the ingredients reasonably well mixed.

You may need to add either flour or water to adjust the consistency of the dough. The dough should be fairly wet. It should be more stiff than a batter, but it should feel wet and pliable. It will feel a little wetter as the water incorporates into the flour. At some point the gluten will develop, and it should become an elastic, somewhat slack, pliable dough. In my case, I am using 100% hydration, which is higher than you're likely to need unless you are using a high protein hard whole grain flour, like a hard spring wheat from the northern plains. The flour used in this recipe is of that type, except it has 90% of the bran sifted out. It takes a lot more water than if you make this with mostly white flour. So, you have to do this by feel. What should happen is that when you eventually pour this dough out on the counter to fold it, it should spread out slowly over the course of a minute or so. It shouldn't be runny, but it shouldn't hold it's shape well either.

Cover the bowl with a moist towel and set aside for an hour.

Fold in the Bowl

The first fold probably needs to be done in the bowl, if it is as wet as it is supposed to be. Reach under the dough with a scraper on an edge, lift it up and out a little holding the top gently with your (wetted) fingers, stretching it just a little, then fold the edge over to the center. Do this for all four sides. Let it sit another hour or so.

Fold on counter

An hour after the first fold in the bowl, the gluten should be forming enough to do the folds on the counter. Gently loosen the dough from the bowl and pour it out onto the counter on a light bed of flour. Spread the dough out a little if it doesn't spread out all on its own. If it is very wet, it may not need any help spreading. If it's not quite so wet, you can encourage it to spread out with your fingers or palms. Don't stretch it aggressively, just spread it out, which it should readily do if it is wet enough. Wet your hands well to get all stickiness off them and shake off the drops a little bit. Snuggle your hands under one edge of the dough and gently lift it up and out slightly. Then fold it over to the center or past the center somewhat. Do this for all four sides. If it ends up as a nice tall cube shape, pick it up and turn it over. Then drop it into a dough rising bucket or a bowl for further fermentation. To make it easier to pull out of the dough rising bucket the next time, you can either spray the bucket with some oil spray or give the dough a good dusting with bread flour on the sides before dropping it into the bucket. I often get a rectangular shape after the last fold, since I'm still not anticipating the size of the folds perfectly. If so, you can fold it over itself one more time to make it more of a cube shape and roll it over to bring the stretched side of the dough on top all in one move to end up with a tall cube of dough. Then it can be picked up from the sides or slightly underneath and lowered gently into a rising bucket.

Wait an hour and fold, wait another hour and fold, etc., as above until it begins to have some "resistance" to folding. The gluten will develop all on its own with time and some folding. In my case I did 3 folds on the counter. Ideally, you can wait as long as it takes for the dough to flatten out, as a liquid would, before folding. That's the indication the dough has "relaxed" and is ready for another fold. After a few folds, the combination of gluten developing and enough time going by for the fermentation to start to generate some gas will result in a slight "crown" forming in the dough as it sits in the bucket, so that the dough won't really flatten out anymore. You can try folding again and should now begin to be more elastic and resistant to folding, consistent with the gluten development.

Bulk Fermentation

I intended to have the total rise time be about 12 hours, and I guessed the amount of starter accordingly. I started the mixing a few hours before I went to bed. It did double in about another 7 hours after the last fold, allowing for a good night's sleep if you're a bit of a night owl like me. You can adjust the time to your convenience by putting less starter in at the beginning. I would think it would take about 2-3 more hours for each halving of the amount of starter, but maybe Sourdough-guy can put a finer point on that. The one step method is new to me, so I still haven't developed a good feel for the timing over extended periods with a very small percentage of starter in the dough.

Shaping

When the dough has doubled, turn it out on the counter in a bed of flour. It will be full of air and very soft and slack. Fold it over itself once to get a long rectangular dough. That one fold will stiffen the dough a little. Gently slice the dough into four equal size pieces. Dust the cut ends with flour or roll the pieces in flour. Lay the pieces out in rectangles about 10 inches long and 4 inches wide by gently stretching them in one direction. Roll them up fairly tightly along the short end, occasionally folding the ends of the roll into the center if it is getting too long as you roll it up. Dust them well with flour and place them in a dusted couche. You may want to use some rice flour mixed with bread flour to dust the couche. The dough is very wet and will be sticky. However, if you dust the dough itself well, and also dust the couche with a combination of rice and bread flour it should be OK. I use 25/75 rice/bread flour to dust the couche. I spray the tops of the loaves with some oil and dust with some flour in order to get that ciabatta flour streak crust look.

Final Proof

Cover the loaves with a towel and allow to rise at room temperature for about 1.5-2 hours. I didn't try getting them warmer, like 80-85F as in Sourdough-guys recipe. Also, I am not sure how long the final proof ought to run, and the poke test is harder to read with this higher hydration dough. The longer proofed, slightly more tensioned loaves had a better crumb and rise, so maybe I didn't let the proof run long enough.

Sourdough-guy suggested an estimate of more like 4 hours for the final proof in his recipe from which I derived the recipe in this blog entry, so it may well be I have underestimated the right length for the final proof. I will try a longer proof next time, and if someone tries this recipe and goes for a longer final proof with good results, I would appreciate your comments.

Bake

Place the loaves on a parchment dusted with corn meal or other similar flour to avoid sticking. As you place them on the parchment stretch them out to about 10 inches long. Then use your fingers to press down firmly all over the dough to dimple it and spread it out. I lightly sprayed the loaves with water using an atomizer pump spray bottle. You should have about a 10 inch by 5 inch rectangle when you're done with lots of dimples on it and only about 1/2 inch tall. Bake at 450F for about 18 minutes. I think the crust color darkening is the best indication of doneness, as it seems like the internal temperature isn't a very good indication of doneness for this very wet, airy, flat dough. These only rose to about 1.5 inches. I'm not sure if this is due to my flour choice or the amount of proofing. I suspect that any whole wheat-like flour may tend not to rise quite as much as a similar white flour version. However, it may also have to do with finding the right amount of time for the final proof.

Cool

Allow to cool completely. The crumb will not set properly if you cut into it too soon.

Results

The crumb was soft, cool, and creamy, and the flavor was mild with a nice after taste and only a touch of sour flavor. I believe this is fairly consistent with what I've been reading in Sourdough-guy's blog on the topic of "one step" sourdough. I get fairly similar results with my two step methods of past blog entries. However, I'm realizing that my mild results are probably the result of feeding my culture frequently, i.e. before it is very, very ripe, and also from refrigerating my intermediate "recipe starters" when they have just doubled or even earlier. I also stop my bulk fermentation when the dough has just doubled. The result may therefore be similar to the one step method, since not letting each intermediate step ripen should make the whole process closer to one long slow rise from a small percentage of starter. I think the two step method can result in more sour and stronger flavors if you let the starter and "recipe starter" ferment to a riper stage before adding them to the dough.

As with most of my attempts with sourdough ciabatta, the result is a chewier crust and slightly chewier crumb than yeast raised versions I've made. Also, the rise isn't quite as dramatic. However, the flavor more than makes up for it, and I like the chewy texture most of the time. If doing a barbecue or hamburger sandwich bread, I might prefer a white flour and probably would prefer a yeast raised version such as the Glezer recipe in Artisan Baking.

Feedback

My blog entries are written with the intention to share with and learn from those who participate here. Questions and suggestions regarding the written explanations or improvements to the methods are welcome.

Pages

Subscribe to Recent Blog Entries